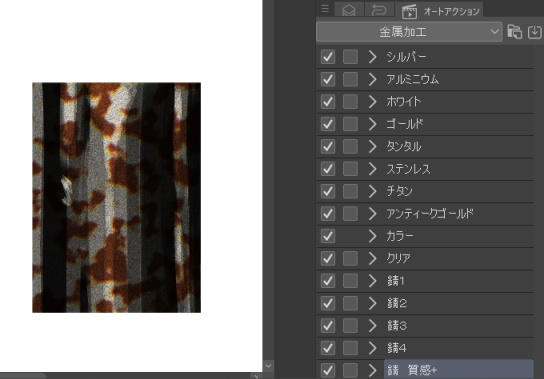
It is a auto action to process the drawn metal more metallurgically.
It gives a crisp texture and adjusts the color.
□ About the auto action of "Color"
"Color" is one that allows you to change the metal to any color you want.
It's just a matter of clipping to the layer below and creating a layer in overlay mode, but I added it to save time.
"Color" is
(1) Perform other metal processing auto action
(2) Execute "Color"
(3) Put your favorite color on the layer made of (2)
You can change the color by following these steps.
In the image above, I run "Silver" and then put a darker blue in "Color".
□ usage
Select the layer of the metal part, select the auto action, and press Play auto action (bottom right ▷ mark).
You can adjust the opacity of the layer created to your liking.
□ Update Add-ons
I added it to give it a more rusty texture.
Continue to perform the "Rust Texture+" auto action after performing other rust auto action (Rust 1, Rust 2, Rust 3, Rust 4).
You can use the auto action on top of each other until you get the rust feeling you like, change the opacity, scrape the resulting rust with an eraser in places, or adjust it freely. Please try to play with various combinations.
【Example】
In this image, "Rust 4" is executed and then "Rust Texture +" is executed.
Specific procedure for combining □ rust processing
(1) Select the layer you want to auto action and execute the rust auto action you like (here execute "Rust 1").
↓ After execution
(2) Execute "Rust Texture +"

.
(3) Run "Rust Texture +" again (you don't need the one that is better at once)
↓ The layer made of "rust texture +" will be in the state of two sheets
(3) Integrate the layer made of "Rust texture +" and change the layer made of "Rust 1" executed at the beginning to your favorite opacity (if you do not need to change it, leave it as it is)
(4) Randomly scrape the layer made of "rust texture +" with an eraser to make your favorite rust
□ created with silver in mind, but it can also be used in other colors.
* As for the gold-based color, "gold" will come out with a harsh color.
【Example】
The steps to create the example image will be the same as above.
描いた金属をより金属っぽく加工するオートアクションです。
パキッとした質感にし、色味を調節します。
□「カラー」のオートアクションについて
「カラー」は金属を好きな色に変更できるものです。
下のレイヤーにクリッピングし、オーバーレイモードのレイヤーを作成するだけのものですが、時短のために追加しました。
「カラー」は
①他の金属加工オートアクションを実行
②「カラー」を実行
③②でできたレイヤーに好きな色を載せる
という手順で色の変更ができます。
上の画像では「シルバー」を実行してから、「カラー」で暗めの青を載せています。
□使用方法
金属部分のレイヤーを選択し、オートアクションを選び、オートアクションの再生を押してください(右下▷マーク)。
お好みで作成されたレイヤーの不透明度を調節されても良いと思います。
□アップデート 追加分
より錆びた質感にするために追加いたしました。
「錆 質感+」のオートアクションは、他の錆オートアクション(錆1、錆2、錆3、錆4)を実行した後に、続けて実行してください。
お好みの錆感になるまでオートアクションを重ねて使用したり、不透明度を変更したり、できた錆を所々消しゴムで削ったり、自由に調節することができます。いろいろ組み合わせて遊んでみてください。
【作成例】
この画像では「錆4」を実行した後に「錆 質感+」を実行しています。
□錆加工を組み合わせた具体的な手順
①オートアクションを実行したいレイヤーを選択し、お好きな錆のオートアクション実行(ここでは「錆1」を実行)
↓実行後
②「錆 質感+」を実行

.
③もう一度「錆 質感+」を実行(一度で良い方は必要ありません)
↓「錆 質感+」でできたレイヤーが二枚の状態になります
③「錆 質感+」でできたレイヤーを統合し、始めに実行した「錆1」でできたレイヤーを好きな不透明度に変更(変更が必要ない方はそのまま)
④「錆 質感+」でできたレイヤーを消しゴムでランダムに削り、好みの錆を作る
□銀色を想定し作成しましたが、他の色味でも使用できます。
※ゴールド系の色味は「ゴールド」は色味がきつく出てしまいます。
【作成例】
例の画像の作成手順は、上記の手順と同じになります。


 .
.


 .
.


