

It is a auto action to process the drawn metal more metallurgically.
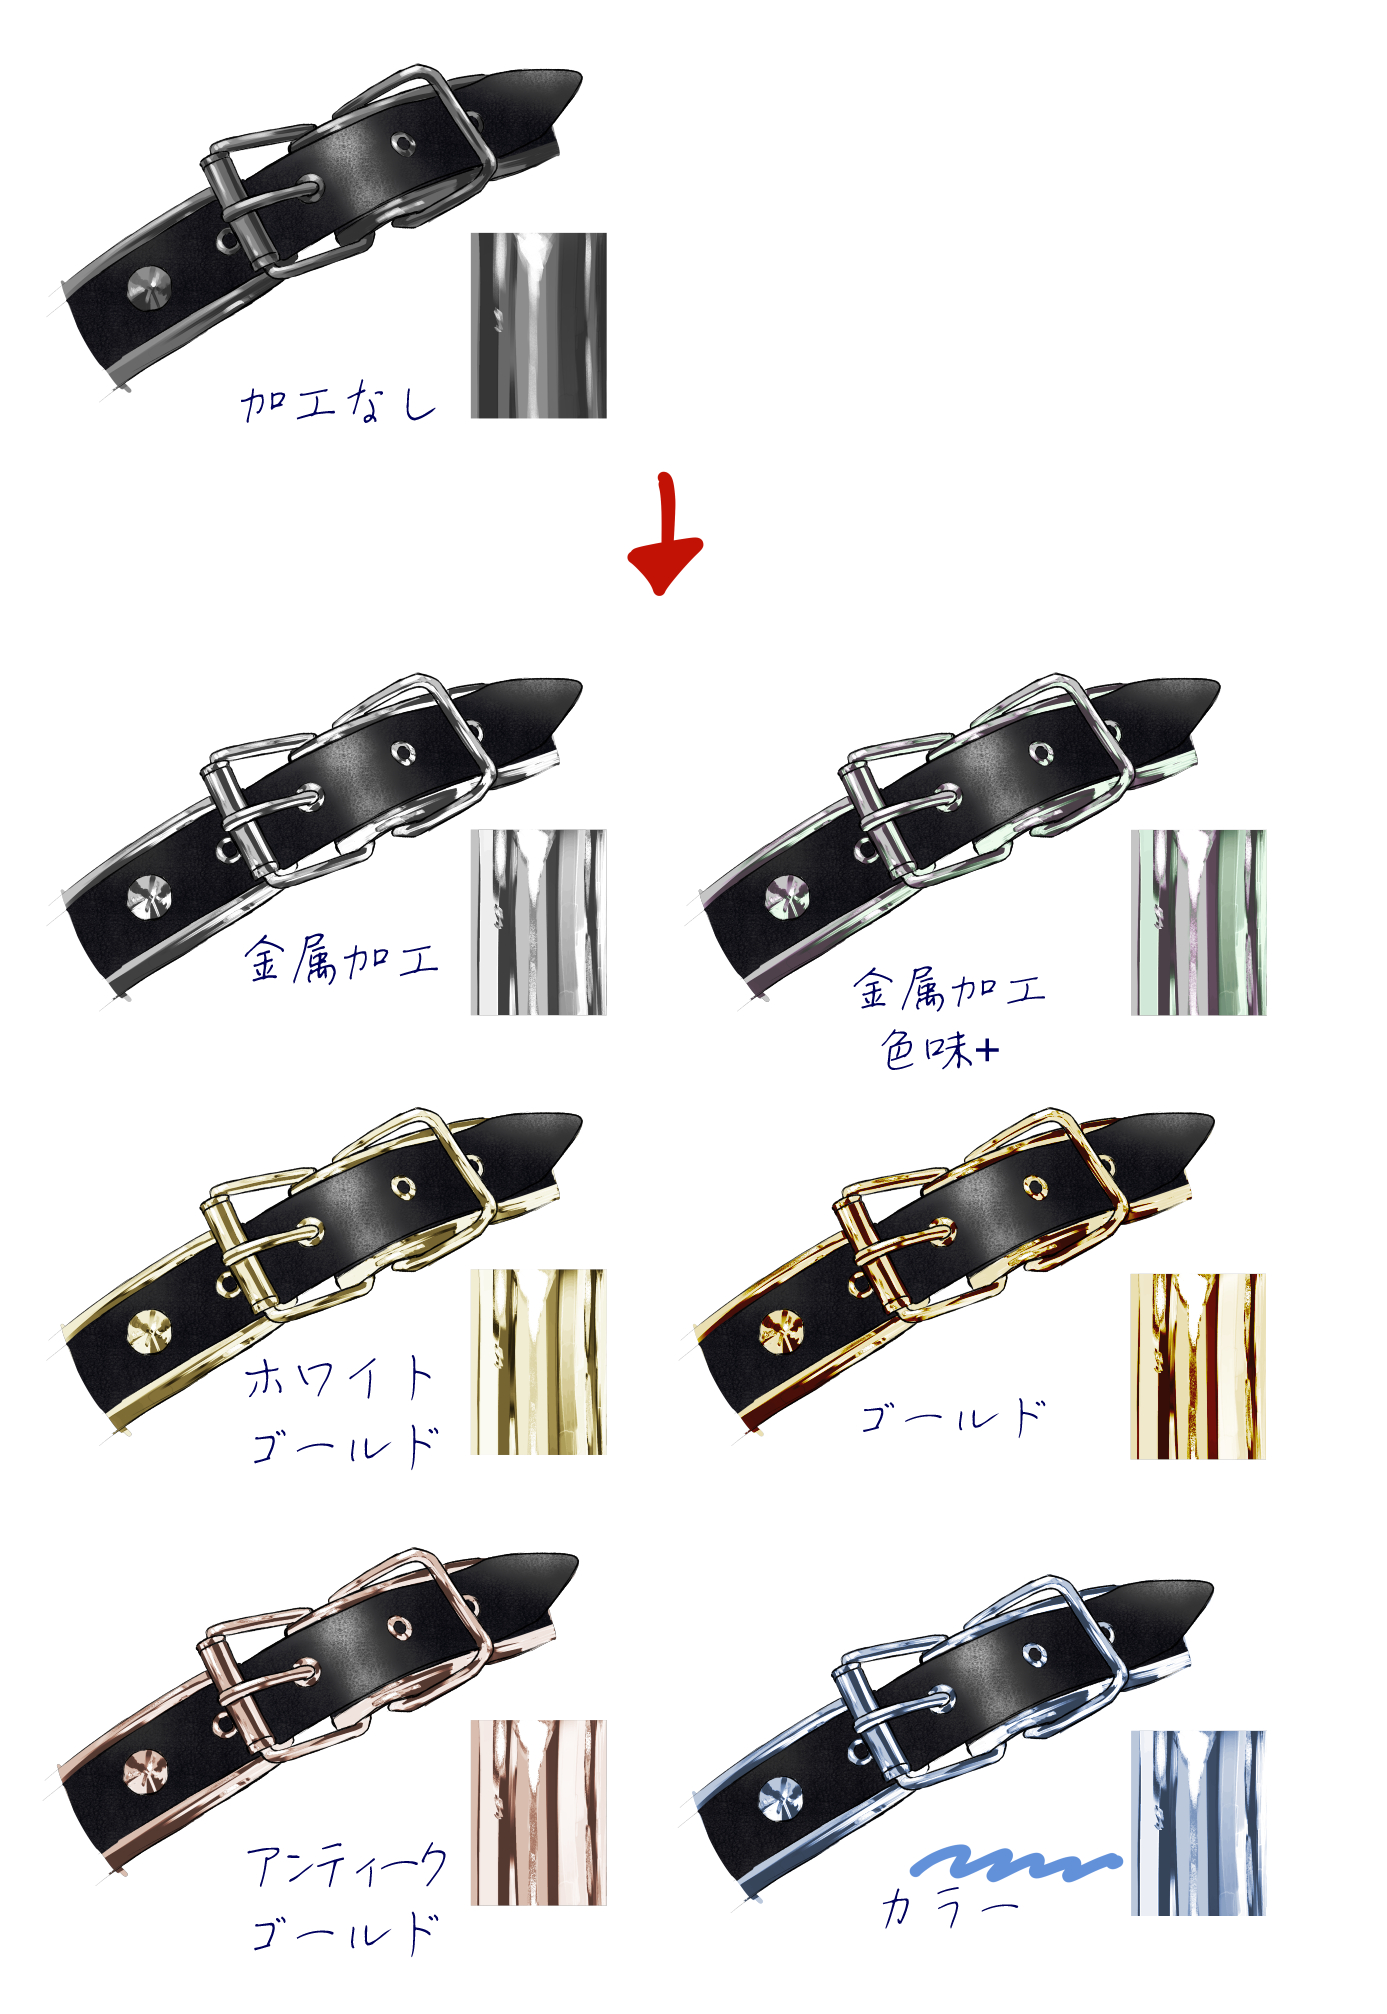
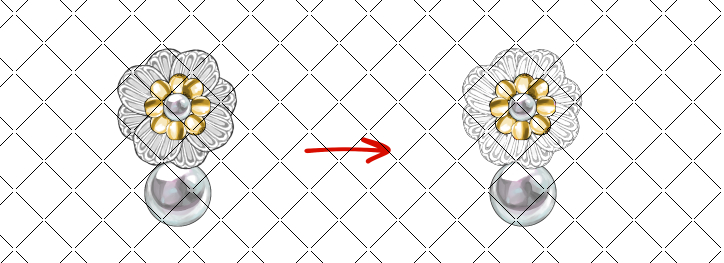

It has been changed so that it can be expressed more metallic than the old version.
If you prefer the old version, please go to the old version page below to download the material and use it.

□ usage
Select the layer of the metal part, select the auto action, and press Play auto action (bottom right ▷ mark).
Adjust the opacity of the layer created to your liking.
□ About the auto action of "Color"
"Color" is one that allows you to change the metal to any color you want.
It's just a matter of clipping to the layer below and creating a layer in overlay mode, but I added it to save time.
"Color" is
(1) Perform other metal processing auto action
(2) Execute "Color"
(3) Put your favorite color on the layer made of (2)
You can change the color by following these steps.
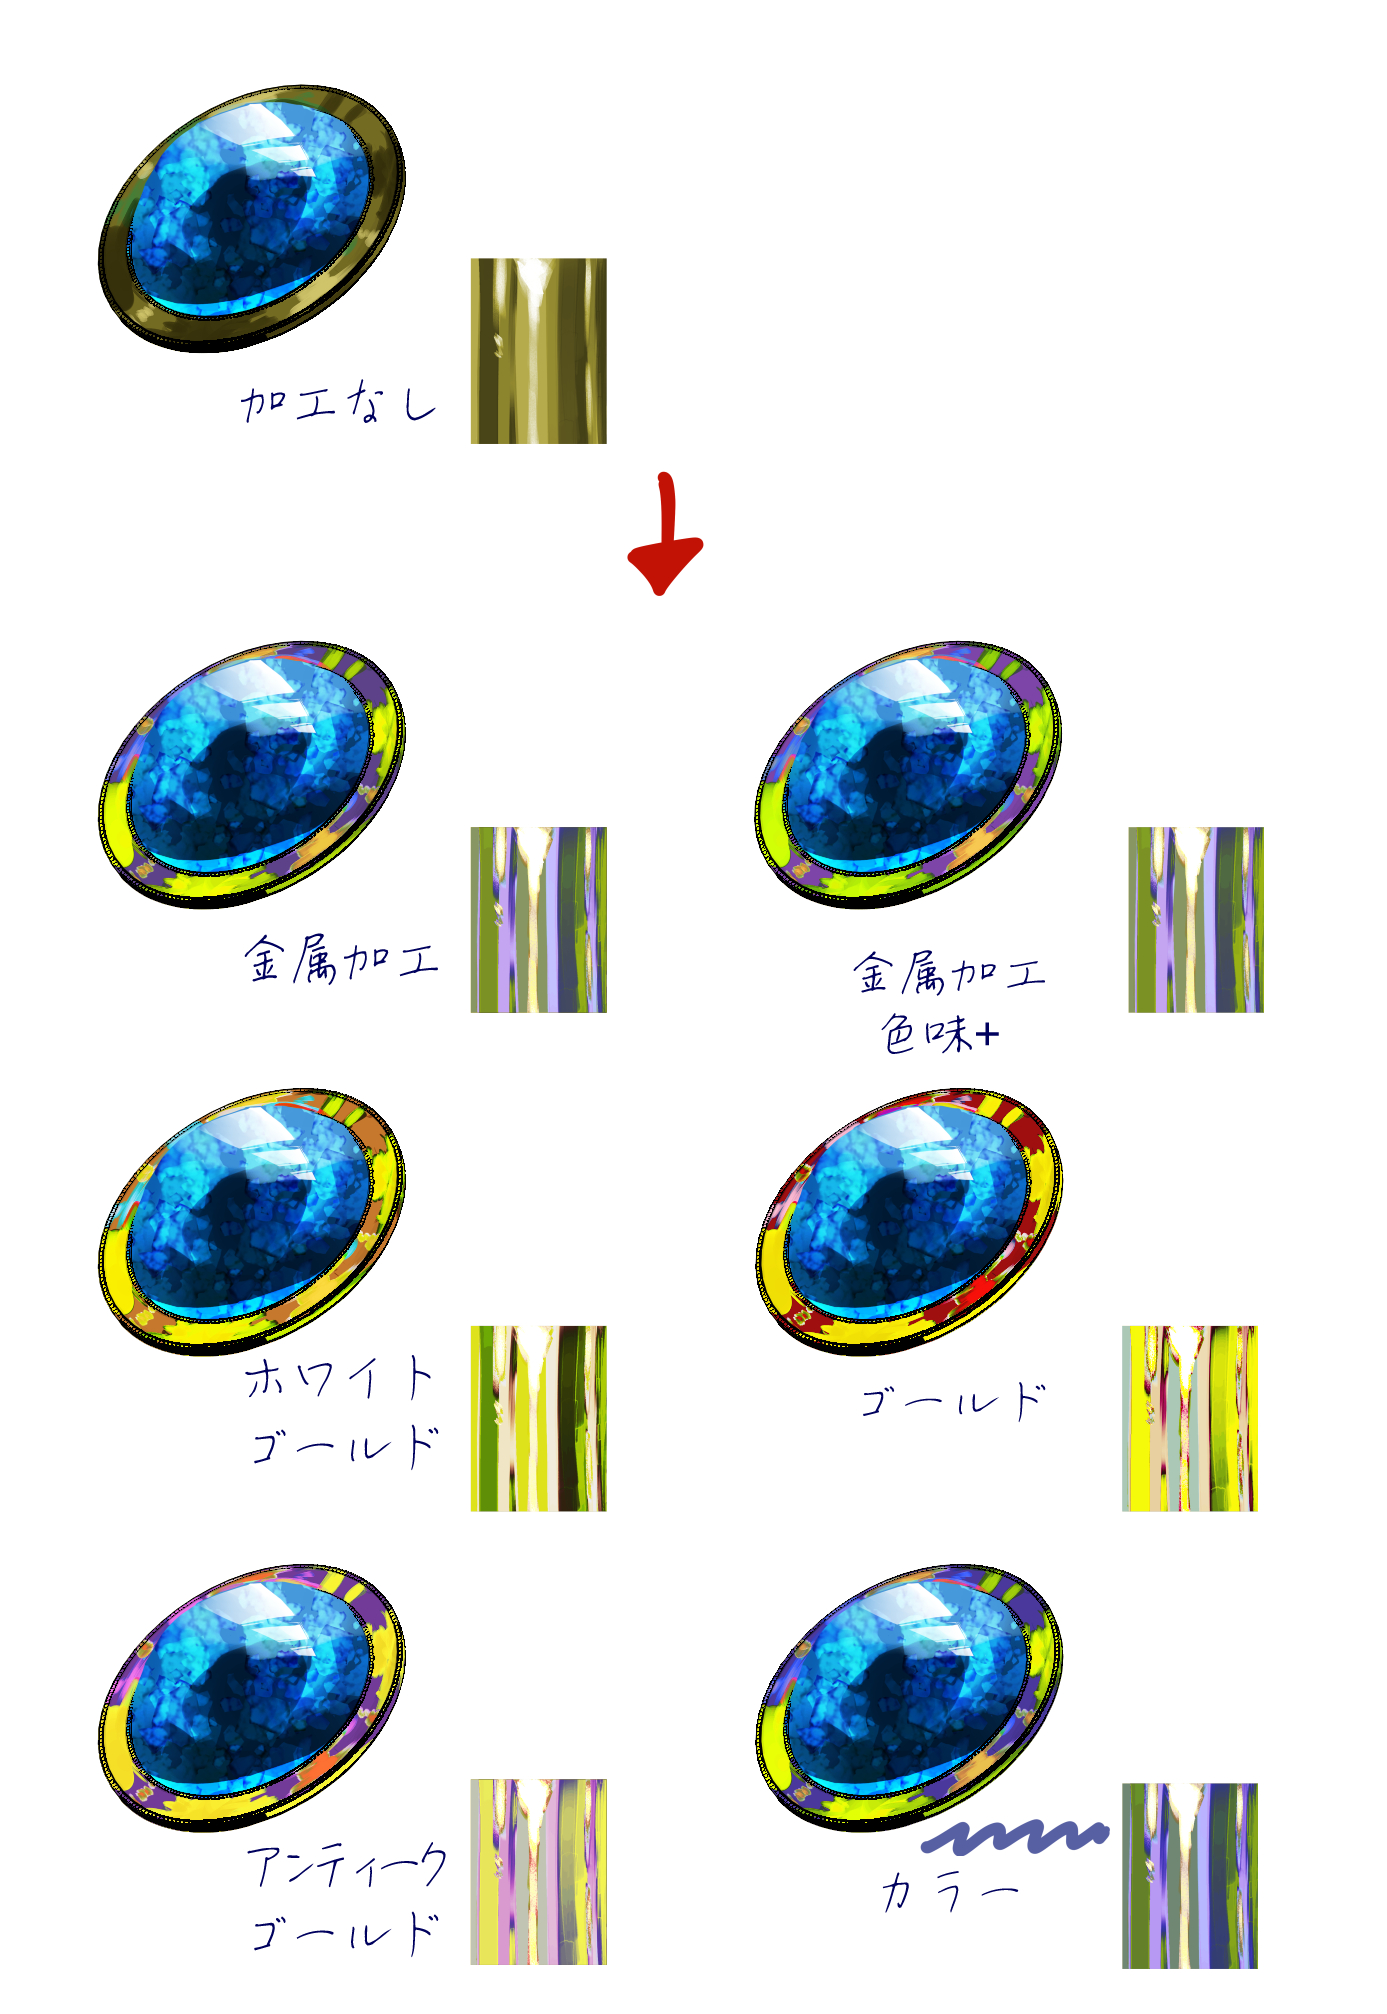
In the image above, "metal processing" is performed, and then the light blue color in the image is put on "color".
□The following auto action are the same as those in the previous version.)


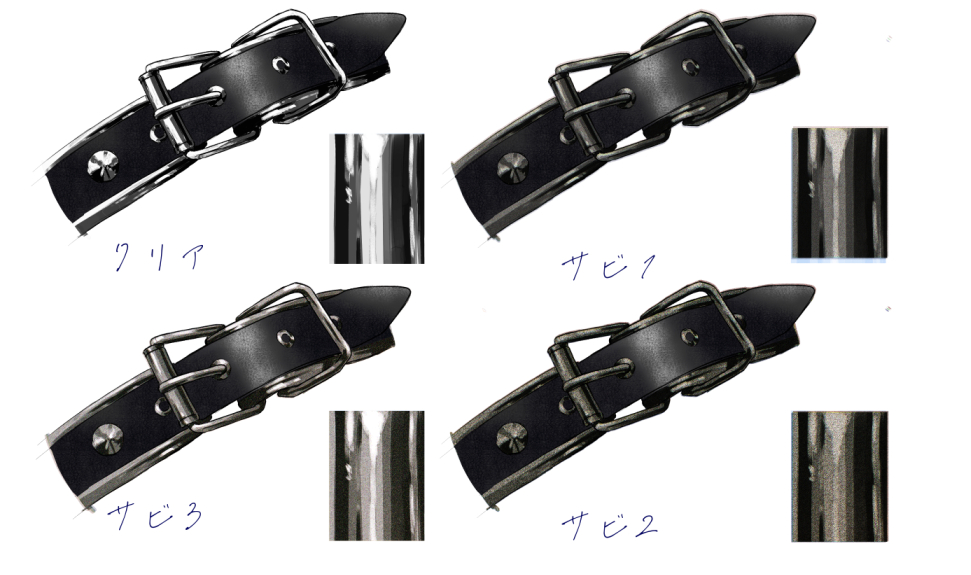
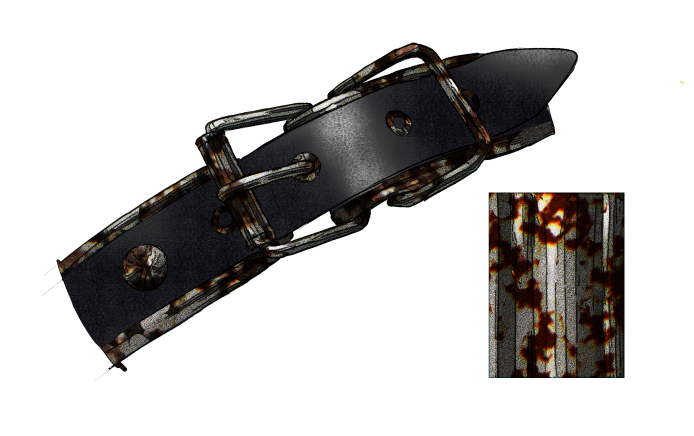
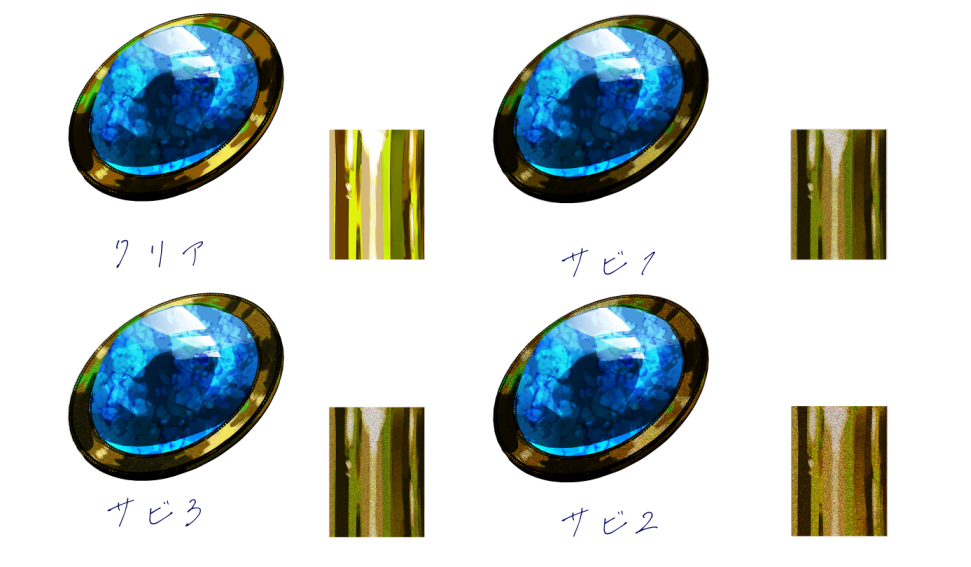
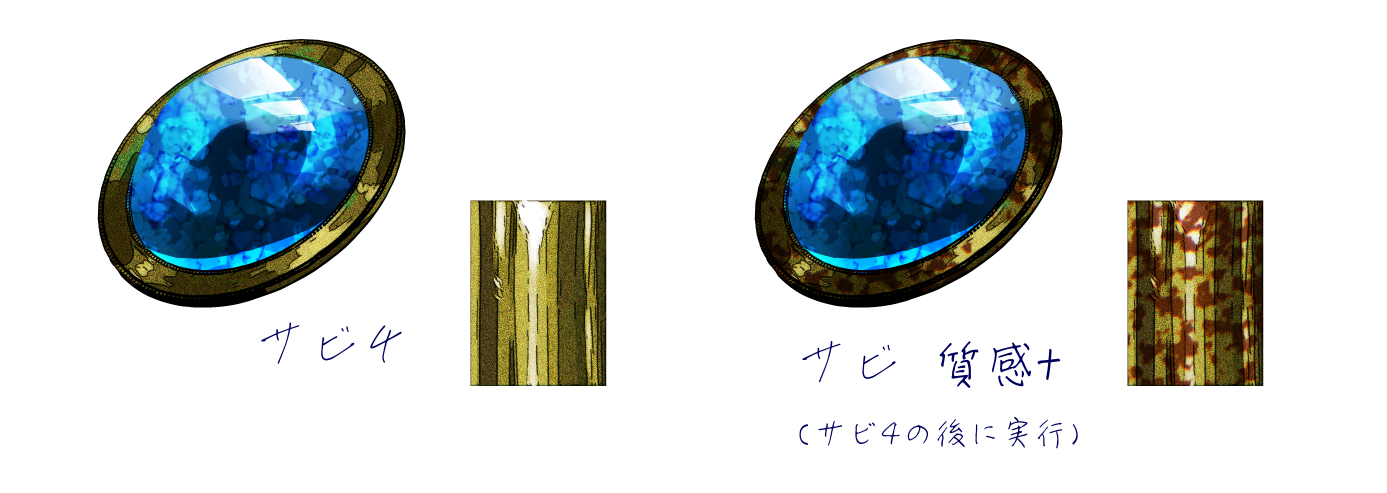
Continue to perform the "Rust Texture+" auto action after performing other rust auto action (Rust 1, Rust 2, Rust 3, Rust 4).
You can use the auto action on top of each other until you get the rust feeling you like, change the opacity, scrape the resulting rust with an eraser in places, or adjust it freely. Please try to play with various combinations.
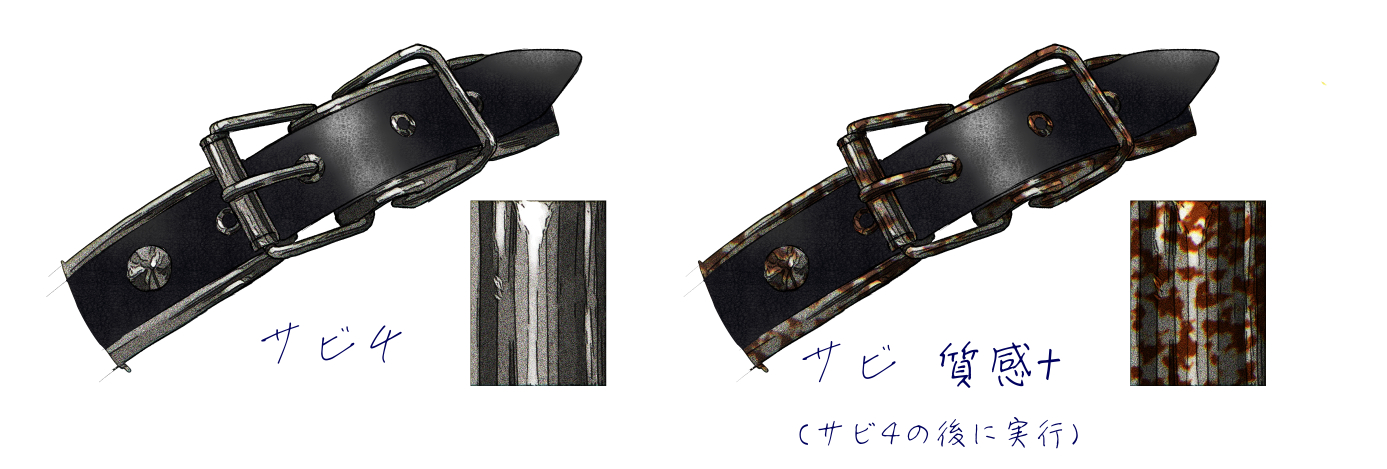
【Example】

In this image, "Rust 4" is executed and then "Rust Texture +" is executed.
Specific procedure for combining □ rust processing
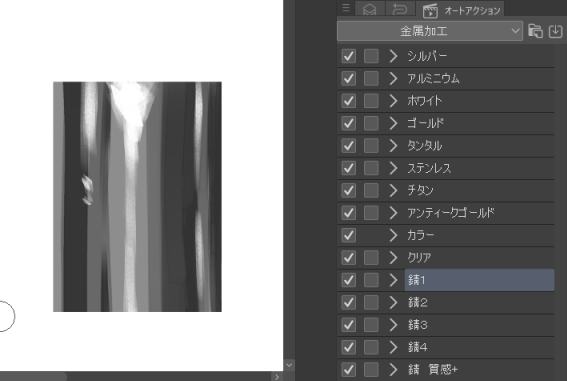
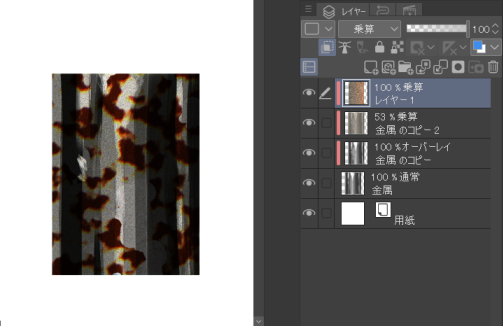
(1) Select the layer you want to auto action and execute the rust auto action you like (here execute "Rust 1").

↓ After execution

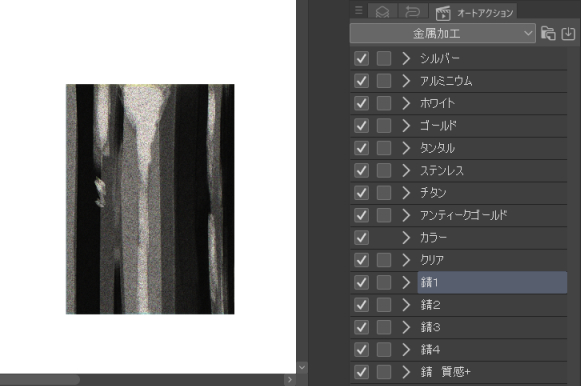
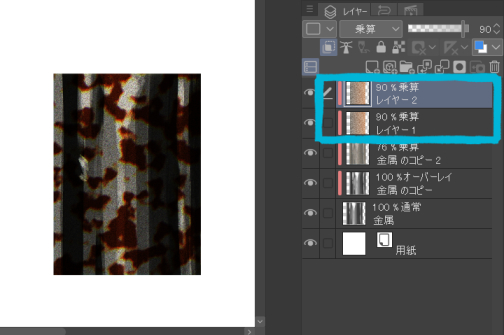
(2) Execute "Rust Texture +"

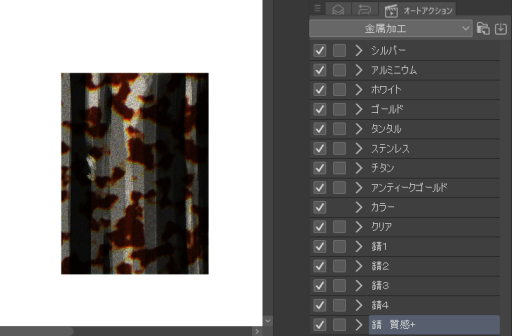
(3) Run "Rust Texture +" again (you don't need the one that is better at once)

↓ The layer made of "rust texture +" will be in the state of two sheets

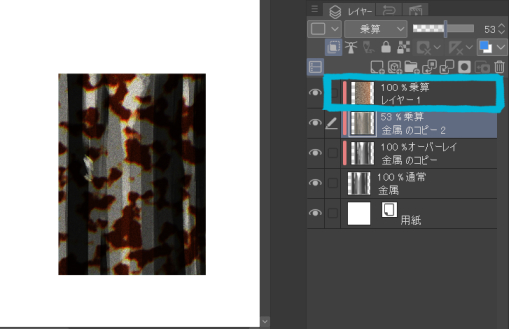
(3) Integrate the layer made of "Rust texture +" and change the layer made of "Rust 1" executed at the beginning to your favorite opacity (if you do not need to change it, leave it as it is)

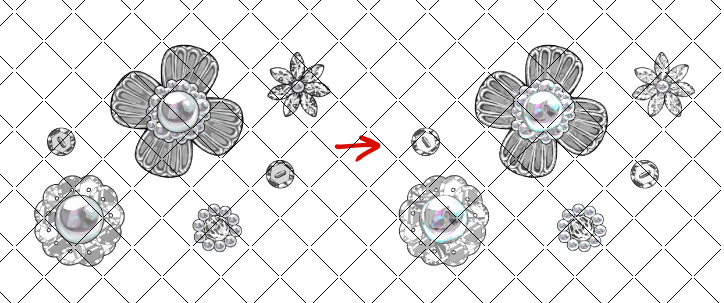
(4) Randomly scrape the layer made of "rust texture +" with an eraser to make your favorite rust

When performing "Rust Texture +" on a wide range of metals, large rust (which has hardened over a wide area) will not be created, so it is necessary to shift or add to it with the move tool created by executing "Rust Texture +" several times.
When □ doesn't work

Darker colors work better with auto action.

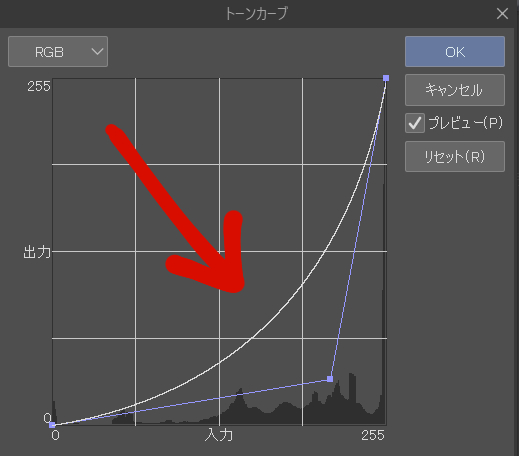
If you run a auto action with a light color and it turns white, change the part that executes the auto action (metal part) to a darker color with "tone curve" and execute it.
Transform and adjust the curve as shown in the image below.

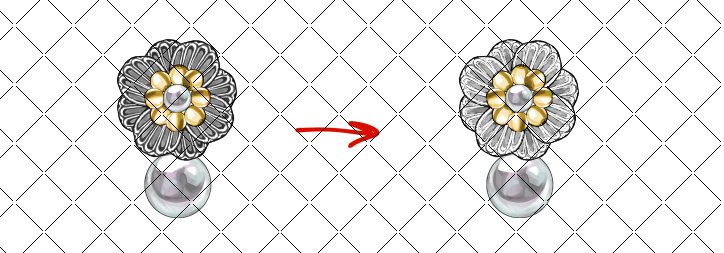
After adjusting with the tone curve, you may end up with the look you were expecting when you run the auto action.
Also, try changing the opacity of the created layer and the layer mode.

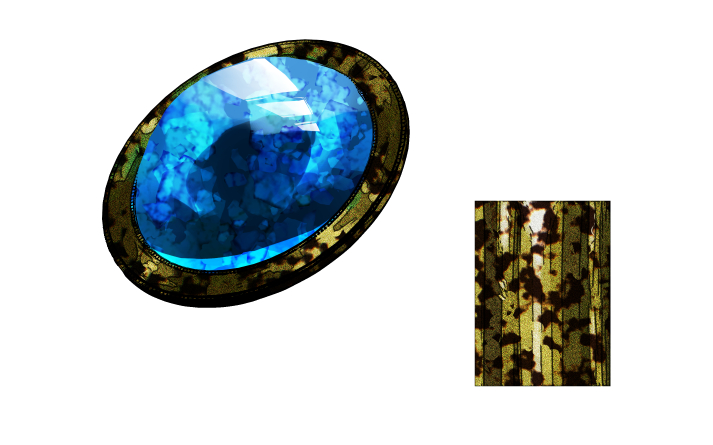
* Since it was created assuming a silver color, if you execute it with a colored color, it will be as follows.
If you want to adapt to something with a tint, I think the old version is more suitable.
Those who have obtained it can use all versions. Please download from "Old Version" below.
If there is some color (close to monochrome), I think you can use it without much discomfort.
Since it depends on the illustration, it cannot be said unequivocally, but it is thought that the description will be similar to the silver "metal processing color +" above.

If you adjust the opacity of a layer created with auto action, you may not be able to use it for adding colors.

* Clear and rust actions can be used as they are in other colors.


【Example】

The steps to create the example image will be the same as above.
描いた金属をより金属っぽく加工するオートアクションです。
旧版より金属っぽく表現できるように変更いたしました。
旧版がお好みの方は、下記にある旧版のページに行き、素材をダウンロードしてお使いください。
□使用方法
金属部分のレイヤーを選択し、オートアクションを選び、オートアクションの再生を押してください(右下▷マーク)。
お好みで作成されたレイヤーの不透明度を調節してください。
□「カラー」のオートアクションについて
「カラー」は金属を好きな色に変更できるものです。
下のレイヤーにクリッピングし、オーバーレイモードのレイヤーを作成するだけのものですが、時短のために追加しました。
「カラー」は
①他の金属加工オートアクションを実行
②「カラー」を実行
③②でできたレイヤーに好きな色を載せる
という手順で色の変更ができます。
上の画像では「金属加工」を実行してから、「カラー」で画像にある水色を載せています。
□以下のオートアクションは旧版にあるものと同じものになります。
「錆 質感+」のオートアクションは、他の錆オートアクション(錆1、錆2、錆3、錆4)を実行した後に、続けて実行してください。
お好みの錆感になるまでオートアクションを重ねて使用したり、不透明度を変更したり、できた錆を所々消しゴムで削ったり、自由に調節することができます。いろいろ組み合わせて遊んでみてください。
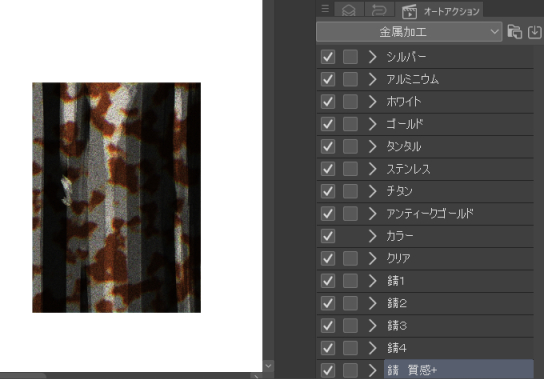
【作成例】
この画像では「錆4」を実行した後に「錆 質感+」を実行しています。
□錆加工を組み合わせた具体的な手順
①オートアクションを実行したいレイヤーを選択し、お好きな錆のオートアクション実行(ここでは「錆1」を実行)
↓実行後
②「錆 質感+」を実行
③もう一度「錆 質感+」を実行(一度で良い方は必要ありません)
↓「錆 質感+」でできたレイヤーが二枚の状態になります
③「錆 質感+」でできたレイヤーを統合し、始めに実行した「錆1」でできたレイヤーを好きな不透明度に変更(変更が必要ない方はそのまま)
④「錆 質感+」でできたレイヤーを消しゴムでランダムに削り、好みの錆を作る
広い範囲の金属に「錆 質感+」を実行する場合、大きめの錆(広範囲で固まっているもの)は作成されないため、「錆 質感+」を何度か実行して作成されたレイヤーを移動ツールでずらしたり、描き足していただく必要があります。
□うまくいかないときは
濃い色のほうがオートアクションがうまくいきます。
明るい色でオートアクションを実行すると白くなってしまう方は、オートアクションを実行する部分(金属部分)を「トーンカーブ」で濃い色に変化させ、実行します。
下の画像のようにカーブを変形させ、調節してください。
トーンカーブで調節した後、オートアクションを実行すると期待していたような描写になるかもしれません。
また、作成されたレイヤーの不透明度や、レイヤーモードを変更してみてください。
※銀色を想定し作成したため、色味があるものに実行すると、以下のようになります。
色味があるものに適応したい場合、旧版の方が向いていると思います。
取得された方はすべてのバージョンをお使いいただけます。下記の「旧バージョン」よりDLしてください。
多少の色味がある場合(モノクロに近い状態)ではあまり違和感なくお使いいただけると思います。
イラストによるので一概には言えませんが、上の銀の「金属加工 色味+」に似た描写になると考えられます。
オートアクションで作成されたレイヤーの不透明度を調節すると、色味足しなどで使えないこともないかもしれません。
※クリア、錆のアクションは他の色でもそのまま使用できます。
【作成例】
例の画像の作成手順は、上記の手順と同じになります。
Category 1 カテゴリ1

Old version


Other materials by yuyuya00


Popular “Material catalog” materials


New materials


Badges
-
 MVP ◆This user has contributed greatly to the management of the community, by posting many great responses to the questions asked. Once every three months, MVPs are determined based on the points earned during that period and will be recognized accordingly.
 -
 New Valuable Player (NVP) ◆These are the next-best contributors to the community after MVPs. This is awarded to users who have not yet won an MVP award, based on the number of points they have earned.
 -
 Official Expert ◆Chosen out of all MVP awardees, who are already proof of excellence, this is a testimony of outstanding correspondence in the community. After careful screening, they are appointed by CELSYS and assume their position.Note: Formally called “Evangelists”
 -
 Official Moderator of CELSYS ◆Moderators are official CELSYS staff members who are fluent in Japanese as well as various other languages. Moderators are not experts on the software or illustration, so they are not able to directly answer your questions. However, moderators provide communication and language support to ensure that everyone can smoothly communicate with each other.
 -
 CELSYS official accountThe Official Administrator Account