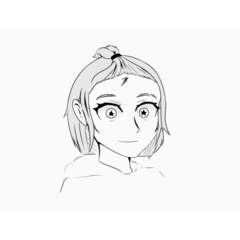

It is a 3D material that assists the drawing of the eyes.
The first position matches the CLIP STUDIO head 3D model "Base".
I made it because I was curious about the shape of the eyes at difficult angles.
Please use it as a reference when drawing people.
目の作画補助をしてくれる3D素材です。
最初の位置はクリスタの頭部3Dモデル「ベース」と合うようになっています。
難しい角度の時に目の形がどうなっているか気になって作りました。
人物の作画時の参考用にどうぞ。

・Eyeball 3D
That's one point.
It can be used individually, but I think it would be more convenient to combine it with the head 3D of the CLIP STUDIO.
At first, the position and size matched the CLIP STUDIO head 3D model "base", but when adjusted, it could be used in combination with other head models.


When drawing at a difficult angle, if you combine the line of sight and the degree of closing of the eyelids, you may wonder what kind of shape the eye is ⋯, so I hope it will be a hint for those who have such problems when creating.

The edges of the eyes may not come out cleanly.
It may be helpful when drawing, because you can start with nothing rather than nothing! It is a material that is.

If you display auxiliary lines, you can use it as a reference for the lowering of the eyelids.
It can also be hidden.
There are two types of pupil shapes: round and vertical.
Choose from the materials.

Choose the shape of the pupil from the layout.
You can also choose whether or not to have auxiliary lines.
However, since it matches the position of the CLIP STUDIO head 3D model "base", when changing the size or position of the eyeball 3D, please switch the display from the object list, not from the layout.


When using it with the head 3D "base", first attach the "base" to the canvas.

Do not move the position of the 3D head, and then paste the eyeball 3D onto the canvas.
It is pasted in a aligned position.
Then move the camera to the desired angle.

If you combine it with a different type of head 3D from the "base", the position will not match, but you can use it by adjusting the position and size.

Personally, I recommend that you first adjust the object scale and position of one eye with a manipulator, and when it feels good, copy and paste the numerical values such as location information into the other eye.
Please note that the X axis value of the position is swapped with plus and minus.


The eyeballs can be moved in circles.
When rotating the eyeball, select "Right eye_eyeball" or "Left eye_eyeball" and rotate it.
If you select "Right eye" or "Left eye", the auxiliary line will also rotate.
When adjusting the position and size of the eyes, select "right eye" or "left eye".
The changes are reflected in both the eyeball and the witness line.


I think it can be used in both realistic and deformed painting styles.
The number of object scale in the eyeball 3D on the right head is 200.
If you draw a picture with large eyes, please refer to it when adjusting the size of the eyeball.

・目玉3D
以上1点です。
単品でも使えますが、クリスタの頭部3Dと組み合わせるとより便利かと思います。
最初はクリスタの頭部3Dモデル「ベース」に合わせた位置、サイズですが調整すると他の頭部モデルとも組み合わせて使用できました。


難しい角度の作画時に目線やまぶたの閉じ具合なども合わさると目は一体どんな形になっているのだろう⋯となってしまう事があるので、他にもそんな悩みをお持ちの方の創作時のヒントになればと思います。

目の端っこが綺麗に出ない事もあります。
何もないよりはとっかかりができるので作画時に助かるかも!という素材です。

補助線を表示するとまぶたの下がり具合の参考に使えます。
非表示にもできます。
瞳の形はまん丸と縦長の2種類あります。
マテリアルから選んでください。

瞳孔の形はレイアウトから選んでください。
補助線の有無も選べます。
ですがクリスタの頭部3Dモデル「ベース」の位置に合わせたものになっているため、目玉3Dの大きさや位置を変更している時にはレイアウトからではなく、オブジェクトリストから表示非表示の切り替えを行ってください。


頭部3D「ベース」と一緒に使用する際にはまずは「ベース」をキャンバスに貼り付けてください。

3D頭部の位置は動かさず、続いて目玉3Dもキャンバスへ貼り付けてください。
位置が合った状態で貼り付けられます。
あとはカメラを動かして希望のアングルにしてください。

「ベース」と違う種類の頭部3Dと組み合わせると位置が合いませんが、位置や大きさを調整する事で使えるようになります。

まずは片目のオブジェクトスケールや位置をマニピュレーターで調整し、いい感じになったらもう片方の目に位置情報等の数値をコピペするという手順が個人的にはおすすめです。
位置のX軸の数値はプラスとマイナスが入れ替わりますのでご注意ください。


目玉はぐるぐる動かせます。
目玉の回転時には「右目_目玉」か「左目_目玉」を選択して回転させてください。
「右目」か「左目」を選択すると補助線も回転してしまいます。
目の位置や大きさの調整時には「右目」か「左目」を選択した状態で行ってください。
目玉にも補助線にも変更が反映されます。


リアルめな画風でもデフォルメされた画風でも活用はできそうかなと思います。
右の頭部で目玉3Dのオブジェクトスケールの数値は200です。
目が大きい絵を描かれる方は目玉の大きさの調整時のご参考にしてください。
Eyeball 3D 目玉3D


