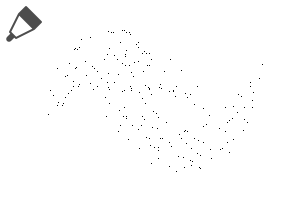
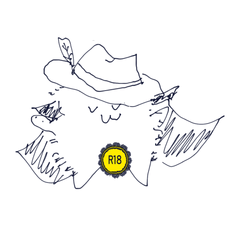
■ 600DPI/monochrome/seamless/2-value/color can be changed.
Because there are a lot of ■ brushes, it is recommended to put only the one often used in the brush palette.
1. set as reference layer line drawings (OK even in a folder with line drawings)
2. Draw Tones new layer
Point
If there is a gap in the line, it becomes easy to overflow.
If the line is not connected, it is OK if I select it with auto select tool and draw it.
-It is easy to paint when you pull the line over the outside of the balloon.
The sand eyes are often used for the uniform cardigan and knit ○
Check area scaling under Settings + [tool property] to avoid the line.
A white border margin between the background and the person. (Until 20px)
By making the [area scaling] + 20, it is possible to slightly protrude from the line and to make the fluffy atmosphere of the girl cartoon.
Brush [tool property] > [sub tool detail] > [brush tip]
By switching from [circular] to [material], you can be a window to the edge.
(It is registered in advance.) The default setting is circular. )
If you want a simple brush, duplicate the brush.
You can change the color of the white tone.
Because the shading and the sand eyes do not moire even if piled up, I can use it for the transparent balloon ti, etc.
Do not reduce the rotation of the paper in the tool property.
Because the pattern shifts when I paint it after using a moving tool, please draw it in a new layer.
○ Other Tone Brushes
https://assets.clip-studio.com/ja-jp/detail?id=1772102
https://assets.clip-studio.com/ja-jp/detail?id=1739477
https://assets.clip-studio.com/ja-jp/detail?id=1772274
https://assets.clip-studio.com/ja-jp/detail?id=1808513
https://assets.clip-studio.com/ja-jp/detail?id=1806325
■600dpi/モノクロ用/シームレス/二値/色が変えられます。
■ブラシ数が多いので、よく使うものだけをブラシパレットに入れるのがおすすめです。
1. 線画を参照レイヤーに設定 (線画を入れたフォルダでもOK)
2. 新規レイヤーにトーンを描画
ポイント
・線に隙間があるとはみ出しやすくなります。
・線がつながっていない場合は自動選択ツールで選択してから描画すればOKです。
・線をフキダシの外にオーバーに引いておくと塗りやすいです。
・砂目は制服のカーディガンやニットに使われることが多いです○
上と同じ設定+[ツールプロパティ]の[領域拡縮]にチェックを入れると線を避けて塗れます。
背景と人物の間に白フチ的な余白がつくれます。(20pxまで)
[領域拡縮]を+20にすることで、線から少しはみ出して少女漫画的なふんわりした雰囲気にすることも可能です。
ブラシの[ツールプロパティ]>[サブツール詳細]>[ブラシ先端]で
[円形]から[素材]に切り替えることで、フチをほわほわにすることができます。
(予めほわほわが登録されています。初期設定は円形です。)
ほわほわブラシが単体で欲しい場合は、ブラシを複製して下さい。
色を変えられるので白トーンにすることもできます。
網点と砂目は重ねてもモアレしないので透けるフキダシなどにも使えます。
ツールプロパティの紙質の回転拡大縮小は行わないで下さい。
移動ツール使用後に重ね塗りすると模様がズレてしまうので、新規レイヤーに描画して下さい。
○ほかのトーンブラシはこちら○
https://assets.clip-studio.com/ja-jp/detail?id=1772102
https://assets.clip-studio.com/ja-jp/detail?id=1739477
https://assets.clip-studio.com/ja-jp/detail?id=1772274
https://assets.clip-studio.com/ja-jp/detail?id=1808513
https://assets.clip-studio.com/ja-jp/detail?id=1806325


