【2】Basic usage
1. Fur brush 1
2. Fur brush 2
- It is a left-right flipped version of the brush tip of "Fur Brush 1".
3. Fur brush 3
- The thickness of the brush tip changes with pen pressure.
4. Fur brush 4
- It is a left-right flipped version of the brush tip of "Fur Brush 3".
- The thickness of the brush tip changes with pen pressure.
* The opacity of the ink changes depending on the pen pressure.
* combine mode is "multiplication".
* The brush density changes depending on the starting and ending.
【3】Actual usage
(1) Select "Black" and draw from left to right with "Fur Brush 1".
If you draw a curve, you can draw each hair bently.
(2) By repeating item (1), you can express a natural shade of fur.
(3) By selecting "Transparent color" and drawing from left to right with "Fur Brush 1", you can reduce the shade of the coat.
【4】Actual usage (shaping)
(1) Erase roughly with the eraser.
(2) Erase unnecessary parts with the eraser.
(3) Select "Transparent Color" and blur the outline with "Fur Brush 3".
Basically, I think this is enough to look like it.
(4) Select "Black" and outline with "Fur Brush 3".
(5) Select "Transparent Color" and blend the outline with "Fur Brush 1".
I think it looks like it is enough to stop here.
(6) Select "Black" and use "Fur Brush 1" to add the bristles of the outline part,
The following is a drawing that alternately uses "black" and "transparent color" and overlaps several times.
【5】Actual usage (drawing patterns)
(1) Select "Black" and draw a pattern with "Fur Brush 3" or "Fur Brush 4".
(2) You can also draw a thin (white) pattern by selecting "Transparent color" and drawing with "Fur Brush 3" or "Fur Brush 4".
* The default combine mode of the brush is "Multiply", so if you select "White", you cannot draw anything.
If you want to draw a pattern in "White", change the combine mode to "Normal".
【6】Actual usage (draw in color)
(1) You can use it in color without any problem.
(2) You can express the glossy coat by adding an additive (luminous) layer, selecting "White", changing the combine mode of the "Fur Brush 1" brush to "Normal" and drawing.
(3) You can express a natural gloss by blurring or lowering the opacity of the layer.
The following is > "Filter", "Blur", > "Blur" and "Blur (Strong)" and changed the opacity of the layer to "50%".
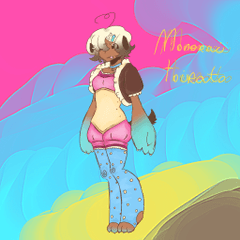
【7】Examples
more than
【2】基本的な使い方
1.毛皮ブラシ1
2.毛皮ブラシ2
- 「毛皮ブラシ1」のブラシ先端を左右反転したものです。
3.毛皮ブラシ3
4.毛皮ブラシ4
- 「毛皮ブラシ3」のブラシ先端を左右反転したものです。
- ブラシ先端の厚さが筆圧で変わります。
※インクの不透明度が筆圧で変わります。
※合成モードは「乗算」です。
※入り抜きでブラシ濃度が変化します。
【3】実際の使い方
(1)「黒」を選択し、「毛皮ブラシ1」で左から右に描きます。
曲線を描くように描くと一本一本の毛も曲がって描けます。
(2)項目(1)を繰り返すことで自然な濃淡の毛並みを表現できます。
(3)「透明色」を選択し、「毛皮ブラシ1」で左から右に描くことで、毛並みの濃淡を薄くできます。
【4】実際の使い方(形を整える)
(1)消しゴムでざっくり消します。
(2)消しゴムで不要な部分を消します。
(3)「透明色」を選択し、「毛皮ブラシ3」で輪郭をぼかします。
基本的にはこれで十分それらしく見えるかと思います。
(4)「黒」を選択し、「毛皮ブラシ3」で輪郭を描きます。
(5)「透明色」を選択し、「毛皮ブラシ1」で輪郭をなじませます。
ここで止めても十分それらしく見えるかと思います。
(6)「黒」を選択し、「毛皮ブラシ1」で輪郭部分の毛を描き足したり、
「黒」と「透明色」を交互に使用し、何度か重ねて描いたものが以下となります。
【5】実際の使い方(模様を描く)
(1)「黒」を選択し、「毛皮ブラシ3」や「毛皮ブラシ4」で模様を描きます。
(2)「透明色」を選択し、「毛皮ブラシ3」や「毛皮ブラシ4」で描くことで、薄い(白い)模様も描けます。
※ブラシのデフォルトの合成モードが「乗算」ですので、「白」を選択した場合、何も描けません。
「白」で模様を描きたい場合は、合成モードを「通常」に変更してください。
【6】実際の使い方(カラーで描く)
(1)カラーでも問題なく使えます。
(2)加算(発光)レイヤーを追加し、「白」を選択し、「毛皮ブラシ1」ブラシの合成モードを「通常」に変更して描くことで、光沢のある毛並みを表現できます。
(3)ぼかしたり、レイヤーの不透明度を低くすることで自然な光沢を表現できます。
「フィルター」>「ぼかし」>「ぼかし(強)」を適用し、レイヤーの不透明度を「50%」に変更したものが以下となります。
【7】作例
以上


