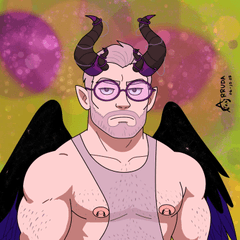

Hassle-Free, Basic Auto-action: Greyscale Switch. Perfect for your Value checking needs!

Imagine this illustration isn't flat yet, meaning all the layers are still there.

Greyscale Switch will NOT flatten all your layers, it will NOT change any of your layers and effects. It will only create a correction layer to show the greyscale version.
- go to menu tab > LAYER > New Correction Layer > Hue/Saturation/Luminosity
- slide down the Saturation level to "-100"
- click ok
You'll notice that the Hue and Luminosity aren't changed (all remain 0), which means this Greyscale Switch is loyal to your coloured art.
- go to menu tab> LAYER > New Layer > Fill
- pick the blackest of the black or hex#000000 (using pure black is the best colour to pick to create a greyscale preview)
- set the blending mode to either Hue or Color
- keep this fill layer on the top of all your layers always
- voíla!
- [ MASK LAYER: OFF ] : the correction layer does not have the mask layer. so that when you use this autoaction, the Greyscale Switch will show everything grey!
- [ MASK LAYER: ON ] : the mask layer created when making a correction layer is retained. So that you can edit out the what part of the art will look grey.


IMPORTANT
- Both sets of the Greyscale Switch will automatically put the correction layer (the thing that's creating the greyscale preview) at the TOP of all your layers. I'm mentioning this in case you don't need your other layers to be greyscale.
- You can export/save as your artwork while the Greyscale Switch is on. If you ever need it. Just export as (into your prefered image format) or save as.
- The Greyscale Switch sets are originally in english. So to change the name of Greyscale Switch layer, do the steps below...
- go to the auto-action window
- open Greyscale Switch (and turn "off" the button mode if you have it "on")
- click the arrow pointing to the set name, and dinffind the "Change Layer Name" command
- click the square box, and that's it!
Now every time you activate/play the auto-ction set, the greyscale switch will ask you to rename it. But because that automatic renaming is such a hassle, I made the correction layer of both action sets to have layer palette colours (hex#595959) so that if you get lazy to rename the correction layer, then you can easily identify it with the layer colour (and the layer order: always on top)!
- (If this will ever happen to you) If you select a layer already on top of all the other layers, and then you activate Greyscale Switch, and then an error window will appear asking you that the layer can not be put to the top: just click OK to continue. This means that you have already selected the top order of all the layers, and that the auto-action is just being redundant.
GUARANTEE
You can use Greyscale Switch on your .clip files or any flat images (PNG, JPG, TIFF, etc.).
This greyscale preview is best used to check the values on your artwork. Use it whenever you feel like it!
CONCLUSION
Thanks for reading all that and for downloading Greyscale Switch! I hope this is helpful to those who need it. If there's any errors when you're using Greyscale Switch, contact me in twitter (see my profile).
I highly appreciate the people that actually read all the directions of my uploaded assets. Because I write a lot and I love sharing what I've learnt from my experiences using clip studio paint.
Alright, until next time folks! ( o w < )Vm


