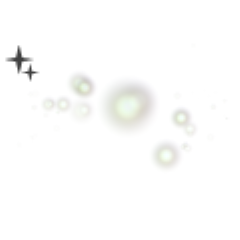

This is a simple brush that can draw lens flare.
2019/4/2: image material & brushes added.
シンプルなレンズフレアが描けるブラシです。
2019/4/2:画像素材&ブラシ追加しました。


LensFlare Color lensflare カラー
-
lensflare1 lensflare1
-
Lensflare1 spread. lensflare1 散布
-
Lensflare1 Radio 1. lensflare1 放射1
-
Lensflare1 Radio 2. lensflare1 放射2
-
Lensflare1 line. lensflare1 流線
-
lensflare2 lensflare2
-
Lensflare2 spread. lensflare2 散布
-
lensflare2 Radio1. lensflare2 放射1
-
Lensflare2 Radio2. lensflare2 放射2
-
Lensflare2 Stream. lensflare2 流線
-
lensflare3 lensflare3
-
Lensflare3 spread. lensflare3 散布
-
Lensflare3 Radio1. lensflare3 放射1
-
Lensflare3 Radio3 Radiation 2. lensflare3 放射 2
-
Lensflare 3 streamlined. lensflare3 流線
-
lensflare4 lensflare4
-
Lensflare4 spread. lensflare4 散布
-
Lensflare4 Radio 1. lensflare4 放射1
-
Lensflare4 Radio 2. lensflare4 放射2
-
Lensflare4 Stream. lensflare4 流線
-
lensflare5 lensflare5
-
Lensflare5 spread. lensflare5 散布
-
lensflare5 Radio 1. lensflare5 放射1
-
Lensflare5 Radio2. lensflare5 放射2
-
Lensflare5 stream. lensflare5 流線
-
lensflare6 lensflare6
-
Lensflare6 spread. lensflare6 散布
-
Lensflare6 Radio 1. lensflare6 放射1
-
Lensflare6 Radio2. lensflare6 放射2
-
Lensflare6 Streamline. lensflare6 流線
-
lensflare mix lensflare mix
-
Lensflare mix spread. lensflare mix 散布
lensflare bicolor lensflare bicolor
-
lensflare bicolor1 lensflare bicolor1
-
lensflare bicolor1 spread. lensflare bicolor1 散布
-
lensflare bicolor1 Radio1. lensflare bicolor1 放射1
-
lensflare bicolor1 Radio 2. lensflare bicolor1 放射2
-
Lensflarebicolor1 Streamline. lensflarebicolor1 流線
-
lensflare bicolor2 lensflare bicolor2
-
lensflare bicolor2 spread. lensflare bicolor2 散布
-
lensflare bicolor2 Radio1. lensflare bicolor2 放射1
-
lensflare bicolor2 Radio2. lensflare bicolor2 放射2
-
Lensflare bicolor2 stream. lensflare bicolor2 流線
-
lensflare bicolor3 lensflare bicolor3
-
lensflare bicolor3 spread. lensflare bicolor3 散布
-
lensflare bicolor3 Radio 1. lensflare bicolor3 放射1
-
lensflare bicolor3 Radio 2. lensflare bicolor3 放射2
-
Lensflare bicolor3 streamlined. lensflare bicolor3 流線
-
lensflare bicolor4 lensflare bicolor4
-
lensflare bicolor4 scattered. lensflare bicolor4 散布
-
lensflare bicolor4 Radio 1. lensflare bicolor4 放射1
-
lensflare bicolor4 Radio 2. lensflare bicolor4 放射2
-
Lensflare bicolor 4 streamlined. lensflare bicolor4 流線
-
lensflare bicolor5 lensflare bicolor5
-
lensflare bicolor5 spread. lensflare bicolor5 散布
-
lensflare bicolor5 Radio 1. lensflare bicolor5 放射1
-
lensflare bicolor5 Radio 2. lensflare bicolor5 放射2
-
Lensflare bicolor5 streamlined. lensflare bicolor5 流線
-
lensflare bicolor6 lensflare bicolor6
-
lensflare bicolor6 spread. lensflare bicolor6 散布
-
lensflare bicolor6 Radio 1. lensflare bicolor6 放射1
-
lensflare bicolor6 Radio 2. lensflare bicolor6 放射2
-
Lensflare bicolor 6 streamlined. lensflare bicolor6 流線
-
lensflare bicolor mix lensflare bicolor mix
-
lensflare bicolor mix 散布 lensflare bicolor mix 散布
Rainbow. 虹
Additional Material images & brushes 追加素材 画像&ブラシ
-
img_ light std. img_光std
-
img_ Light 2. img_光2
-
img_ Light 3. img_光3
-
img_ Light 4. img_光4
-
img_ Light 5. img_光5
-
img_ Light 6. img_光6
-
img_ Light 7. img_光7
-
img_ Light 8. img_光8
-
Img_ Rainbow Circle img_虹円
-
img_ Hongguang 2. img_虹光2
-
img_ backlight. img_逆光
-
img_ backlight 2. img_逆光2
-
Img_ Lens Flare img_レンズフレア
-
Img_ Lens Flare 2 img_レンズフレア2
-
lensflare mix2 lensflare mix2
-
lensflare reflection. lensflare 反射
Old version


