

It is a brush that can draw a circle and blur that glitter. キラキラした丸やボケが描けるブラシです。

The brush that says "bokeh" has the expression of the blur to appear in the setting of border of watercolor.

You can draw this brush by layer settings "dodge" or "Bibbit Light" to create a circle with the texture of the brush image.
It is easy to come out with a sparkling texture when I use it in a dark image, and white flies when I use it in a lighter image.
It is not drawn by "dodge (Light Emitting)" "Bibbit Light" when it is a black image.
This is a brush that is susceptible to layer colors underneath the drawing layer.
How to use
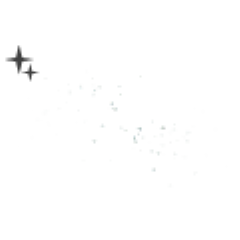
The top left image is the original state which does nothing.
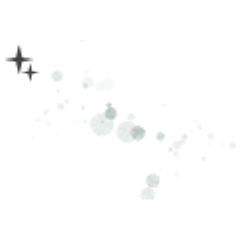
1: "Black background (bottom)" + "color thinning (Medium)" + "dodge (Light Emitting)"
2: The brightness of the image below the layer using this brush changes the condition of the glitter and the light.
The right side is lighter color from the left side.

If you want to use a brush with a black image, you'll see a brush image when you overlap the layers you've copied below or above the layers you've drawn.
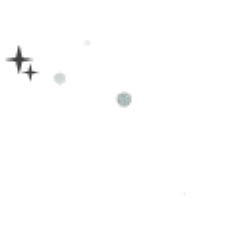
3: Draw layer settings "normal" above the black background. (Leftmost)
Copy the same layer over the drawn layer and set the copy to dodge.
If it is this way, the "opacity" of the original image is lowered because it is white flying state.
The second from the left: 15% opacity normal layer
The third from the left: 20% opacity the "normal" layer
Most right: 30% opacity normal layer
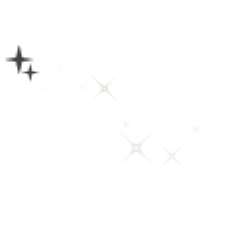
4: When "brightness" is set up another copy of the layer in the image that was able to be done in the above procedure, it becomes a sparkling sparkle like the crystal and the diamond.
The second from the left: "normal" opacity 45% + "luminance" opacity 35%
Left third: "Normal" opacity 45% + "luminance" opacity 35% + "dodge (Light emitting)" opacity 78%
If you do not pinch the "luminance" layer and put the color of the red tea on the black background, the green is faded when I set it as follows on that.
Most Right: Color layer # 332622 + "normal" opacity 30% + "dodge (Light emitting)" 100%

5: Use this brush instead of a texture to apply a sparkling sparkle effect, such as reflections from the surface.
It can also be used as a texture hanging on a character or an image.
It is the characteristic of this brush that a simple water surface can be drawn.
I prepare the groundwork of the first as shown in the above figure.
The new layer then draws to any place with this brush, and after "mesh transformation" + "gaussian blur", "dodge (Light emitting)" setting can be sparkling water.
When the color is applied after the base & texture setting is finished, the water of the favor is completed when the blue expression of water changes the opacity while seeing the change of the color at the end.
The brush size is 2000px the initial value, but if the size is reduced, the particle can be drawn as To纏matsu.

When using as a texture to fill illustrations with low contrast, you can make pale atmosphere by adjusting the opacity and the eraser, etc., to create an effect that comes out contrast.
Using the adjusted image as an example, the texture is hung on the image at the arrow tip.
If you feel the brush's texture or contour is stiff, you can adjust it in gaussian blur to soften it.
It is a brush that is effective in a dark image, but please try to adjust it to the liking that was in a style other than "tonal correction" and gradient map.
Please feel free to change the brush particle size to your liking.
Please be careful because the glitter collapses when it is too small.
The brush setting can be changed by "tool property" and "sub tool detail", so please feel free to adjust it so that it is easy to use.
「bokeh」と書いてあるブラシは水彩境界の設定でボケの表現が出るようにしています。
このブラシはレイヤー設定「覆い焼き(発光)」「ビビットライト」で描画するとブラシ画像のテクスチャがキラキラする丸が描けます。
暗めの画像で使用するとキラキラしたテクスチャが出やすく、明るめの画像で使用すると白飛びします。
真っ黒画像だと「覆い焼き(発光)」「ビビットライト」で描画されません。
描画レイヤーの下にあるレイヤー色に影響されやすいブラシです。
使用方法
左上画像は何もしていない元の状態です。
1:「黒背景(下)」+「色薄がけ(中)」+「覆い焼き(発光)(上)」
2:このブラシを使用するレイヤーの下にある画像の明るさで、キラキラと発光する具合が変わります。
右側は左側より明るめの色になっています。
黒画像にブラシを使いたい時は、描画したレイヤーの下や上にコピーしたレイヤーを重ねるとブラシ画像が現れます。
3:黒背景の上にレイヤー設定「通常」で描画します。(一番左側)
描画したレイヤーの上に同じレイヤーをコピーして、コピーした方を「覆い焼き(発光)」に設定します。
このままだと白飛び状態なので元の画像の「不透明度」を下げます。
左から二番目:「通常」レイヤー不透明度15%
左から三番目:「通常」レイヤー不透明度20%
一番右:「通常」レイヤー不透明度30%
4:上記の手順で出来た画像にもう一枚コピーしたレイヤーを「輝度」設定し重ねると、水晶やダイヤモンドの様な煌めきになります。
左から二番目:「通常」不透明度45%+「輝度」不透明度35%
左から三番目:「通常」不透明度45%+「輝度」不透明度35%+「覆い焼き(発光)」不透明度78%
「輝度」レイヤーを挟まなくても黒背景の上に赤茶系の色を乗せて、その上に下記のように設定すると緑っぽさが薄れます。
一番右:色レイヤー#332622+「通常」不透明度30%+「覆い焼き(発光)」100%
5:このブラシをテクスチャの代わりに使用すると、水面の反射光の様な煌めき効果をかける事が出来ます。
文字や画像にテクスチャ掛けとしても使用出来ます。
簡単な水面の描画が出来るのもこのブラシの特徴です。
上記の図のように先の下地を用意します。
次に新規レイヤーにこのブラシで任意の場所に描画し、「メッシュ変形」+「ガウスぼかし」した後「覆い焼き(発光)」設定にすると煌めく水面が出来ます。
水の青の表現は、最後に色の変化を見ながら不透明度を変えたり、下地&テクスチャ設定終えた後に色をつけたりすると、好みの水面が出来上がります。
ブラシサイズは初期値2000pxにしてますが、サイズを小さくすると粒子が纏まったように描画出来ます。
コントラストの少ない塗りのイラストにテクスチャとして使用する場合、不透明度や消しゴム掛け等調整することで淡い雰囲気作りや、コントラストが出る効果を作ることが出来ます。
使用例として調整済み画像を元に、矢印先の画像にはテクスチャ掛けをしています。
ブラシのテクスチャや輪郭が硬いと感じた場合、「ガウスぼかし」で調整すると柔らかくなります。
暗い画像に効果が出るブラシですが、「色調補正」「グラデーションマップ」他、画風にあった好みで調整してみてください。
ブラシの粒子サイズは好みに合わせてご自由に変更してください。
小さすぎるとキラキラが潰れてしまいますのでご注意ください。
ブラシ設定は「ツールプロパティ」「サブツール詳細」で変更可能ですので、使いやすいよう自由に調整してください。
particle particle
-
diamonddust(s) diamonddust(s)
-
diamonddust(s)bokeh1 diamonddust(s)bokeh1
-
diamonddust(s)bokeh2 diamonddust(s)bokeh2
-
diamonddust(m) diamonddust(m)
-
diamonddust(m)bokeh1 diamonddust(m)bokeh1
-
diamonddust(m)bokeh2 diamonddust(m)bokeh2
-
diamond_circle diamond_circle
-
diamond_circle_bokeh diamond_circle_bokeh
-
luster luster
-
luster_bokeh luster_bokeh
-
twinkle twinkle


Update history
19/01/21 Brush Public 19/01/21 ブラシ公開


Other materials by nanahichi


Popular “Material catalog” materials


New materials


Badges
-
 MVP ◆This user has contributed greatly to the management of the community, by posting many great responses to the questions asked. Once every three months, MVPs are determined based on the points earned during that period and will be recognized accordingly.
 -
 New Valuable Player (NVP) ◆These are the next-best contributors to the community after MVPs. This is awarded to users who have not yet won an MVP award, based on the number of points they have earned.
 -
 Official Expert ◆Chosen out of all MVP awardees, who are already proof of excellence, this is a testimony of outstanding correspondence in the community. After careful screening, they are appointed by CELSYS and assume their position.Note: Formally called “Evangelists”
 -
 Official Moderator of CELSYS ◆Moderators are official CELSYS staff members who are fluent in Japanese as well as various other languages. Moderators are not experts on the software or illustration, so they are not able to directly answer your questions. However, moderators provide communication and language support to ensure that everyone can smoothly communicate with each other.
 -
 CELSYS official accountThe Official Administrator Account