

This is a simple brush that can draw lens flare. シンプルなレンズフレアが描けるブラシです。
It was not flashy, but I wanted the painting and the accent when I was lonely.


"How to use lens flare 1"
This brush is a brush with a color from the beginning.
Change the setting of the layer using this brush with the background color.
layer settings of the background black system
1 Normal
2 linear light
3 Normal + color burn
4 linear light + color burn
5 Normal + screen
6 normal + dodge (Light emitting)
7 Normal + addition (light emitting)
8 Normal + overlay
9 linear light + dodge (Light emitting)
10 linear light + Bibbit Light
layer settings of the background color blue system
1 Normal
2 overlay
3 linear light
4 pin light
5 screen
6 dodge (Light emitting)
7 addition (Light emitting)
8 pin light + overlay
9 pin light + dodge (Light emitting)
10 linear light + hard light
If the brush has a strong effect, adjust the opacity of the layer.
"How to use lens flare 2"
1
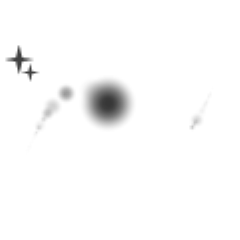
If you set the radiation type brush as shown, it will be a backlight effect brush.
If you put your favorite lens flare brush on a layer painted with this setting, you can draw backlight sun and strong light source.
Because it is a brush using an image, it becomes a clear, hard radiation.
When to use
Blur → gaussian blur or radiation blur
Please adapt.
2
If you check the normal brush type continuous spraying, the brush tip image will come out continuously.
It seems to be able to apply the effect of light, etc.
3
If you want to draw a continuous lens flare that appears on the backlight, it is likely that you will move the brush back and forth.
"Lens flare Brush Use 3"
This brush is not only a color image but can be drawn in main color & sub color of your choice.
Choose "LensFlare bicolor" if you want to use your favorite color.
-Rainbow brushes are usually two types of radiation types.
If you want to change the orientation of the rainbow image,
Usually type
It changes in the direction where the brush moves.
The radiation type is
direction of particle tool property
Sub tool detail palette, spraying effect direction of particle
Change the
The rainbow image is not a brush but image material.
From the brightness of the picture to be used
"Screen", "dodge", "addition (Light emitting)"
Change the layer effect.
If you use a darker color, adjust the opacity of the layer.


You can also express soft light and lens flare effect as taken with a toy camera.
Because I make the tip image simple, I can match a scenery, a background, a person's picture etc. anything.
I think that it is necessary to adjust but can use it for the photograph.
Because the image is lonely, and the brush image insists too much and piling with this brush, it becomes a noisy image, please be careful.
There are not many brush tip images, but I set five kinds of settings for one brush tip image.
When I use it for myself, the time to re-set it changes greatly is lye, and it divides it for the shorter.
If there are any settings you don't need, please delete them after the DL.
When this brush was created, the light effect brush which was previously published was born.

Light effect Brush
https://assets.clip-studio.com/ja-jp/detail?id=1731419
The material of this place is used for the picture drawn in the example of the brush use this time.

Wall Material Brick Set
https://assets.clip-studio.com/ja-jp/detail?id=1721717
派手さはないですが、描いている絵が何か寂しい時のアクセントが欲しくて作りました。
「レンズフレア使用方法1」
このブラシは初めから色が付いているブラシです。
背景色によってこのブラシを使用したレイヤーの設定を変えることで変化します。
背景色黒系のレイヤー設定
1 通常
2 リニアライト
3 通常+焼き込みカラー
4 リニアライト+焼き込みカラー
5 通常+スクリーン
6 通常+覆い焼き(発光)
7 通常+加算(発光)
8 通常+オーバーレイ
9 リニアライト+覆い焼き(発光)
10 リニアライト+ビビットライト
背景色青系のレイヤー設定
1 通常
2 オーバーレイ
3 リニアライト
4 ピンライト
5 スクリーン
6 覆い焼き(発光)
7 加算(発光)
8 ピンライト+オーバーレイ
9 ピンライト+覆い焼き(発光)
10 リニアライト+ハードライト
ブラシの効果が強く出てしまった場合、レイヤーの不透明度を調節してください。
「レンズフレア使用方法2」
1
放射タイプのブラシを図のように設定すると逆光のような効果ブラシになります。
この設定で描いたレイヤーに好みのレンズフレアブラシを乗せると、逆光の太陽や強い光源等が描けます。
画像を使用したブラシなので、はっきりとした硬い放射線になります。
使用する時は
「ぼかし」→「ガウスぼかし」or「放射ぼかし」
等で馴染ませてください。
2
通常のブラシタイプを「連続吹き付け」にチェックを入れると、ブラシ先端画像が途切れなく連続で出て来ます。
光のエフェクト効果等に応用出来そうです。
3
逆光の時に現れる連なるレンズフレアを描きたい場合は、ブラシを往復させるよう動かすとそれらしい形になります。
「レンズフレアブラシ使用方法3」
・このブラシはカラー画像だけではなく、好みのメインカラー&サブカラーで描画できます。
好みの色を使いたいときは「lensflare bicolor」を選んでください。
・虹ブラシは通常タイプと、放射タイプの二種類です。
虹画像の向きを変えたい場合、
通常タイプは
ブラシの動かす向きで変わります。
放射タイプは
「ツールプロパティ」の「粒子の向き」
「サブツール詳細パレット」「散布効果」の「粒子の向き」
を変更してください。
・虹画像はブラシではなく画像素材となっております。
使用する絵の明るさ等から
「スクリーン」「覆い焼き(発光)」「加算(発光)」他
レイヤー効果を変更してください。
使用する時に色が濃い場合、レイヤーの不透明度を調節してください。
トイカメラで撮ったような柔らかな光やレンズフレア効果も表現出来ます。
先端画像をシンプルに作ってますので、風景や背景、人物の絵等何にでも合わせることが出来ます。
調整が必要ですが写真にも使えると思います。
画像が寂しいからと、このブラシで盛り過ぎますとブラシ画像が主張しすぎでうるさいイメージになりますので気をつけて下さい。
ブラシ先端画像は多くないですが、一つのブラシ先端画像につき5種類の設定をセットにしてます。
自分で使用する時、大きく変化する設定をしなおす時間がもったいなくて、時短の為に分けています。
要らない設定がありましたらDL後、削除してください。
このブラシを作成時、先に公開した「光効果ブラシ」が生まれました。
「光効果ブラシ」
https://assets.clip-studio.com/ja-jp/detail?id=1731419
今回ブラシ使用例に描いた絵にこちらの素材を使っています。
「壁材煉瓦セット」
https://assets.clip-studio.com/ja-jp/detail?id=1721717
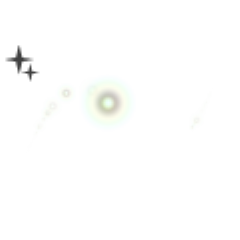
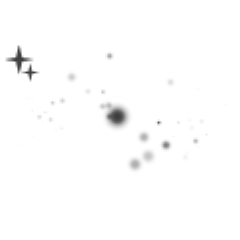
lensflare lensflare
-
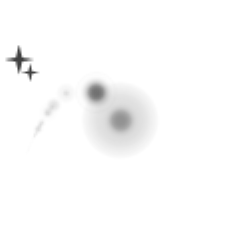
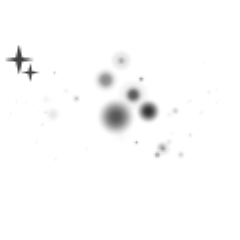
lensflare1 lensflare1
-
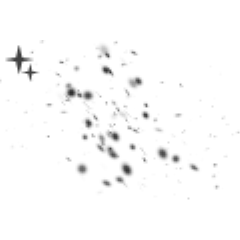
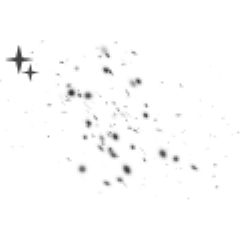
Lensflare1 spread. lensflare1 散布
-
Lensflare1 Radio 1. lensflare1 放射1
-
Lensflare1 Radio 2. lensflare1 放射2
-
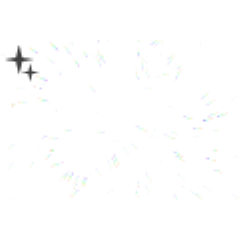
Lensflare1 line. lensflare1 流線
-
lensflare2 lensflare2
-
Lensflare2 spread. lensflare2 散布
-
lensflare2 Radio1. lensflare2 放射1
-
Lensflare2 Radio2. lensflare2 放射2
-
Lensflare2 Stream. lensflare2 流線
-
lensflare3 lensflare3
-
Lensflare3 spread. lensflare3 散布
-
Lensflare3 Radio1. lensflare3 放射1
-
Lensflare3 Radio3 Radiation 2. lensflare3 放射 2
-
Lensflare 3 streamlined. lensflare3 流線
-
lensflare4 lensflare4
-
Lensflare4 spread. lensflare4 散布
-
Lensflare4 Radio 1. lensflare4 放射1
-
Lensflare4 Radio 2. lensflare4 放射2
-
Lensflare4 Stream. lensflare4 流線
-
lensflare5 lensflare5
-
Lensflare5 spread. lensflare5 散布
-
lensflare5 Radio 1. lensflare5 放射1
-
Lensflare5 Radio2. lensflare5 放射2
-
Lensflare5 stream. lensflare5 流線
-
lensflare6 lensflare6
-
Lensflare6 spread. lensflare6 散布
-
Lensflare6 Radio 1. lensflare6 放射1
-
Lensflare6 Radio2. lensflare6 放射2
-
Lensflare6 Streamline. lensflare6 流線
-
Lensflare mix spread. lensflare mix 散布
-
lensflare mix lensflare mix


lensflare bicolor lensflare bicolor
-
lensflare bicolor1 lensflare bicolor1
-
lensflare bicolor1 spread. lensflare bicolor1 散布
-
lensflare bicolor1 Radio1. lensflare bicolor1 放射1
-
lensflare bicolor1 Radio 2. lensflare bicolor1 放射2
-
Lensflarebicolor1 Streamline. lensflarebicolor1 流線
-
lensflare bicolor2 lensflare bicolor2
-
lensflare bicolor2 spread. lensflare bicolor2 散布
-
lensflare bicolor2 Radio1. lensflare bicolor2 放射1
-
lensflare bicolor2 Radio2. lensflare bicolor2 放射2
-
Lensflare bicolor2 stream. lensflare bicolor2 流線
-
lensflare bicolor3 lensflare bicolor3
-
lensflare bicolor3 spread. lensflare bicolor3 散布
-
lensflare bicolor3 Radio 1. lensflare bicolor3 放射1
-
lensflare bicolor3 Radio 2. lensflare bicolor3 放射2
-
Lensflare bicolor3 streamlined. lensflare bicolor3 流線
-
lensflare bicolor4 lensflare bicolor4
-
lensflare bicolor4 scattered. lensflare bicolor4 散布
-
lensflare bicolor4 Radio 1. lensflare bicolor4 放射1
-
lensflare bicolor4 Radio 2. lensflare bicolor4 放射2
-
Lensflare bicolor 4 streamlined. lensflare bicolor4 流線
-
lensflare bicolor5 lensflare bicolor5
-
lensflare bicolor5 spread. lensflare bicolor5 散布
-
lensflare bicolor5 Radio 1. lensflare bicolor5 放射1
-
lensflare bicolor5 Radio 2. lensflare bicolor5 放射2
-
Lensflare bicolor5 streamlined. lensflare bicolor5 流線
-
lensflare bicolor6 lensflare bicolor6
-
lensflare bicolor6 spread. lensflare bicolor6 散布
-
lensflare bicolor6 Radio 1. lensflare bicolor6 放射1
-
lensflare bicolor6 Radio 2. lensflare bicolor6 放射2
-
Lensflare bicolor 6 streamlined. lensflare bicolor6 流線
-
lensflare bicolor mix lensflare bicolor mix
-
lensflare bicolor mix 散布 lensflare bicolor mix 散布


rainbow rainbow


Other materials by nanahichi


Popular “Material catalog” materials


New materials


Badges
-
 MVP ◆This user has contributed greatly to the management of the community, by posting many great responses to the questions asked. Once every three months, MVPs are determined based on the points earned during that period and will be recognized accordingly.
 -
 New Valuable Player (NVP) ◆These are the next-best contributors to the community after MVPs. This is awarded to users who have not yet won an MVP award, based on the number of points they have earned.
 -
 Official Expert ◆Chosen out of all MVP awardees, who are already proof of excellence, this is a testimony of outstanding correspondence in the community. After careful screening, they are appointed by CELSYS and assume their position.Note: Formally called “Evangelists”
 -
 Official Moderator of CELSYS ◆Moderators are official CELSYS staff members who are fluent in Japanese as well as various other languages. Moderators are not experts on the software or illustration, so they are not able to directly answer your questions. However, moderators provide communication and language support to ensure that everyone can smoothly communicate with each other.
 -
 CELSYS official accountThe Official Administrator Account