


Iron bars for outdoor use (2 different heights, with connected/curved upside down auxiliary plate) (屋外用の鉄棒(高さ違い2本・連結/カーブした逆上がり補助板付き)) 屋外用の鉄棒(高さ違い2本・連結/カーブした逆上がり補助板付き)
Content ID:2296495
-
846


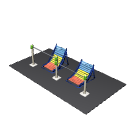
This is an outdoor iron bar to be installed in the garden. Three pillars were erected in a row, and a bar with a height of 1000 mm and 800 mm was passed between them. The middle pillar receives both bars, so the two are lined up as a continuous installation. The upside down auxiliary board was placed at the back of the bar. The end of the bar side is a curve that passes the ground and rises from there to the back. You can run up with your feet while holding the bar. There are 15 horizontal plates in three colors: blue, yellow, and red from the top. I arranged them while changing the angle along the curved surface. The blue side plates along the curved surface receive the transverse plates, and the ground has a frame of steel pipes and diagonal protrusions. The supports are ivory, the metal fittings that fasten the bars are green, and the bars are galvanized. The 3 posts, 2 bars, 2 auxiliary plates and rubber mats are all separate object. The pillars are also divided one by one, so you can create only the high and low sides. The origin is the center of the contact patch, and the bar is in the X direction. 園庭に据え付ける屋外用の鉄棒です。支柱3本を一列に立て、あいだに高さ1000mmと800mmのバーを渡した連結式にしました。真ん中の支柱が両方のバーを受けるので、2本がひと続きの設備として並びます。逆上がり補助板はバーの奥に置きました。バー側の端は地面すれすれで、そこから奥へ向かってせり上がるカーブです。バーを握ったまま足で駆け上がれます。横板は上から青・黄・赤の3色、15枚。曲面に沿って角度を変えながら並べました。曲面に沿う青い側板が横板を受け、地面には鋼管の枠と斜めの突っ張りが付きます。支柱はアイボリー、バーを留める金具は緑、バーは亜鉛メッキの色に分けました。支柱3本・バー2本・補助板2枚・ゴムマットは、すべて別々のオブジェクトです。支柱も1本ずつ分かれているので、高い方だけ・低い方だけの状態も作れます。原点は接地面の中心、バーはX方向です。
About this material
It is a set of two connecting iron bars that share a support and a curved back-up auxiliary plate.
Show/hide
All parts are separate object. Select it by name and erase it, or move it aside.
object Name / Contents
post_left post_mid post_right / props. Separate object one by one (with root-wrapped concrete)
bar_high / Height bar (1000mm) and green fittings
bar_low / Lower bar (800mm) and green fittings
assist_high / Higher upside down auxiliary plate
assist_low / Lower upside down auxiliary plate
safety_mat / Bottom rubber mat
Leave only the high bars — Erase the three bar_low assist_low post_right.
Leave only the low bars — bar_high assist_high post_left Erase three.
post_mid is the middle post that receives both bars, so leave it in both cases.
Best practices
Upside Down Practice — The auxiliaries are located at the back of the bar. While holding the bar,
Put your foot on the low end of the bar side and run up to the back.
Put your feet on the board — the end of the bar side is about 110 mm from the ground, and the highest back end is about 90 mm below the bar.
Rearrange — The posts and bars are separated, so you can create different span arrangements.

Specifications
- 3 pillars (φ90, spacing 1,600 mm, 1 object separately) / bar φ34, height 1,000 mm and 800 mm
- Auxiliary plate: width 620mm, 15 horizontal plates (5 blue, 5 yellow, 5 red), curved curved surface, blue side plate and steel pipe frame
- Rubber mat 4,800 × 2,600 × 40mm (3,200mm wide for single version)
- Origin: Center of the contact patch / Bar: X direction / Support plate: Curve rising to the back of the bar (+ Y side / back)
この素材について
支柱を共有する連結式の鉄棒2本と、カーブした逆上がり補助板の一式です。
表示・非表示の切り替え
部品はすべて別オブジェクトです。名前で選んで消すか、脇へ動かしてください。
オブジェクト名 / 内容
post_left post_mid post_right / 支柱。1本ずつ別オブジェクト(根巻きコンクリート付き)
bar_high / 高い方のバー(1000mm)と緑の金具
bar_low / 低い方のバー(800mm)と緑の金具
assist_high / 高い方の逆上がり補助板
assist_low / 低い方の逆上がり補助板
safety_mat / 下のゴムマット
高い鉄棒だけ残す — bar_low assist_low post_right の3つを消してください。
低い鉄棒だけ残す — bar_high assist_high post_left の3つを消してください。
post_mid は両方のバーを受ける真ん中の支柱なので、どちらの場合も残します。
おすすめの使い方
逆上がりの練習 — 補助板はバーの奥にあります。バーを握ったまま、
バー側の低い端から足を乗せ、奥へ駆け上がって回る動きになります。
板に足をかける — バー側の端は地面から約110mm、いちばん高い奥の端はバーの約90mm下です。
並べ替える — 支柱とバーが分かれているので、スパンを変えた配置も作れます。
仕様
- 支柱3本(φ90・間隔1,600mm・1本ずつ別オブジェクト)/バー φ34・高さ1,000mmと800mm
- 補助板 幅620mm・横板15枚(青5・黄5・赤5)・カーブした曲面・青い側板と鋼管の枠
- ゴムマット 4,800 × 2,600 × 40mm(単体版は3,200mm幅)
- 原点:接地面の中心/バー:X方向/補助板:バーの奥(+Y側・奥へ立ち上がるカーブ)
Material マテリアル




Other materials by Didymoi.A


Popular “3D object” materials


New materials


-
 MVP ◆This user has contributed greatly to the management of the community, by posting many great responses to the questions asked. Once every three months, MVPs are determined based on the points earned during that period and will be recognized accordingly.
 -
 New Valuable Player (NVP) ◆These are the next-best contributors to the community after MVPs. This is awarded to users who have not yet won an MVP award, based on the number of points they have earned.
 -
 Official Expert ◆Chosen out of all MVP awardees, who are already proof of excellence, this is a testimony of outstanding correspondence in the community. After careful screening, they are appointed by CELSYS and assume their position.Note: Formally called “Evangelists”
 -
 Official Moderator of CELSYS ◆Moderators are official CELSYS staff members who are fluent in Japanese as well as various other languages. Moderators are not experts on the software or illustration, so they are not able to directly answer your questions. However, moderators provide communication and language support to ensure that everyone can smoothly communicate with each other.
 -
 CELSYS official accountThe Official Administrator Account