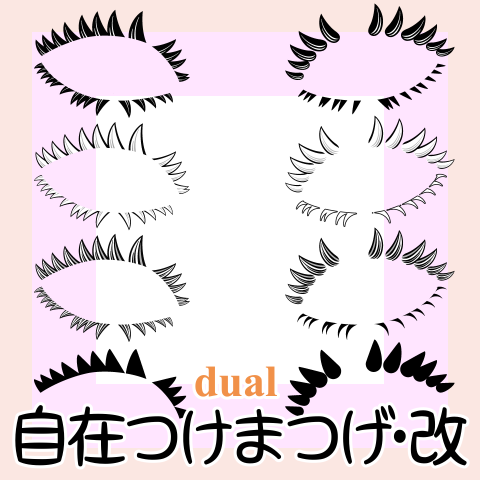
・Material data (original picture)
main color: Black, sub color: White, some gray
Height: Up to 50 mm
Width: Nariyuki (depending on design)
600 dpi
・ 13 types of brushes (stamp & ribbon dual type)
・ 4 types of straight line tools (same as above)
・Bonus
2 types of brushes (stamp type)
1 layer template for sample (may be heavy)
20 points in total +brush tip blank material
If there is something that can be used when you want to try different impressions around the eyes... And
Made.
Draw in a vector layer that can be easily corrected and changed after drawing
Recommend.
【Tsukema bundle】Please draw the series in gray or color.
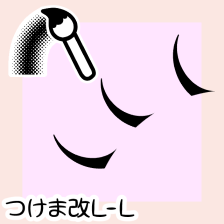
【Tsukema Kai L】Series
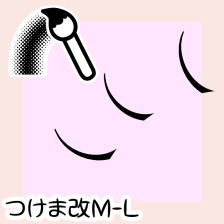
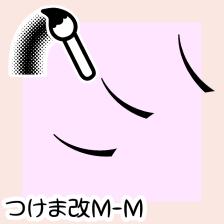
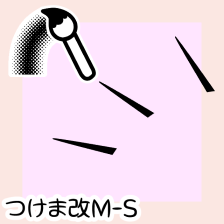
【Tsukema Kai M】Series
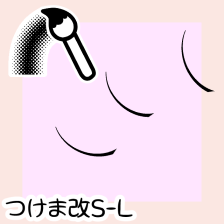
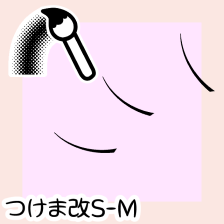
【Tsukema Kai S】Series
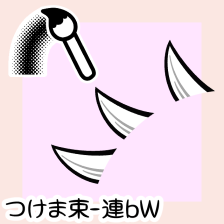
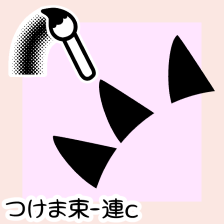
【Tsukema Bundle-Ren】 Series
【Tsukemakai】 The operation of [Tsukema Bundle-Ren] is a trial version of the old work (ID: 2029169)
It conforms to.
You can change the angle of the eyelashes with "Orientation" and the direction in which they grow with "Inversion".
* Notes on "Invert" (in the case of dual setting)
The ribbon that hides the bottom half may also have an effect.
Left) Eyelashes under the ribbon Right) Dual setting does not return
If you don't understand the reason, start with "2-brush shape" with dual settings.
Please set "How to apply: Subtraction" to "Normal".
The ribbon that was hidden will appear.
If you use the ribbon as a guide, it is easy to understand the adjustment such as "reverse operation".
Finally, you can solve it by returning to "How to apply: Subtraction".
If you set "Dual Settings: Off" after drawing, the ribbon settings will be erased.
Please note that "Dual Setting: On" does not return.
We recommend "undo" and "redo".
The dual setting of the brush body can be turned on and off.
*About original drawing and drawing
There is a blank space in the "brush tip" so that there are no defects at the beginning of drawing.
Left) With blanks (default setting) Right) No blanks
Accordingly, there is only one type of original eyelash drawing.
If you want to turn off the dual setting, you can remove the whitespace.
* Depending on the situation, there will be defects at the edges.
It is affected by the "orientation" and "interval → random" values.
If the base of the eyelashes appears at the end of → drawing
If you pull the last control point a little, it will hide, but rarely, before hiding
We have confirmed the phenomenon that new eyelashes are added one after another.
→ when the roots of the eyelashes appear at the beginning of drawing
If you add a space at the beginning in the "Registration pattern" of "brush tip"
The eyelashes are sent back to dissolve.
However, adding white space is troublesome and the design of the drawing changes.
"Use an eraser or mask to erase" is the quickest way to clean
I think it will be finished.
Thank you for your understanding.
I'll put a blank image material just in case.
* Degree of overlap with the "interval" of [continuous b]
If you lower the "Interval" value, your eyelashes will become fluffy.
If you cut the dual setting, you can draw to the root, but there is a subtle part in the overlap of lines.
arises.
Thank you for your understanding.
If you draw in monochrome, the gray part will disappear.
《Synthesis of brush tip in comparison and darkness》
This is a function added to [Tsukema Bundle-Ren].
Left) Off (default) Right) On
You can choose to combine the main lines or draw them individually.
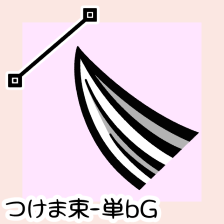
【Tsukema Bundle-Single】Series
[Single] draws each bundle of eyelashes from the eyelid outward.
It can be turned at the control point, but the parallel roots also move.
Please also make use of 《orientation》.
Drawing example (1920 x 1920, 300 dpi)
The above drawing example is added as a bonus with layer template.
* For the eyes, we used a lot of "balloons" that can be changed and moved along with the paint.
Bonus brush
【Iris】Series (Stamp Type)
I used it in the drawing example.
There is a brief explanation in the trial version (ID: 2073054).
I tend to draw by hand ... To make such "eyelashes" impressive,
I want to draw after careful consideration.
We aimed for "false eyelashes" that are easy to change and fine-tune even after drawing.
I think it can be used as it is, but it can also be used as an original base as a draft
I think it can be used.
I hope it will help you finish the attractive eye area ☆
・素材データ(原画)
メインカラー:黒、サブカラー:白、一部にグレー
高さ:最長 50 mm
幅:なりゆき(デザインによる)
600 dpi
・ブラシ(スタンプ & リボン デュアルタイプ)13 種類
・おまけ
ブラシ(スタンプタイプ)2 種類
サンプル用 レイヤーテンプレート 1 点(重いかも)
合計 20 点 +ブラシ先端用の空白素材
目元の印象をいろいろ試したいときに使えるものがあれば…と
作りました。
描画後の修正・変更が簡単にできるベクターレイヤーでの描画を
オススメします。
【つけま束】シリーズはグレーまたはカラーで描画してください。
【つけま改L】シリーズ
【つけま改M】シリーズ
【つけま改S】シリーズ
【つけま束-連】シリーズ
【つけま改】【つけま束-連】の操作は旧作のお試し版(ID:2029169)
に準じています。
《向き》でまつげの角度を変え、《反転》で生える向きを変更できます。
*《反転》の注意点(デュアル設定の場合)
下半分を隠しているリボン部分が影響する場合もあります。
左)まつげがリボンの下 右)デュアル設定が戻らない
訳が分からない描画になったら、デュアル設定の《2-ブラシ形状》より
《適用方法:減算》を《通常》にしてください。
隠れていたリボンが登場します。
リボンを目安にすると《反転操作》等の調整が分かりやすいです。
最後に《適用方法:減算》へ戻せば解決します。
描画後に《デュアル設定:オフ》にするとリボンの設定は消去されます。
《デュアル設定:オン》では戻りませんのでご注意ください。
《元に戻す》《やり直す》をお勧めします。
ブラシ本体のデュアル設定はオン・オフが可能です。
*原画と描画について
描き始めに不備が生じないよう《ブラシ先端》に空白が存在します。
左)空白あり(初期設定) 右)空白なし
準じてまつげの原画は1種類のみとなっています。
デュアル設定を切る場合は空白を削除しても問題ありません。
*状況次第では端に不備が出る
《向き》や《間隔→ランダム》の数値に影響されます。
→描き終わりにまつげの根元が出る場合
最後の制御点を少し引っ張ると隠れますが、稀に、隠れるより先に
新たなまつげが次々と追加される現象を確認しています。
→描き始めにまつげの根元が出る場合
《ブラシ先端》の《登録パターン》で先頭に空白を追加していけば
まつげが後ろへ送られて解消します。
しかし空白の追加が手間であり描画のデザインも変わります。
「消しゴムやマスクを活用して消す」が一番手っ取り早くキレイに
仕上がると思います。
ご了承ください。
念のため空白の画像素材を付けておきます。
*【連b】の《間隔》と重なり具合
《間隔》の数値を下げると、バサバサまつげになります。
デュアル設定を切ると根元まで描けますが、線の重なりに微妙な部分が
生じます。
ご了承ください。
モノクロで描くとグレー部分が消えます。
《ブラシ先端同士を比較暗で合成》
【つけま束-連】に追加した機能です。
主線を一つにまとめるか個々に描くか選択できます。
【つけま束-単】シリーズ
【単】はまつげの束ごとに、まぶたから外へ向けて描きます。
制御点で向きを変えられますが平行になっている根本も動きます。
《向き》も活用してください。
作画例(1920 x 1920、300dpi)
上の作画例はレイヤーテンプレートでおまけに付けています。
*瞳には、塗りも一緒に変更・移動できる《フキダシ》を多用しました。
おまけブラシ
【虹彩】シリーズ(スタンプタイプ)
作画例で使用しました。
試供版(ID:2073054)に簡単な説明があります。
ついつい手癖で描きがち…そんな「まつげ」を印象的に仕上げるには、
じっくり検討して描きたい。
描画後も手軽に変更・微調整がしやすい「つけまつげ」を目指しました。
このままでも使えると思いますが、下絵としてオリジナルのベースにも
使えると思います。
魅力的な目元を仕上げるお手伝いになれば幸いです☆


 MVP ◆This user has contributed greatly to the management of the community, by posting many great responses to the questions asked. Once every three months, MVPs are determined based on the points earned during that period and will be recognized accordingly.
 New Valuable Player (NVP) ◆These are the next-best contributors to the community after MVPs. This is awarded to users who have not yet won an MVP award, based on the number of points they have earned.
 Official Expert ◆Chosen out of all MVP awardees, who are already proof of excellence, this is a testimony of outstanding correspondence in the community. After careful screening, they are appointed by CELSYS and assume their position.Note: Formally called “Evangelists”
 Official Moderator of CELSYS ◆Moderators are official CELSYS staff members who are fluent in Japanese as well as various other languages. Moderators are not experts on the software or illustration, so they are not able to directly answer your questions. However, moderators provide communication and language support to ensure that everyone can smoothly communicate with each other.
 CELSYS official accountThe Official Administrator Account