・Material data
Original: Color (gradient) Gray (Wings: Additional)
W x H: 40 x 80 mm, 600 dpi
Draw in a vector layer that can be easily corrected and changed after drawing
Recommend.
The basic operation is the same as the old work
The explanation of the tool property etc. is the old work (trial ID: 2070063)
Please confirm.
Additional explanations and precautions are summarized below.
Free sample [One-wing modified grade sample] (ribbon type)
I added roundness to the tip.
《sub tool detail→brush shape→brush tip→tip shape》
If you remove the tip image, it will be a simple ribbon like the old work.
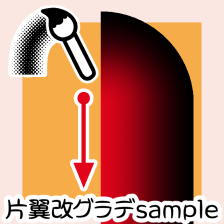
This sample is a gradient of red center color → black outer color.
If you draw from top to bottom, you can draw only on the right side.
The gradient ribbon brush seems to weigh a little bit when drawing.
Please try to see if you can use it comfortably in your work environment.
Free sample [One-wing modified sample] (stamp type)
New wings have been added to the wings of the old game.
Additional original drawings are gray.
If you draw on a monochrome layer, you can erase the gray part.
It is not in the regular version.
Bonus [sample-top] (image)
It is intended to change to a design with a pointed tip.
I added a lot in the revised version.
It is not finished on the brush to keep the price unchanged.
Please add or delete to "brush tip→tip shape" only if necessary.
* Change tip
I'm changing the line I drew for illustration.
The brush can be changed using a similar procedure.
In "sub tool detail→brush tip", click "Add brush tip shape"
Click on it.
《select brush tip shape》 menu will appear.
When the user tag "0" is selected, the image used in [One-wing Kai] is displayed.
*Sample images include regular images.
* Irrelevant images will also appear with the user tag "0".
Select the image you need and click "OK" to "tip shape"
will be added.
Move to the top position and delete unwanted (rounded tip) images.
*When setting to "Dual Setting"
If the color close to the drawing line (center) is darker, a subtle gap (1 dot level) is
We have confirmed that it will occur.
The condition generally improves when "anti-aliasing" is turned on and off.
Left: There is a gap (on) You can see it when you zoom in tremendously...
Right: No gaps (off)
In rare cases, even if you adjust it, the gap may not disappear.
If you are concerned, please follow up by painting it with your hands.
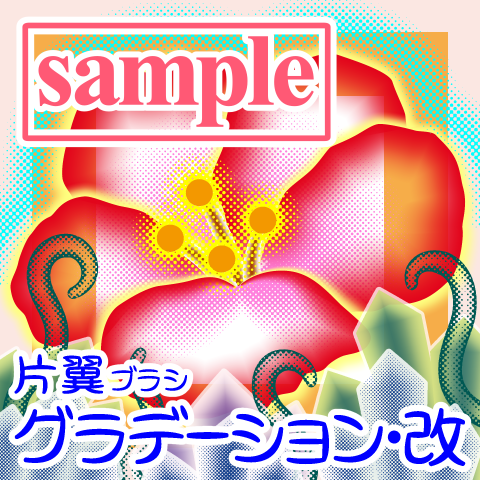
Example of playing (canvas size: 1920x1920, 300dpi)
It may be unnecessary, but it is a bonus.
After releasing the last part, I thought, "I should have added a tip!"
I couldn't stay or stand, so it was revised immediately.
I hope ♪ you enjoy it

・素材データ
原画:カラー(グラデーション) グレー(翼:追加分)
幅 x 高さ:40 x 80 mmくらい、600 dpi
描画後の修正・変更が簡単にできるベクターレイヤーでの描画を
オススメします。
基本操作は旧作と同じ
ツールプロパティ等の説明は旧作(お試し版 ID:2070063)で
ご確認をお願いします。
追加の説明・注意点を以下にまとめます。
試供品【片翼改グラデsample】(リボンタイプ)
先端に丸みを追加しました。
《サブツール詳細→ブラシ形状→ブラシ先端→先端形状》で
先端画像を抜けば旧作と同様のシンプルなリボンになります。
今回のサンプルは、中心色:赤→外側色:黒のグラデーションです。
上から下へ描画すると右側にのみ描けます。
グラデーションのリボンブラシは描画時に若干の重さが生じるようです。
作業環境で快適に使えるか、お試しください。
試供品【片翼改sample】(スタンプタイプ)
旧作の翼に新たな翼を追加しました。
モノクロレイヤーに描けばグレー部分を消せます。
正規版にはありません。
おまけ【sample-top】(画像)
先端を尖ったデザインに変更するためのものです。
改訂版で大量に追加しました。
価格据え置きのためブラシには仕上げていません。
必要な場合のみ《ブラシ先端→先端形状》へ追加・削除をしてください。
*先端を変更
説明用に描画した線を変更しています。
ブラシも同様の手順で変更できます。
《サブツール詳細→ブラシ先端》で《ブラシ先端形状を追加します》を
クリックします。
《ブラシ先端形状の選択》メニューが登場します。
ユーザータグ「0」を選択すると【片翼改】で使用する画像が表示されます。
*サンプル画には正規版の画像も含まれています。
*無関係な画像でもユーザータグ「0」があると一緒に表示されます。
必要な画像を選択して《 OK 》をクリックすると《先端形状》に
追加されます。
先頭の位置へ移動して、不要な(先端が丸い)画像を削除してください。
*《デュアル設定》にする場合
描画線(中心)に近い色が濃い場合、微妙な隙間(1ドットレベル)が
生じることを確認しています。
《アンチエイリアス》のオン・オフで概ね状態が改善します。
左:隙間あり(オン)ものすごく拡大したら見えるのです…
右:隙間なし(オフ)
稀に調整しても隙間が消えないときもあります。
気になる場合は手で塗りつぶす等のフォローをお願いします。
遊んでみた例(キャンバスサイズ:1920x1920、300dpi)
不要かもしれませんが、おまけにつけます。
前回分を公開したあとで「先端を付ければよかった!」と思い立ち、
居ても立っても居られなくて即改訂となりました。
楽しんでいただければ幸いです♪


