
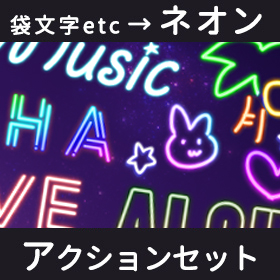
You can make it from fonts! Neon Processing Action Set ver.4 (フォントから作れる!ネオン加工アクションセット ver.4) フォントから作れる!ネオン加工アクションセット ver.4
Content ID:2067972
-
22,405

It is a auto action set that applies "neon processing" at once while leaving the original image from the "text layer" or hand-drawn raster layer.
It is also sold at BOOTH (*^^*)
⇒ http://bit.ly/3JR3xhE
2024.2.24
We've improved auto action content to make it more intuitive to use.
「テキストレイヤー」または手描きのラスターレイヤーから原本画像を残しながら「ネオン加工」を一気に施すオートアクションセットです。
BOOTHでも販売してます(*^^*)
⇒ http://bit.ly/3JR3xhE
2024.2.24
より直感的に使えるよう、オートアクション内容を改良しました。


b. Text bordered from the layer property's border effect setting.
c. Handwriting bordered from the layer property border effect setting
We have improved it so that it can support everything

● Add a white border to the easy
Select the target layer you want to border
→ auto action [Edging (black and white text)]

● Rounded corners
Execute the [Round corners] auto action

* It will be slightly smaller than the original image.
If you want to make it more round, please use "└Add rounded corners"!
● How to make perforated neon
1. auto action [Edging (black and white text)] to make border characters
2. Create a border with auto action [for holes] in the border text
Freely drill holes with the → eraser and then execute the auto action of [black text →××]

● Increase the amount of light emitted
Use it to align with the "luminous" layer

● Change the color of neon
Select the "Shadow" layer and execute the auto action ["Shadow" red→●● for color adjustment.

Alternatively shortcut you can adjust the color with "ctrl + U" or [Edit-tonal correction] "Hue, saturation, lightness"

1. Select the gradient layer
2. Please change the gradient from "tool property"

For other appearances, adjust the opacity of the "neon tube" and "light emitting" layer.
● Freely put various colors on it
1. Select the "Shadow" layer
2. Create a new layer (expression color: color)
3. Clipping to layer below
4. Draw the layer in your favorite color

That's all! I hope you enjoy it even a little (*^^*)
b. テキストをレイヤープロパティの「境界効果」設定から縁取りしたもの
c. 手書き文字をレイヤープロパティの「境界効果」設定から縁取りしたもの
全てに対応できるよう今回改良しました
● カンタンに白縁をつける
縁取りを付けたい対象レイヤーを選択
→ オートアクション【縁取り(白黒text)化】を実行
● 角を丸くする
【角を丸くする】オートアクションを実行
※元の画像より若干小さくなります
もっと丸みをつけたい時は「└角丸足し」をお使いください!
● 穴あきネオンの作り方
1. オートアクション【縁取り(白黒text)化】で縁取り文字を作る
2. 縁取り文字にオートアクション【穴け用】で枠線を作成
→消しゴムで穴を自由にあけてから【黒text→××】オートアクションを実行
● 発光量を増やす
「発光」レイヤーに合わせて使用します
● ネオンの色を変更する
<変更可能グラデ以外の場合>
「シャドウ」レイヤーを選択し、色調整用のオートアクション【「シャドウ」赤→●● 】を実行します
もしくはショートカット「ctrl+U」か【編集-色調補正】の「色相・彩度・明度」で色を調整できます
<変更可能グラデの場合>
1. グラデーションレイヤーを選択
2.「ツールプロパティ」よりグラデーションの変更から行ってください
他見え方については「ネオン管」「発光」レイヤーの不透明度を調節してください
●自由に色んな色をのせる
1.「シャドウ」レイヤーを選択
2. 新規レイヤーを作成(表現色:カラー)
3. 下のレイヤーにクリッピング
4. レイヤーを好きな色で描画
以上です!少しでも楽しんでもらえれば幸いです(*^^*)
Category 1 カテゴリ1

Old version


Other materials by おくとば


Popular “Material catalog” materials


New materials


-
 MVP ◆This user has contributed greatly to the management of the community, by posting many great responses to the questions asked. Once every three months, MVPs are determined based on the points earned during that period and will be recognized accordingly.
 -
 New Valuable Player (NVP) ◆These are the next-best contributors to the community after MVPs. This is awarded to users who have not yet won an MVP award, based on the number of points they have earned.
 -
 Official Expert ◆Chosen out of all MVP awardees, who are already proof of excellence, this is a testimony of outstanding correspondence in the community. After careful screening, they are appointed by CELSYS and assume their position.Note: Formally called “Evangelists”
 -
 Official Moderator of CELSYS ◆Moderators are official CELSYS staff members who are fluent in Japanese as well as various other languages. Moderators are not experts on the software or illustration, so they are not able to directly answer your questions. However, moderators provide communication and language support to ensure that everyone can smoothly communicate with each other.
 -
 CELSYS official accountThe Official Administrator Account