
by
 ◆
◆
◆
Auto action to create the "rainy" animation of 8fps 24FR 8fps 24fr の「雨降り」アニメを作成するオートアクションです
It's a auto action for creating rain animations
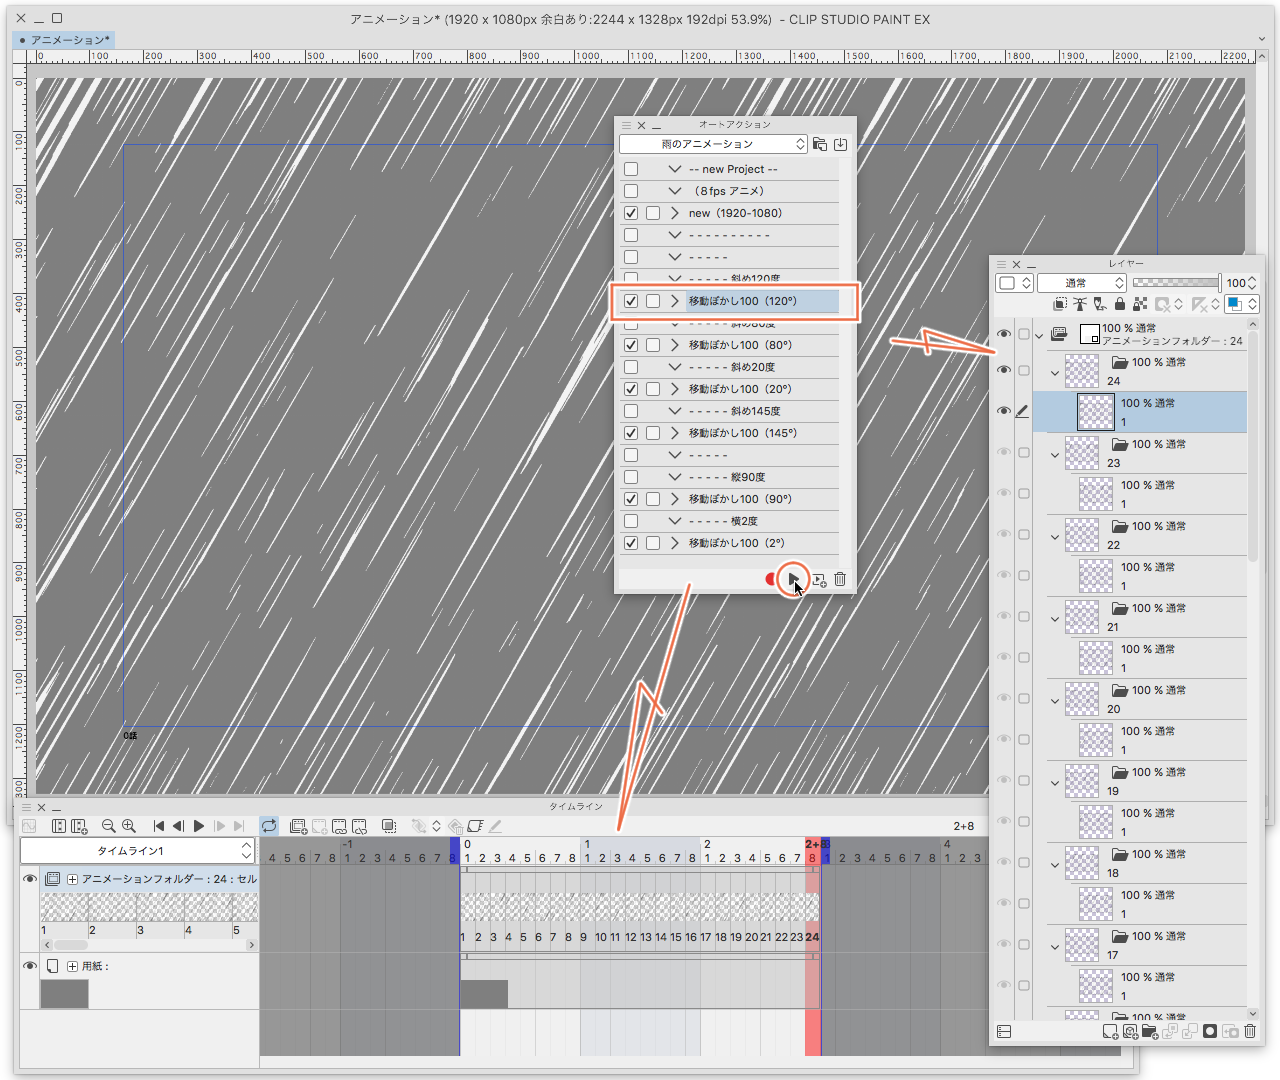

Completed animation auto action "movable blur (120 °)"
(The animation created in 1920 × 1080px is reduced to 576 × 324px)
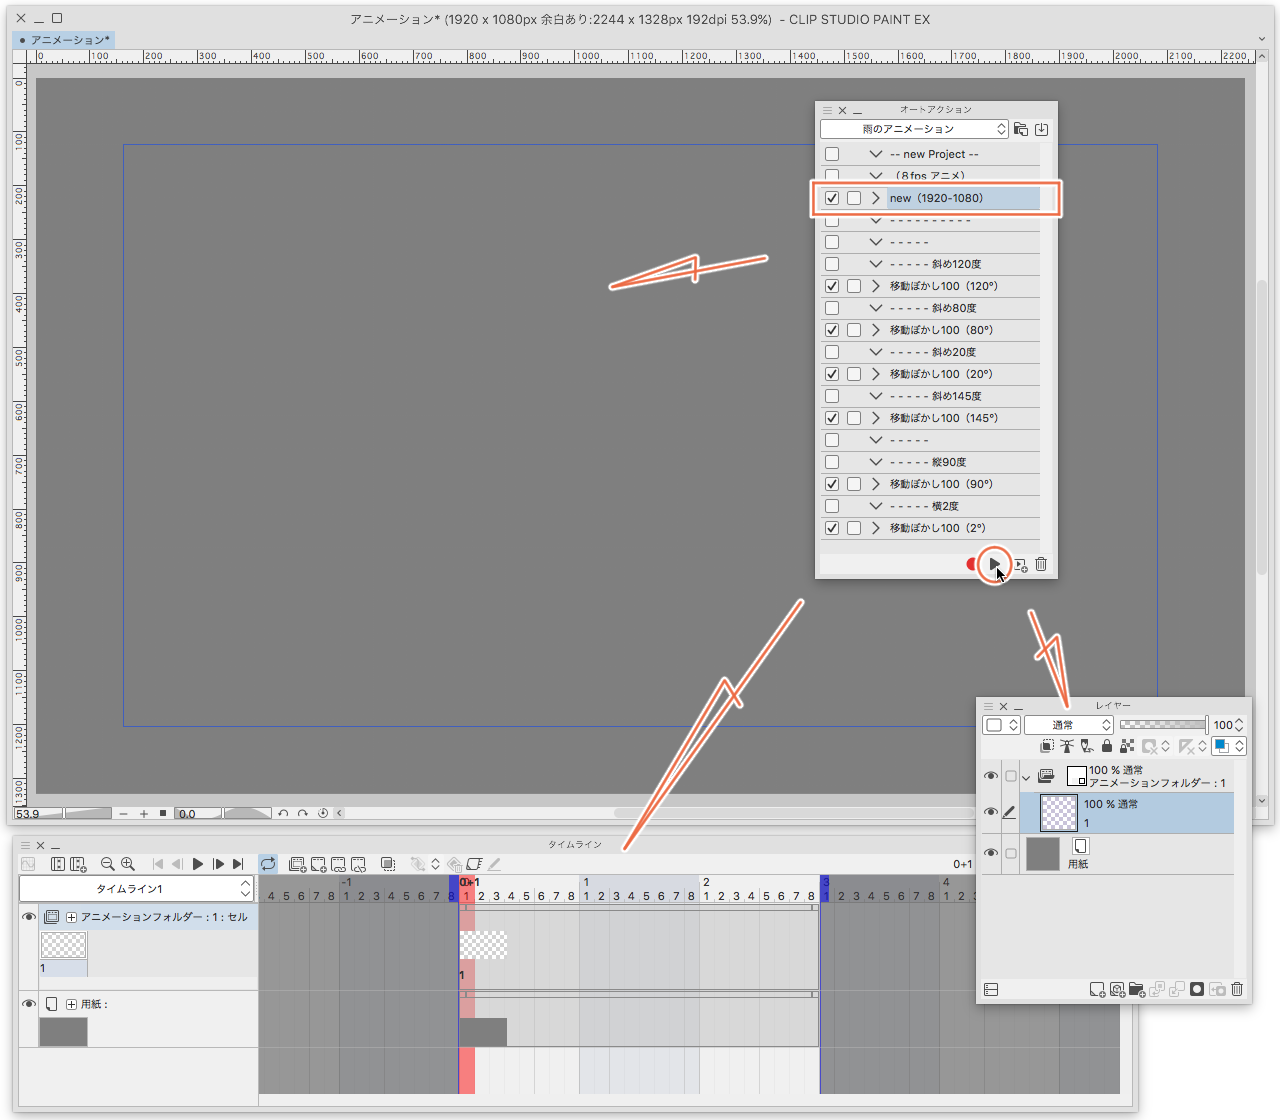
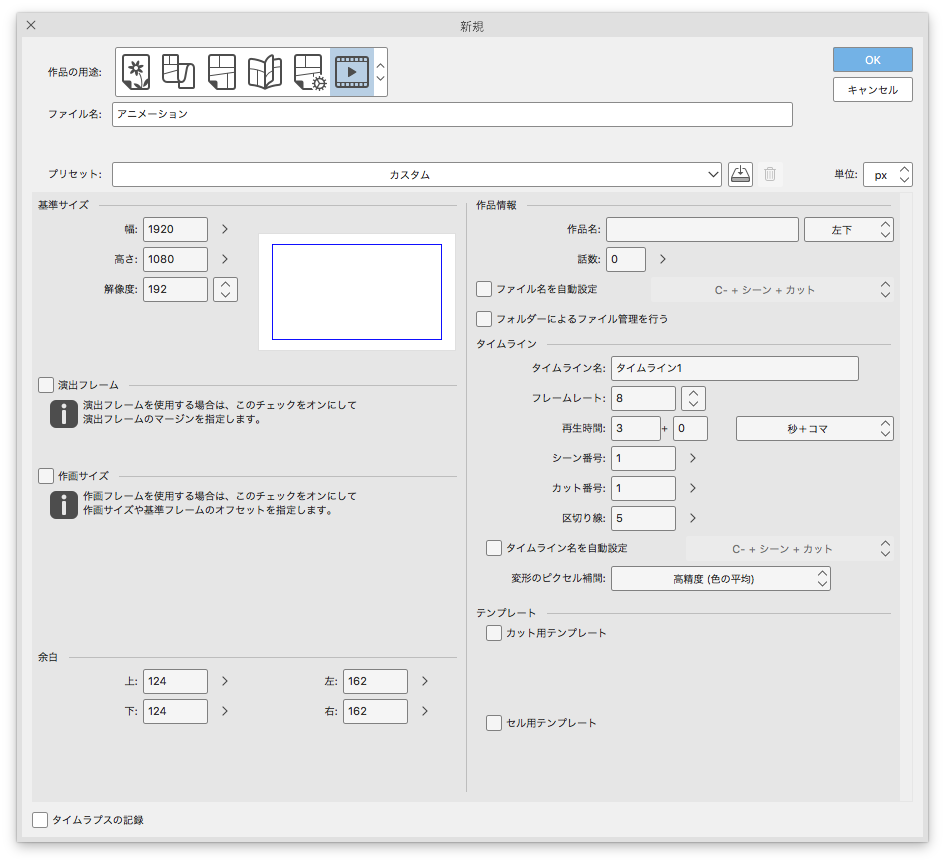
First, auto action will play new (1920-1080)

When playing auto action (new 1920-1080)
"Base Size" width 1920px height 1080px Resolution 192
124px under "Margins" 124px left 162px right 162px
frame rate 8
Play time: 3 seconds
This will create an animation canvas

Continue to set the "paper" color to gray and the layer color of gray near White in the animation folder to turn OFF This canvas's work information.
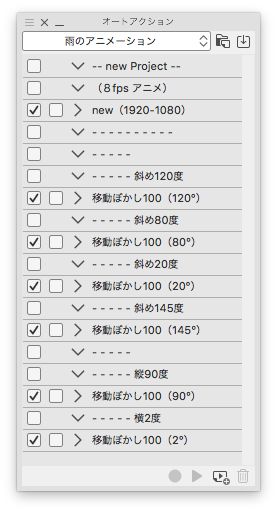
All you have to do is pick one from the six-rain angle and play the auto action.
Note Time to play takes 30 seconds to 2 minutes.)

The attachment plays (movable blur 100 (120 °))
100 means "blur distance" of "movable blur" (100).
(120 °) means "blur angle" of "movable blur" (120)
Because the "blur distance" is all (100), only check the number of the back.
The beginning of the auto action starts with creating a folder and inserting layers
animation cels should be selected in a layer folder state.
(It may not work if it is included in the layer folder.)
That's it.
If you try other auto action rain angle
Make sure you create a new canvas for the animation
Close the animation folder
Place the background under the animation folder

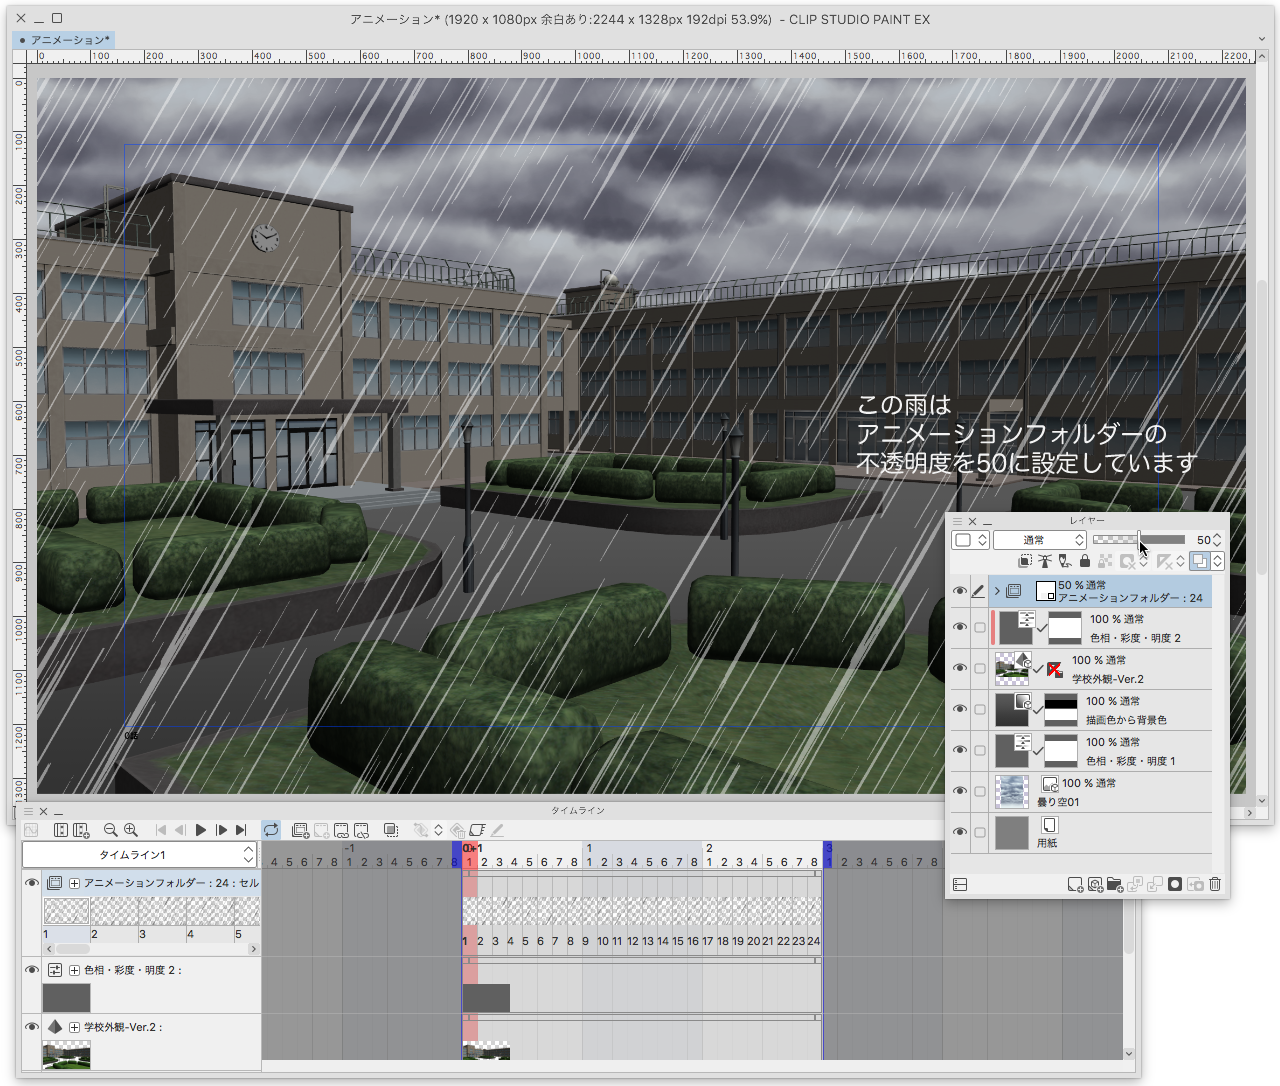
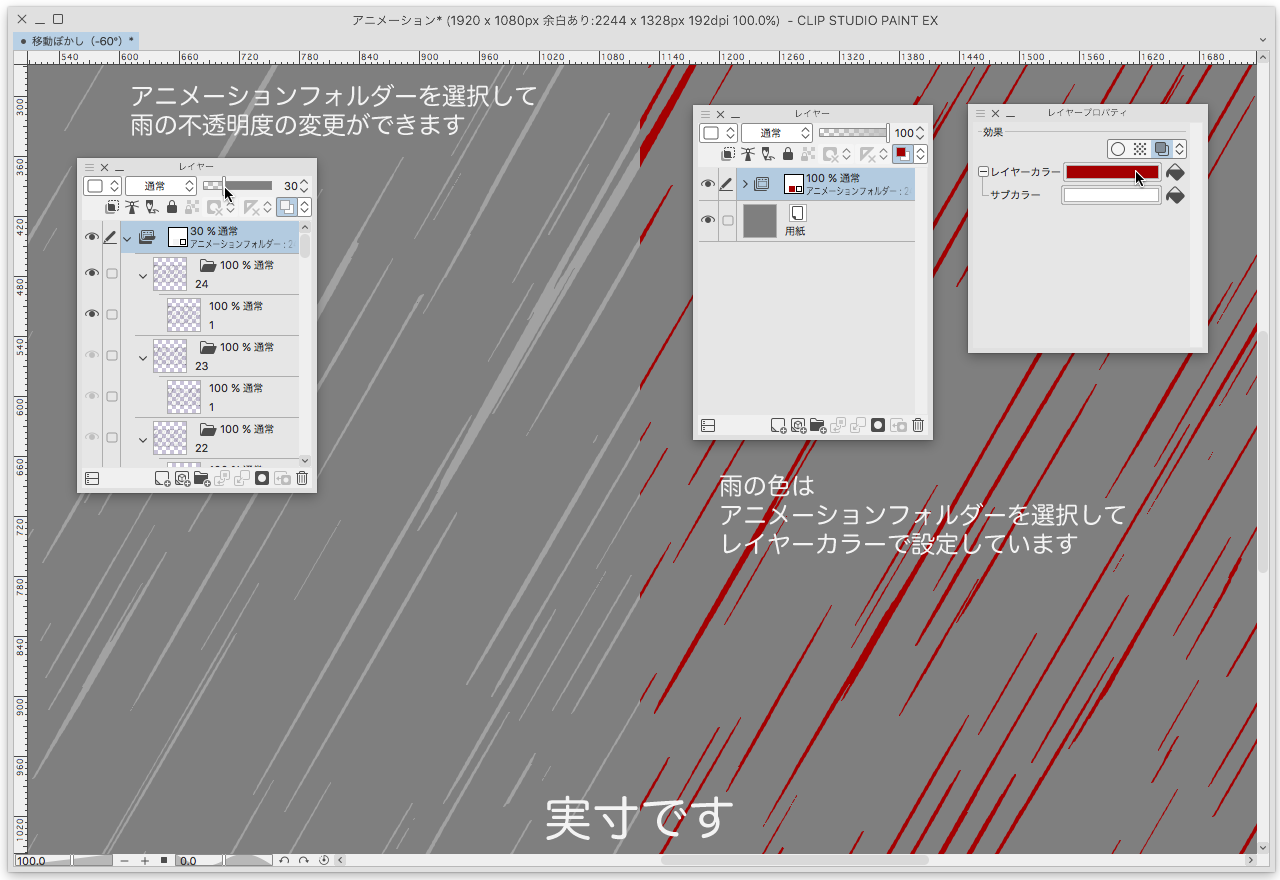
Attachment selects animation folder to lower opacity

You can change the opacity of the animation folder to feel good.
There is no atmosphere because it is white as it is.
Setting Animation folder layer color
The rain itself is black, but it is set to white in layer color.

auto action Description

> New (1920-1080)
8fps Create canvas for 3 seconds animation
Canvas doesn't have to dwell on this size
You may create it in a free size.
The size of the rain will not change, so it will be fine rain on a large canvas.
On a small canvas, it rains roughly.
Create only one layer name animation cels in the animation folder "1"
With the animation cels that you created, leave the timeline entered state.
timeline need 24 frames
auto action will create 24-frame rain
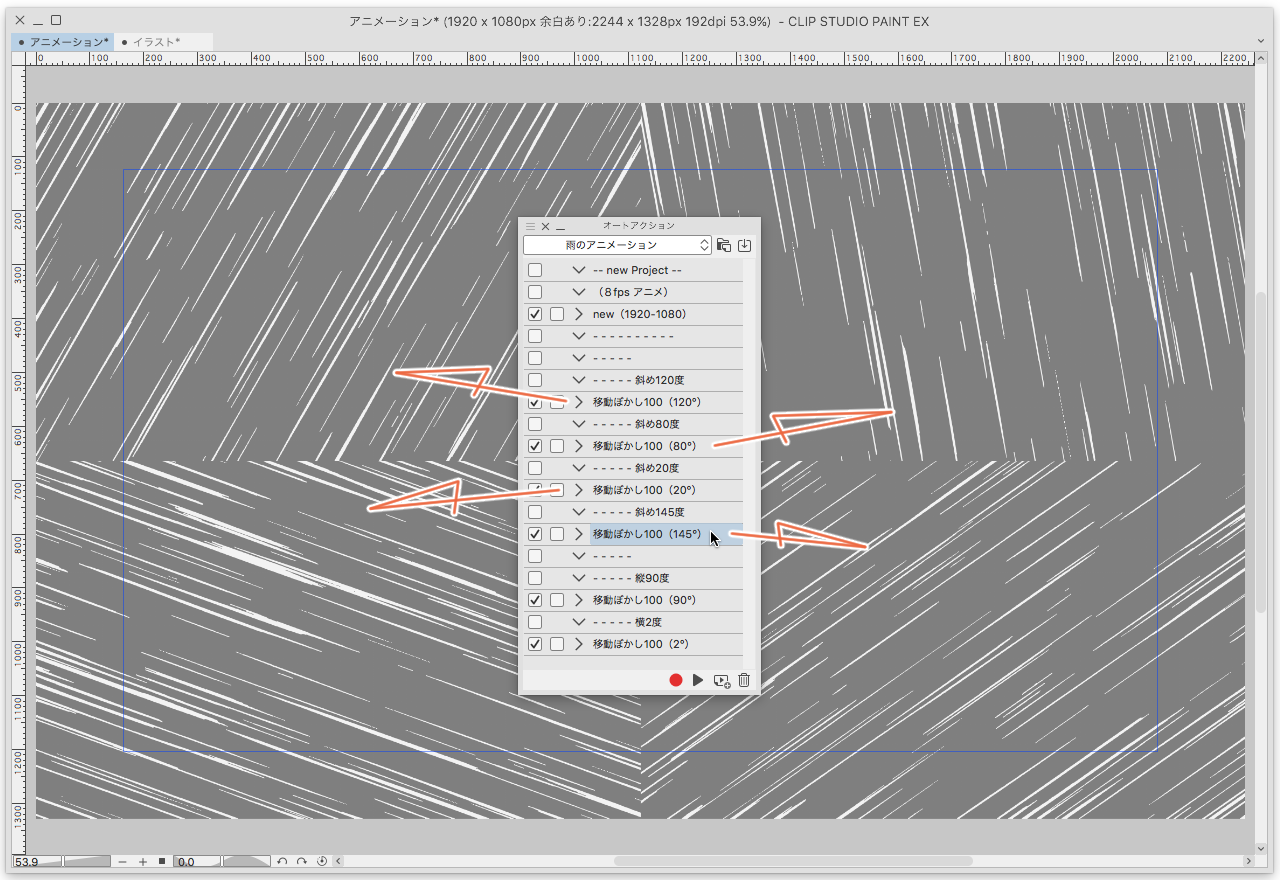
> Movable blur 100 (120 °)
Creates a rain tilted at 20 degrees from the vertical (90 °) to the right
> Movable blur 100 (80 °)
Creates a vertical (90 °), 10-degree left-leaning rain
> Movable blur 100 (20 °)
Creates a sidewise rain from the left
> Movable blur 100 (145 °)
Creates a sidewise rain from the right
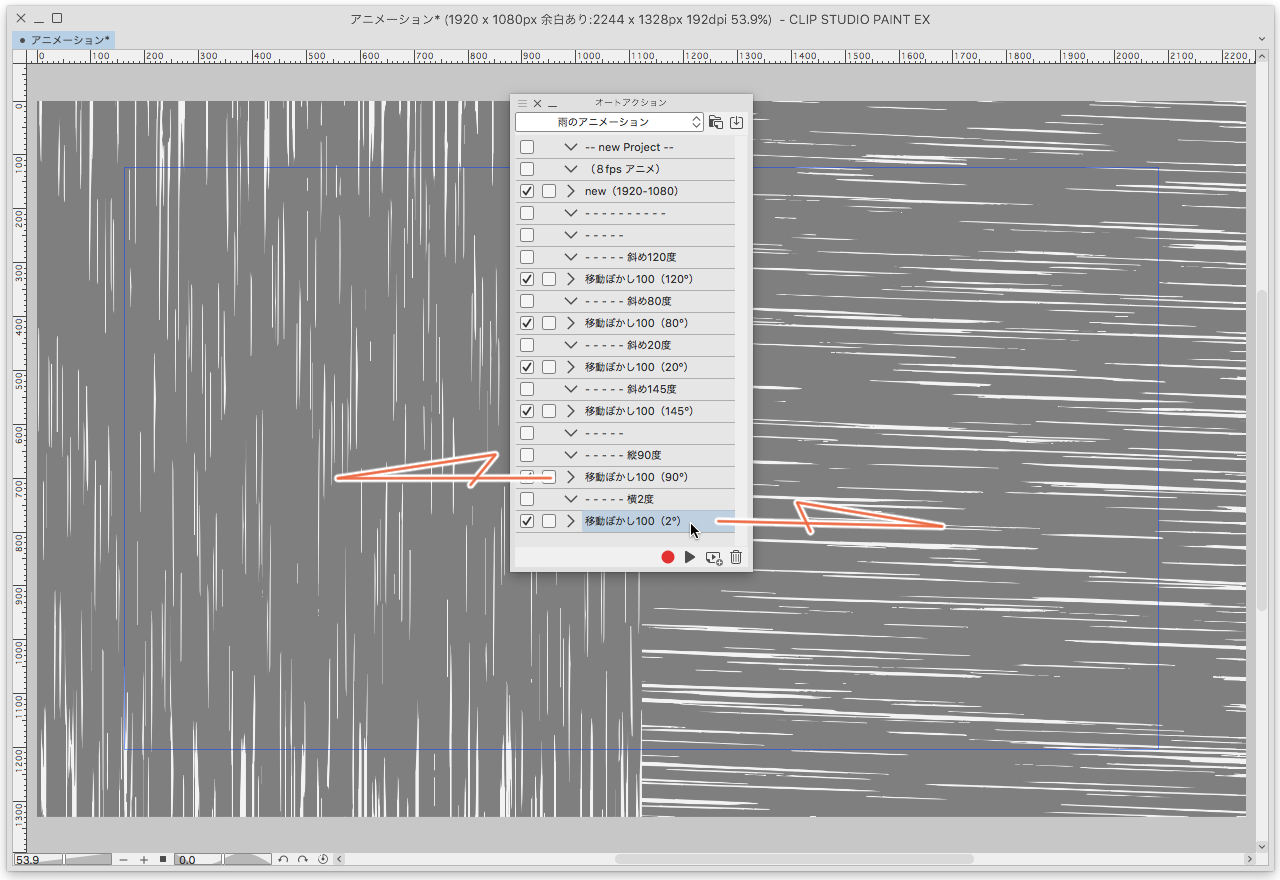
> Movable blur 100 (90 °)
It's vertical rain.
> Movable blur 100 (2 °)
It is rain blowing from the left almost to the side.


※
auto action Create a canvas
Is created without the need to worry about time
But
The Rain auto action takes time.
I think "movable blur" is probably the cause.
The auto action takes approximately 30 to 2 minutes.
It may be faster depending on CPU performance.
Maybe it's late.
Let's wait
"Notes when you are creating your own canvas."
Be sure to take the margins of the canvas.
I think that it is not anxious if there is more than 100px.
It makes the rain denser around the canvas.
This is due to the CLIP STUDIO ' movable blur ' specification.
If the playback time is longer than three seconds
You only have to repeat the number of rainy cells from one to twenty-four times.
(Playing auto action and adding animation cels is totally useless.)
And this has nothing to do with canvas,
The rain is perlin noise scale is repeated in 1280px for five
Then I cut the 1280px in the center and made it into a tile after making it in 2560px.
I thought it would be quicker to move the tiles randomly in the key frame.
Anyway,
Let's Tatazuma a lot of things into the rain and play.


雨のアニメーションを作成するためのオートアクションです
完成したアニメーション オートアクション「移動ぼかし(120°)」
(1920 × 1080px で作成したアニメを 576 × 324px に縮小してます)
まず、オートアクション「new(1920-1080)」を再生します
オートアクション(new 1920-1080)を再生すると
「基準サイズ」 幅1920px 高さ1080px 解像度192
「余白」 上124px 下124px 左162px 右162px
「フレームレート」 8
「再生時間」 3秒
この設定でアニメーションのキャンバスが作成されます
続けて、このキャンバスの「作品情報」をOFFに、「用紙」の色をグレーに、アニメーションフォルダーに白に近いグレーのレイヤーカラーを設定しています
あとは6つ雨の角度から一つを選んでオートアクションを再生するだけです
(注意!・再生時間は30秒から2分くらいかかります)
添付では(移動ぼかし100(120°)」を再生しています
100というのは「移動ぼかし」の「ぼかす距離」が(100)ということです
(120°)というのは「移動ぼかし」の「ぼかす角度」が(120)ということです
「ぼかす距離」はすべて(100)なので、その後ろの数値だけ確認してください
オートアクションの始まりは「フォルダーを作成してレイヤーを挿入」で始まります
アニメーションセルはレイヤーフォルダーに入ってない状態で選択しておいてください
(※ レイヤーフォルダーに収められている場合はうまくいかないかもしれません)
これで出来上がりです
他のオートアクションの雨の角度を試す場合は
かならず新規にアニメーションのキャンバスを作成してください
アニメーションフォルダーを閉じて
アニメーションフォルダーの下に背景を配置します
添付ではアニメーションフォルダーを選択して不透明度を下げています
アニメーションフォルダーの不透明度を変更して良い感じにできます
そのままでは白色なので雰囲気はありません
アニメーションフォルダーにレイヤーカラーを設定しています
雨自体は黒色なのですがレイヤーカラーで白色に設定しています
オートアクションの説明
> new(1920-1080)
8fps 3秒のアニメーションのキャンバスを作成します
キャンバスはこのサイズにこだわる必要はありません
自由なサイズで作成して構いません
雨のサイズは変わりないので大きなキャンバスでは細かな雨になってしまいます
小さなキャンバスでは大雑把な雨が降ることになります
アニメーションフォルダーの中に「1」というレイヤー名のアニメーションセルを1枚だけ作成してください
作成したアニメーションセルを選んだ状態でタイムラインに入力された状態にしておきます
タイムラインは24フレーム必要です
オートアクションは24フレーム分の雨を作成します
> 移動ぼかし100(120°)
垂直(90°)から右に20度傾いた雨を作成します
> 移動ぼかし100(80°)
垂直(90°)から左に10度傾いた雨を作成します
> 移動ぼかし100(20°)
左から横殴りの雨を作成します
> 移動ぼかし100(145°)
右から横殴りの雨を作成します
> 移動ぼかし100(90°)
垂直の雨です
> 移動ぼかし100(2°)
左からほぼ真横に吹き付ける雨です
※
キャンバスを作成するオートアクションは
時間を気にする必要もなく作成されます
しかし
雨のオートアクションは時間がかかります
たぶん「移動ぼかし」が原因だと思うのですが
オートアクションにかかる時間はだいたい30秒から2分くらいです
CPUの性能によってはもっと速いかもしれませんし
もしかすると遅いかもしれません
ひたすら待ちましょう
「ご自身でキャンバスを作成される場合の注意事項です」
キャンバスの余白は必ずとってください
100px以上あれば気にならないと思うのですが
キャンバスの周囲で雨が濃くなります
これはクリスタの「移動ぼかし」の仕様によるものです
再生時間を3秒よりも長くする場合は
雨のセルの番号を1から24までを何度も繰り返せば良いだけです
(オートアクションを再生してアニメーションセルを追加するのは全くの無駄です)
あと、これはキャンバスとは関係ないのですが
雨はパーリンノイズのスケールが5のために1280pxで繰り返されています
それならいっそ2560pxで作成した後に中央の1280pxを切り取ってタイルにしてしまって
タイルをキーフレームでランダムに移動させたほうが手っ取り早いとは思いました
ともあれ、
いろんなモノを雨の中にたたずませて遊んでください


Other materials by けも


Popular “Auto Action” materials


New materials


Badges
-
 MVP ◆This user has contributed greatly to the management of the community, by posting many great responses to the questions asked. Once every three months, MVPs are determined based on the points earned during that period and will be recognized accordingly.
 -
 New Valuable Player (NVP) ◆These are the next-best contributors to the community after MVPs. This is awarded to users who have not yet won an MVP award, based on the number of points they have earned.
 -
 Official Expert ◆Chosen out of all MVP awardees, who are already proof of excellence, this is a testimony of outstanding correspondence in the community. After careful screening, they are appointed by CELSYS and assume their position.Note: Formally called “Evangelists”
 -
 Official Moderator of CELSYS ◆Moderators are official CELSYS staff members who are fluent in Japanese as well as various other languages. Moderators are not experts on the software or illustration, so they are not able to directly answer your questions. However, moderators provide communication and language support to ensure that everyone can smoothly communicate with each other.
 -
 CELSYS official accountThe Official Administrator Account