
by
 ◆
◆
◆
This is a auto action to create a checkered pattern using perlin noise パーリンノイズを使った市松模様を作成するオートアクションです
Create a checkered image material layer with auto action

Because tiling is not checked in auto action
Only there it will be manual work
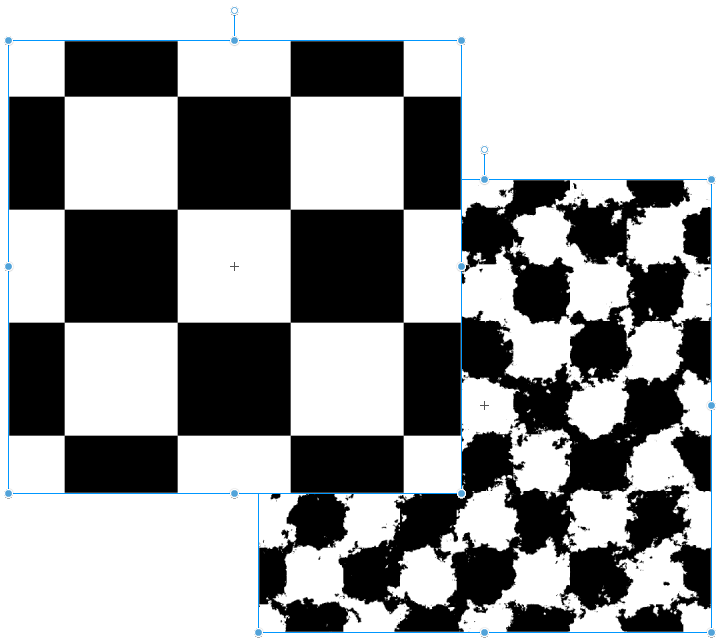
This is auto action to create something like this

After this, check the tiling.
At first
Import "checkered pattern with perlin noise" from the material palette into the auto action.
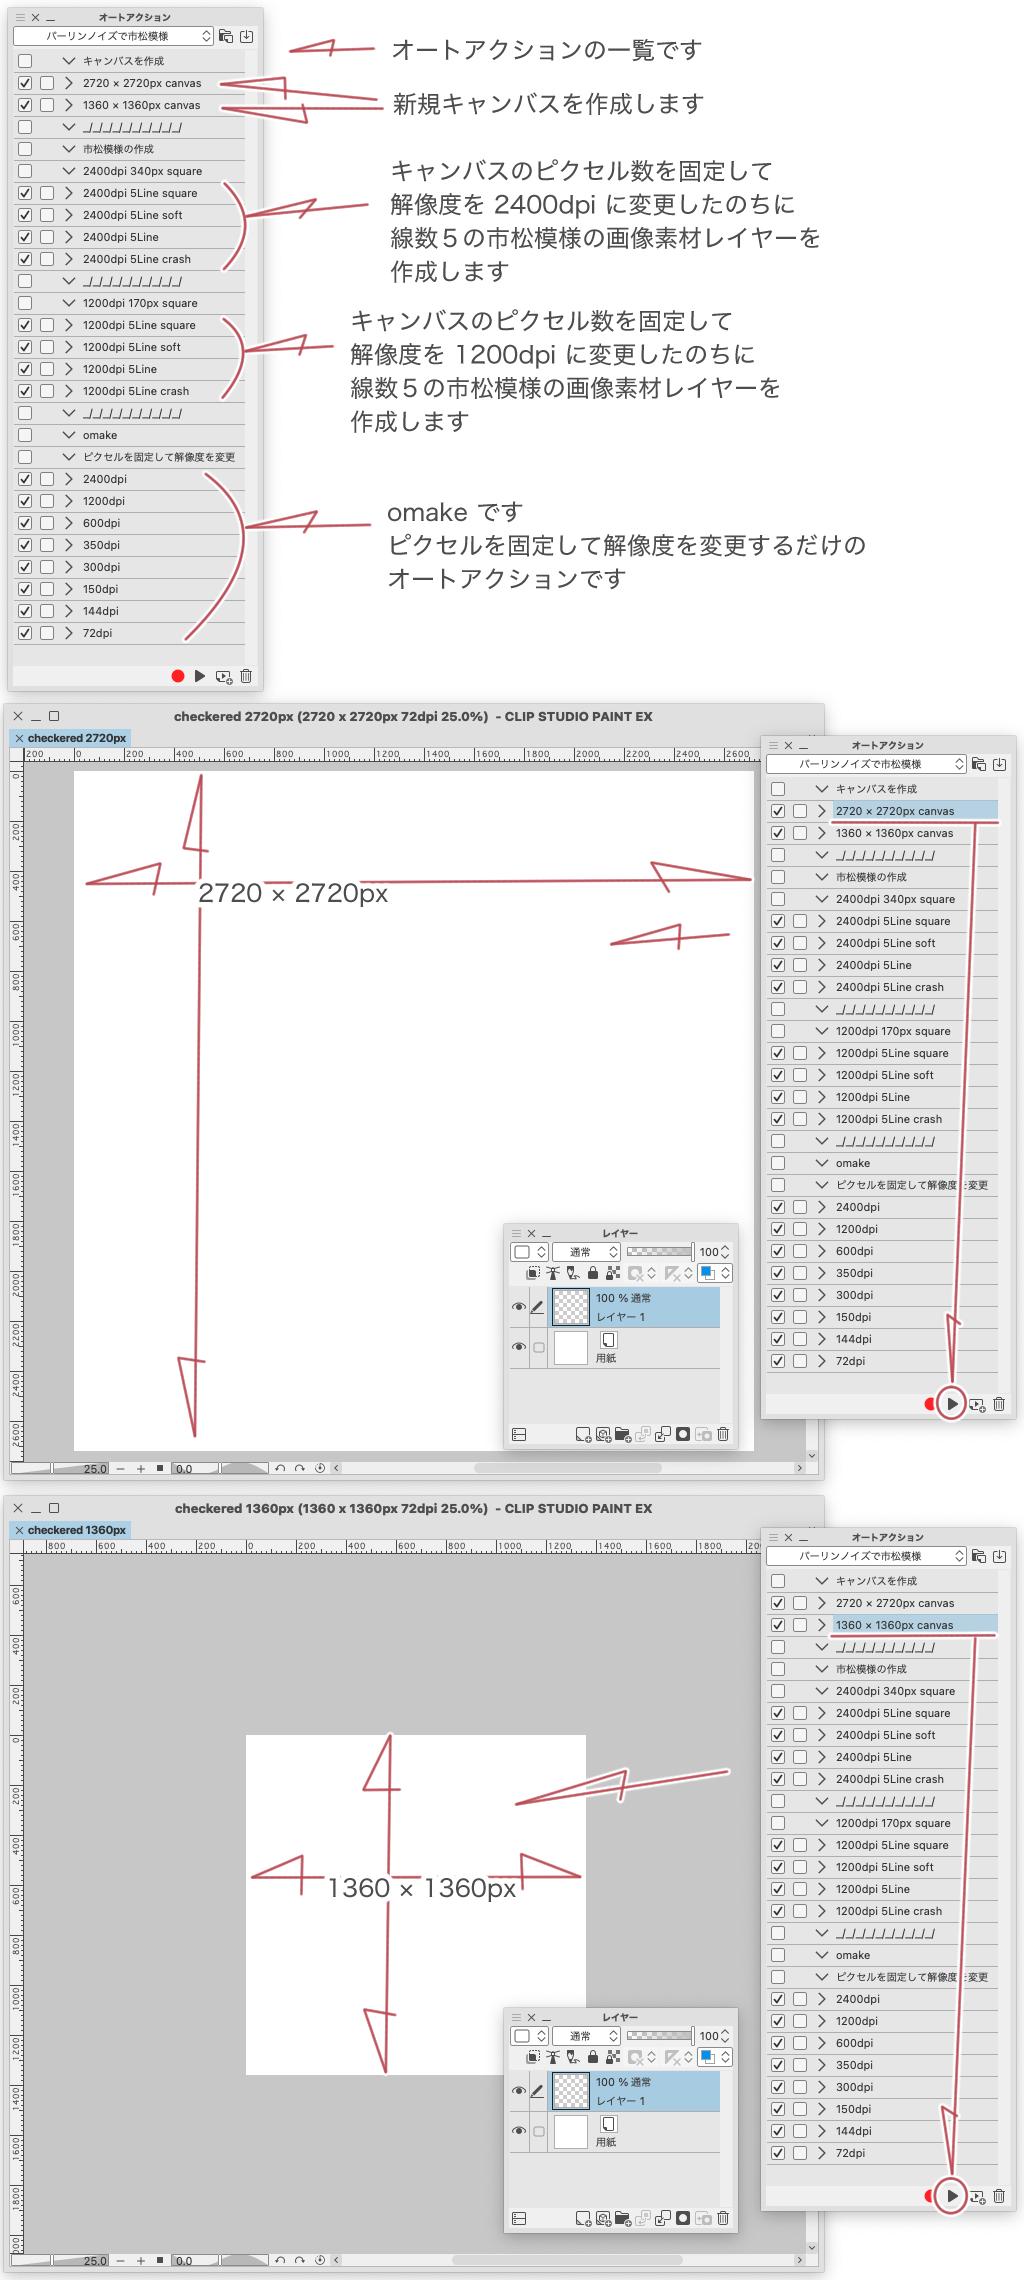
a list of auto action appears
auto action (2720 × 2720px canvas) and (1360 × 1360px canvas)
Create a new canvas of that size
I can play this auto action on canvases of any size.
The purpose is to til, so this size is convenient.
also this auto action is forced to change the resolution to 1200dpi or 2400dpi
I think it's better to create a new canvas of the size you need

"omake" is a bonus
It is a auto action to change the resolution by fix pixel
Change the resolution while maintaining the checkered size.
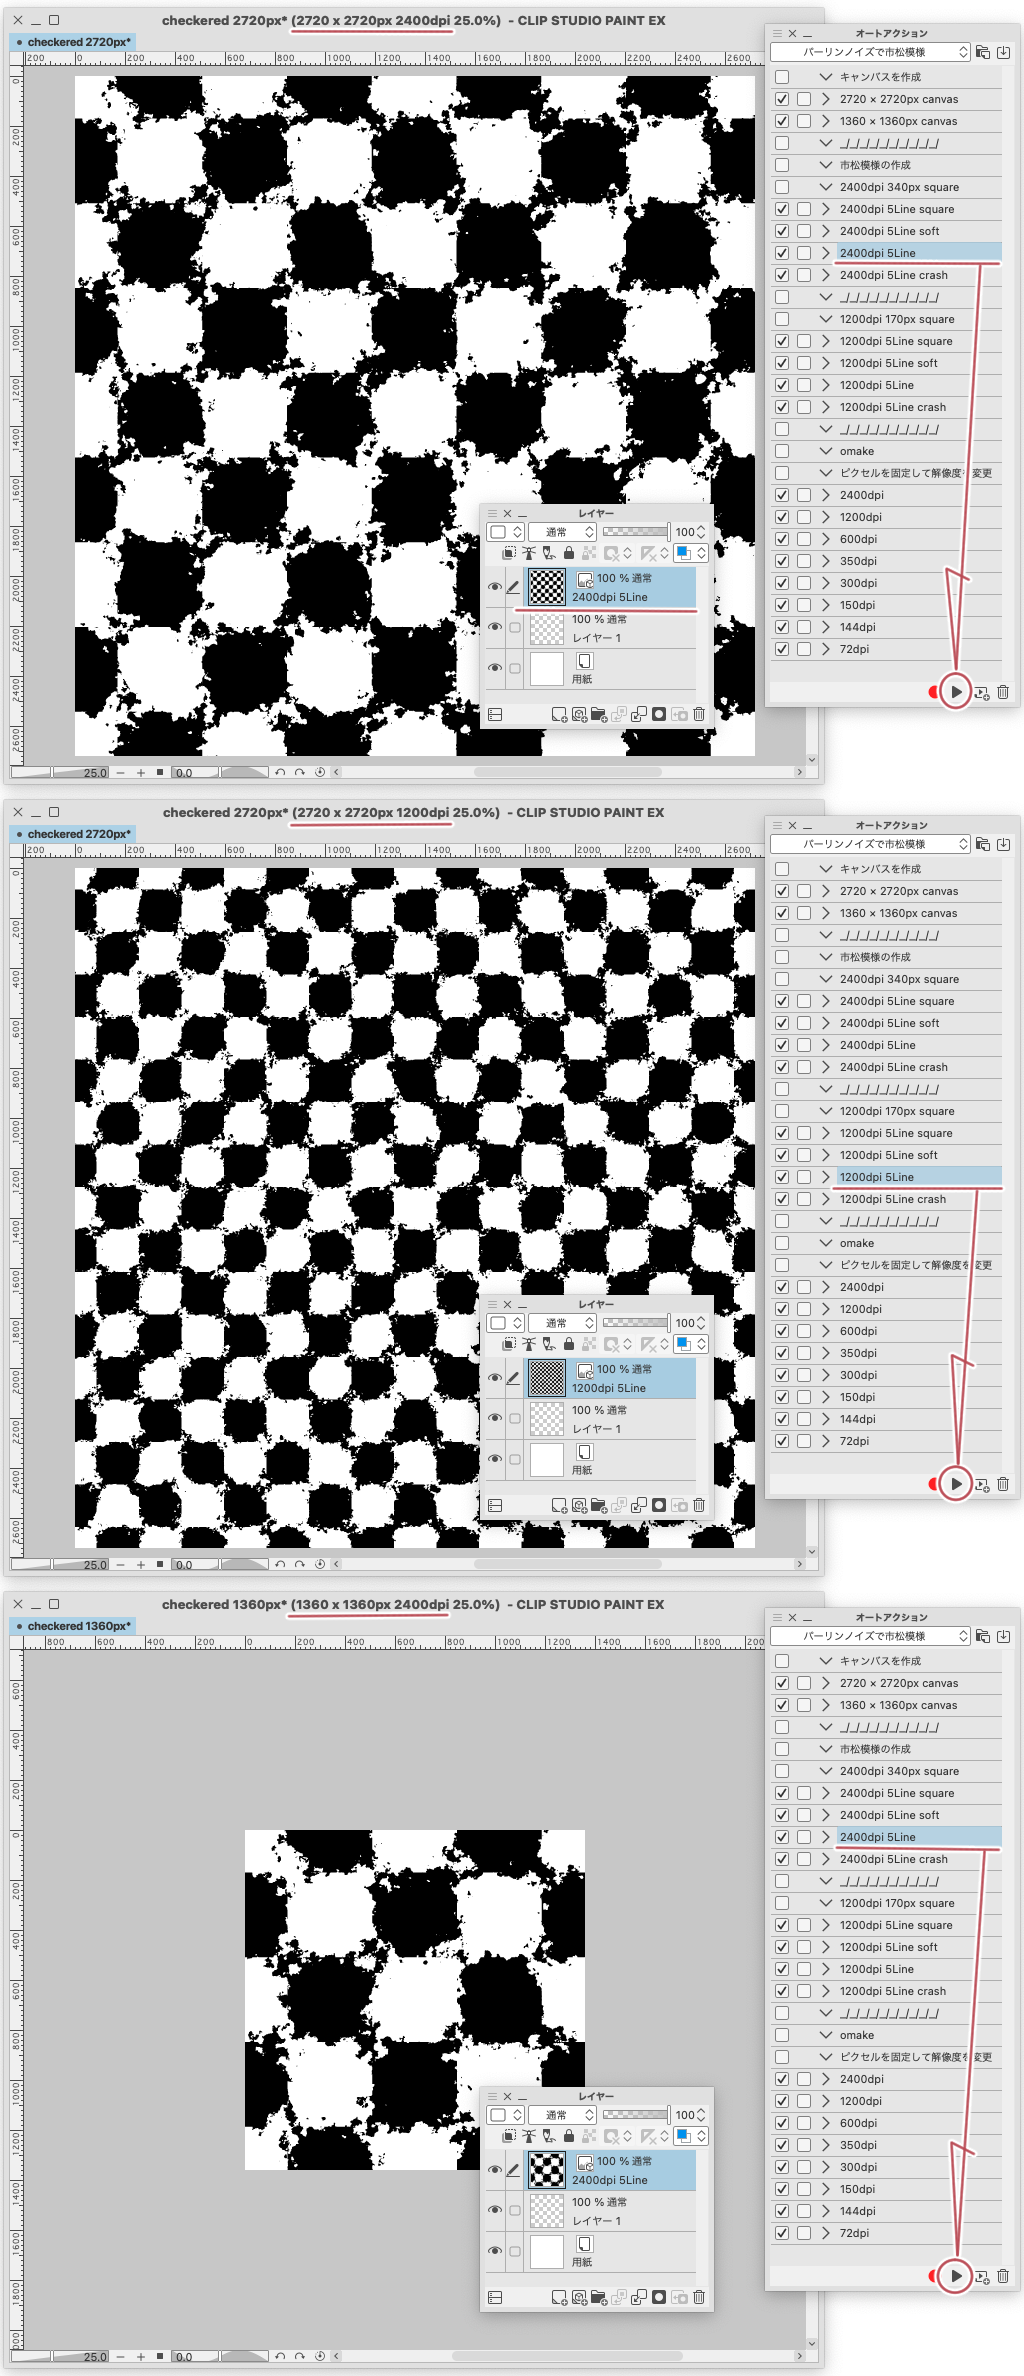
The auto action of "2400dpi 340px square" and "1200dpi 170px square"
From "2400dpi 340px square" or "1200dpi 170px square"
Select (play) an appropriate auto action
at this time the resolution is changed to 2400 dpi or 1200 dpi without permission
auto action command (fix pixel and change resolution)
When the auto action is complete, a checkered image material layer is created
After that, please check the tiling of this image material layer
The result is a seamless-like material.

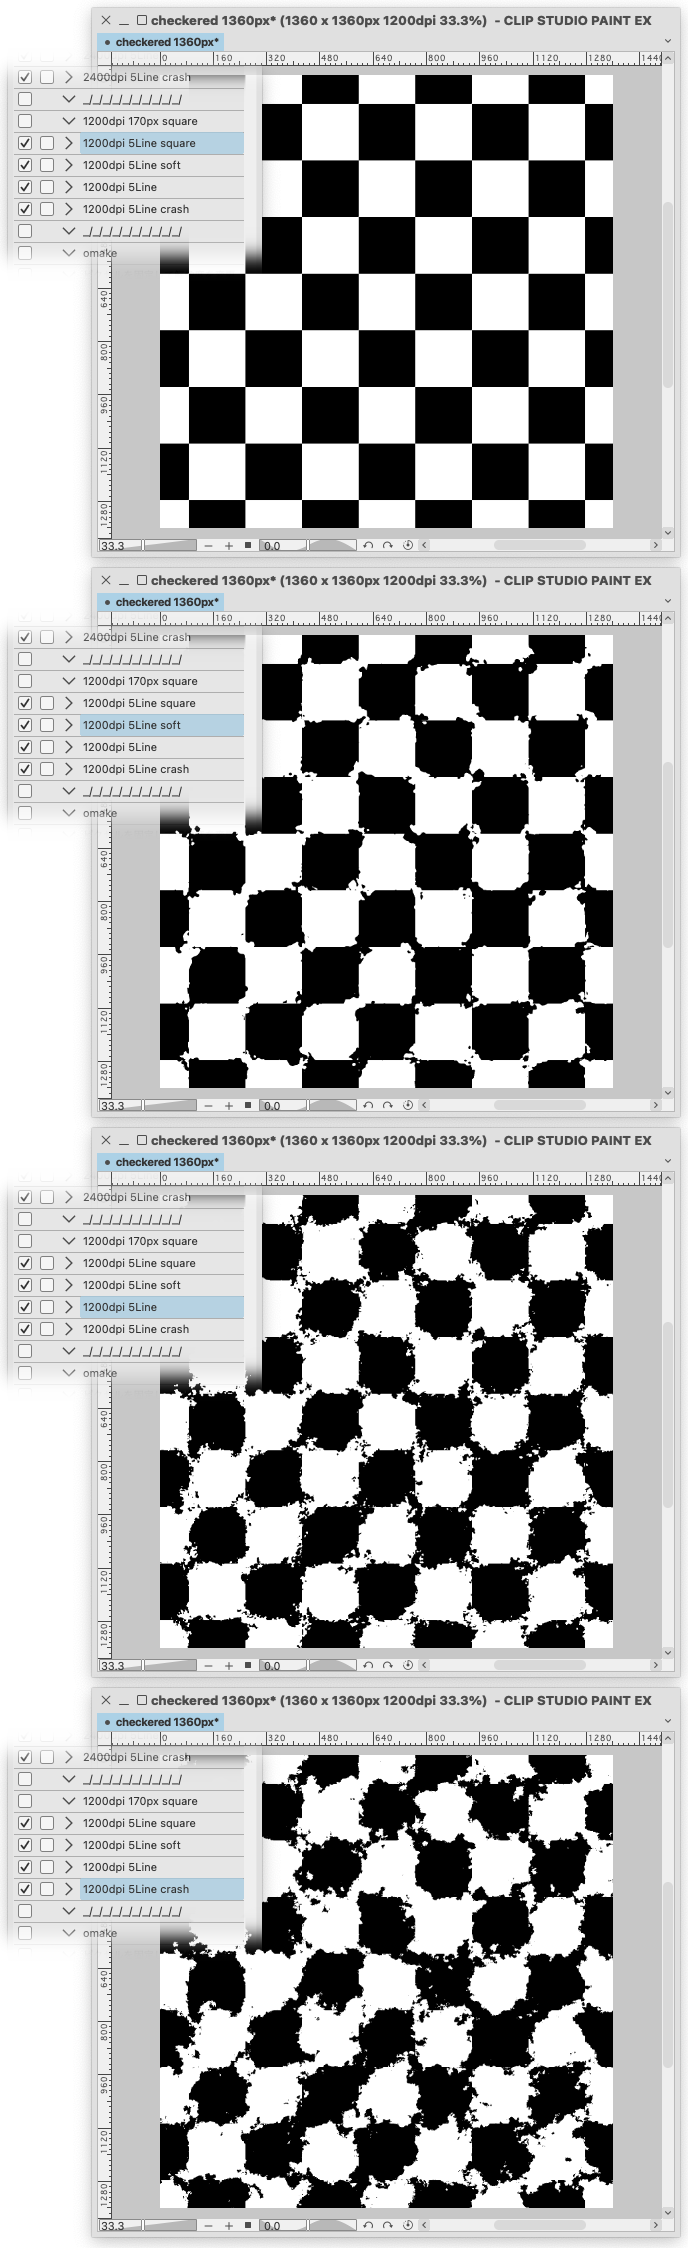
Here is a sample of the name (square) to (crash) given to the auto action
I tried it at 1360 × 1360px 1200dpi

You can freely create it by manipulating the perlin noise of the material title.
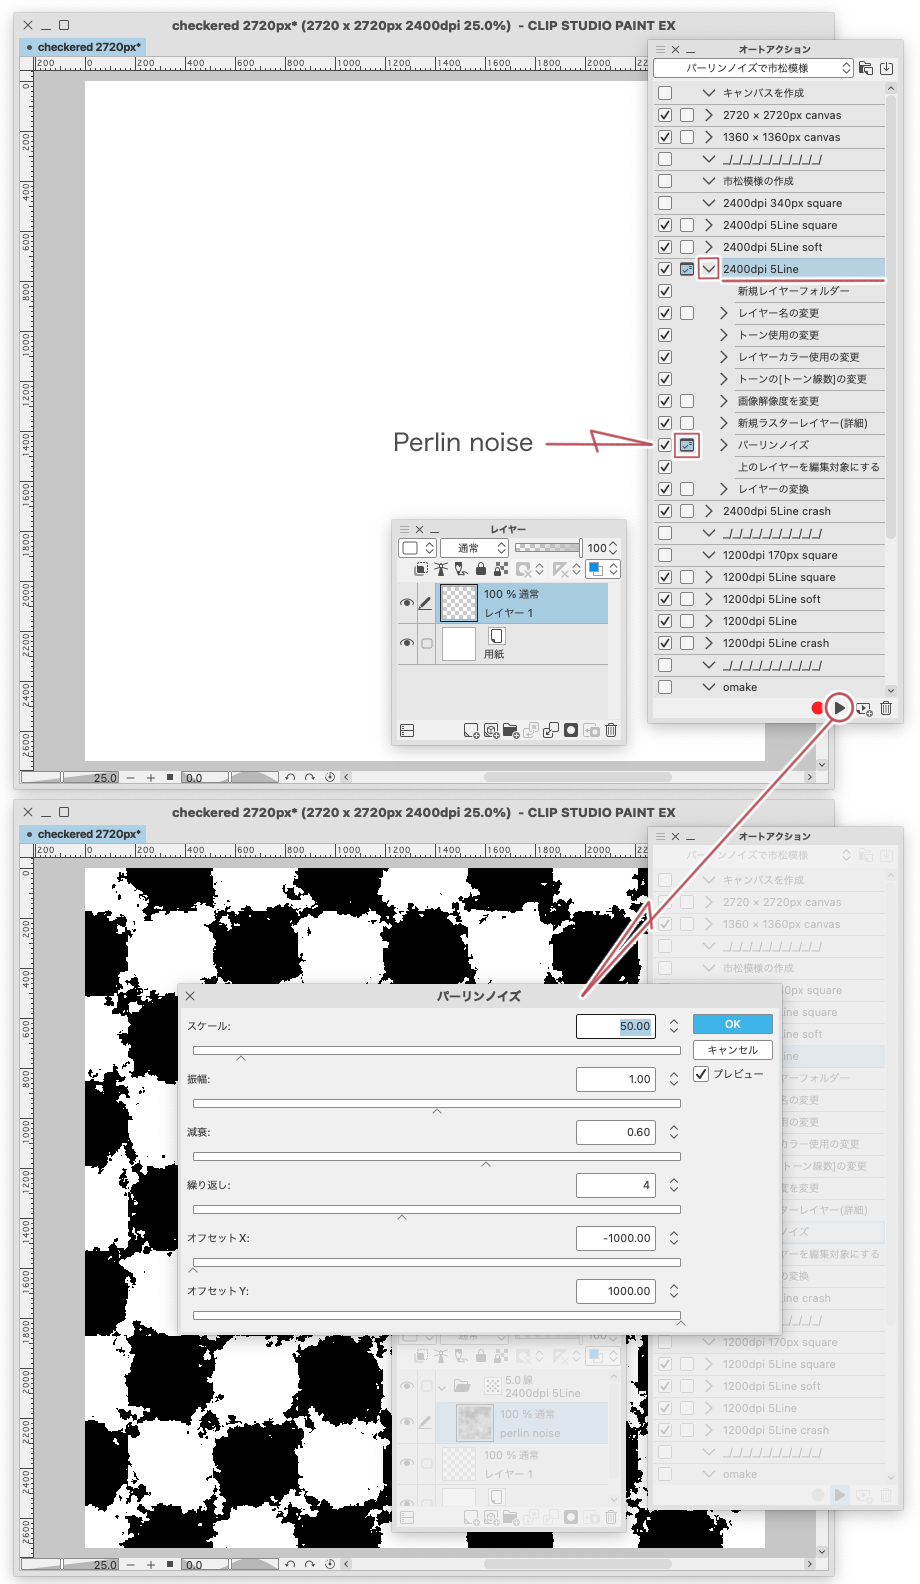
Open the auto action to display the commands
Find (perlin noise) from the command and turn on (setting switching check)
You can manipulate perlin noise settings when playing auto action
If you cancel it, it will be a pure white layer, so it may be better to (OK) even if you think you have failed.

The rest
By unchecking the last (convert layer) of the command
can be in the state it is in just before it is converted to image material layer
There is a perlin noise raster layer in the tone effects folder

You can change the settings of the "layer property palette" of the folder in this state.
I think you can understand how it works if you (change the resolution) in the state of (fix pixel) with "change image resolution"
Messing with the resolution may be a little tricky
It's a play
Play with it
オートアクションで市松模様の画像素材レイヤーを作成します
オートアクションではタイリングにチェックが入れられないために
そこだけは手作業になってしまいます
こんなものを作成するオートアクションです
このあとにタイリングにチェックをいれます
はじめに
素材パレットなどから「パーリンノイズで市松模様」をオートアクションに読み込みます
オートアクションの一覧が表示されます
オートアクションの(2720 × 2720px canvas)と(1360 × 1360px canvas)は
そのサイズの新規キャンバスを作成します
どんなサイズのキャンバスでもこのオートアクションは再生できるのですが
タイリングさせるのが目的なので、このサイズが都合が良いのです
あと、このオートアクションは強制的に解像度が 1200dpi または 2400dpi に変更されてしまいます
新規に必要なサイズのキャンバスを作成するのが良いと思います
「omake」はオマケです
(ピクセル数を固定して解像度を変更)するオートアクションです
市松模様のサイズを保ったまま解像度を変更をします
「2400dpi 340px square」と「1200dpi 170px square」のオートアクション
「2400dpi 340px square」または「1200dpi 170px square」の中から
適当にオートアクションを選んで(再生)します
この時に勝手に解像度が 2400dpi または 1200dpi に変更されてしまいます
オートアクションのコマンドで(ピクセル数を固定して、解像度を変更)しています
オートアクションが完了すると市松模様の画像素材レイヤーが作成されています
あとはこの画像素材レイヤーのタイリングにチェックを入れてください
シームレス風な素材の完成です
オートアクションに付けられている名前の(square)から(crash)のサンプルです
1360 × 1360px 1200dpi で試したものです
素材タイトルのパーリンノイズを操作することで自由に作成することができます
オートアクションを開いてコマンドを表示させます
コマンドの中から(パーリンノイズ)を見つけての(設定切り替えチェック)をオンにすることで
オートアクションの再生時にパーリンノイズ設定の操作ができます
(キャンセル)してしまうと真っ白なレイヤーになってしまうので、失敗したと思っても(OK)するのが良いかもです
あと
コマンドの最後の(レイヤーの変換)のチェックを外すことで
画像素材レイヤーに変換される直前の状態にすることができます
トーン効果のフォルダーの中にパーリンノイズのラスターレイヤーが入っています
この状態でフォルダーの「レイヤープロパティパレット」の設定を変更したり
「画像解像度を変更」で(ピクセル数を固定)した状態で(解像度を変更)したりするとどんな仕組みなのかわかるかなと思います
解像度をいじるのはちょっと注意が必要かもです
おあそびです
あそんでください


Other materials by けも


Popular “Auto Action” materials


New materials


Badges
-
 MVP ◆This user has contributed greatly to the management of the community, by posting many great responses to the questions asked. Once every three months, MVPs are determined based on the points earned during that period and will be recognized accordingly.
 -
 New Valuable Player (NVP) ◆These are the next-best contributors to the community after MVPs. This is awarded to users who have not yet won an MVP award, based on the number of points they have earned.
 -
 Official Expert ◆Chosen out of all MVP awardees, who are already proof of excellence, this is a testimony of outstanding correspondence in the community. After careful screening, they are appointed by CELSYS and assume their position.Note: Formally called “Evangelists”
 -
 Official Moderator of CELSYS ◆Moderators are official CELSYS staff members who are fluent in Japanese as well as various other languages. Moderators are not experts on the software or illustration, so they are not able to directly answer your questions. However, moderators provide communication and language support to ensure that everyone can smoothly communicate with each other.
 -
 CELSYS official accountThe Official Administrator Account