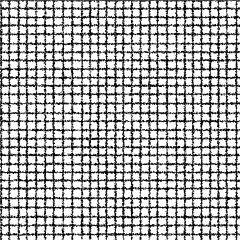
It is a layer material that the Gray painted part becomes a monochrome flow line .
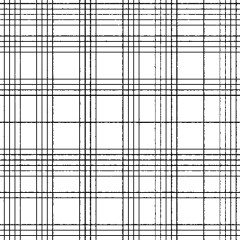
You can also make it cross-line by layering two lines!
You can use it for the shadow of the wall and the ground, the texture expression, and the flow line of the gray material!
This material collection is "Shadow line painted in Gray (gradation line)".
There is also a separate material collection "Shadow Line (for your own use)" (CONTENT ID: 2005428) .
■ Material Collection Contents
Three points The shadow line layer material in gray
replace alpha Airbrush 2 points
auto action
■ Sample
An example of applying a gray image material to a vertical layer in a layer material. In this way, the gray portion is the flow line. (Hatching random tonal correction because the color flew so intense. )
I painted a shadow line for the line drawing material. "Hatching random" layer material is used.
(※ Dirty Draw Add)
The line is thin ahead. The right figure cuts the effect of line drawing.
■ Usage
The composition of the layer material is like this.
The left figure is the state of the canvas. Because of the effect, the line is visible, so we can see the line in the Swatch layer. When you change the opacity of a swatch layer, you can see the line width when you paint at that concentration.
Hide the swatch layer before you apply it.
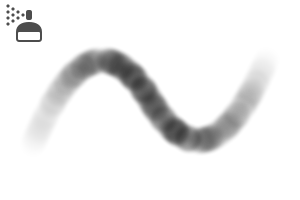
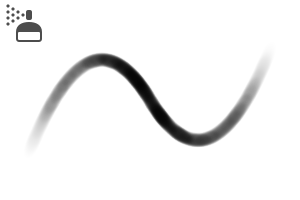
If you draw a layer with a gray airbrush on the "paint here," it will line up that part. The line width changes depending on the concentration.
If you want to set the gray material, put it in the position of the layer.
* If you put the gray change folder in a different folder and the layer below is not visible in white, please change the combine mode of the folder to "normal → pass".
The attached airbrush is set to replace alpha.
This setting is not darker than the value of the specified opacity .
To help you adjust the line. (The fill sample is "Hatching random".) )
※ Replace alpha Tilt is set to change the thickness of the brush cursor by the tilt function of the Pen tab. (It is not available on tablets that do not have a tilt function.) )
If you set the pen perpendicular to the tablet, the brush cursor is thicker and narrower.
※ The settings of pen pressure of the brush "brush density" contains "random". Because a sense of material is easy to appear when I paint it with Betas, I put it so that irregularity goes out intentionally. Turn it off if you don't need it.
There are two auto action inside. (Middle is only explanatory characters)
When I draw the canvas after painting, the line flies as shown in the left figure. This is the same phenomenon as the noise tone. The state shown in the 100% display is the state which goes out to print.
However, because it is still hard to see, please execute the auto action ' line drawing folder '.
* Please make sure to select the Material folder and play the action.
If you want to increase the drawing effect layer, duplicate the "line drawing effect layer + sample layer + fill layer" together.
The direction of the line of the drawing effect layer can be deformed according to the Perth.
how to transform the drawing effect layer
Free transform the tiling frame (using object tool)
○ Mask → Out of range (with selection unlocked) free transform
○ rasterize → Delete out of range → free transform
○ rasterize → Delete out of range → mesh transformation
There are four patterns.
Transform it in a way that's easy for you to do. It is easy to deform because the whole line is seen when show layer the sample.
※ Please note that the balance of the line becomes bad when the gap of line is too open or too narrow by the deformation.
You can also partially deform the lines.
rasterize the effect line layer → free transform the part
This is an example of the case where free transform and mesh transformation are deformed with a lattice frame of 2x2.
"Mesh transformation" does not take the compression of Perth, unlike "free transform".
However, the line may be distorted and should be used carefully.
グレーで塗った部分がモノクロ流線になるレイヤー素材です。
2つの線を重ねることでクロス線にすることもできます!
壁や地面の影、質感表現や、グレー素材の流線化にご利用いただけます!
この素材集は『グレーで塗る影線(グラデ線)』です。
別素材集で『グレーで塗る影線(自作用)』 (コンテンツID:2005428)もあります。
■素材集内容
グレーで塗る影線レイヤー素材 3点
透明度置換エアブラシ 2点
オートアクション
■作例
グレー画像素材をレイヤー素材内の縦線レイヤーに適用した例です。このように、グレー部分が流線化します。(クロスハッチング・ランダムは色飛びが激しかったので色調補正してます。)
線画素材に影線を塗りました。『クロスハッチング・ランダム』レイヤー素材を使用。
(※汚しは描き足し)
線は先が細くカスレます。右図は線画化効果をカットしたものです。
■使い方
レイヤー素材の構成はこのようになっています。
左図はキャンバスの状態です。これは効果で線が見えないため、見本レイヤーで線が見えるようにしています。見本レイヤーの不透明度を変更すると、その濃度で塗ったときの線の太さを確認できます。
塗る前に見本レイヤーを非表示にしてください。
『ここに塗る』レイヤーにグレーのエアブラシで描画すると、その部分が線化します。濃度によって線の太さが変化します。
グレー素材をセットする場合は『ここに塗る』レイヤーの位置に置いてください。
※『グレー変化フォルダ』を別のフォルダに入れて、下のレイヤーが白で見えなくなった場合は、そのフォルダの合成モードを「通常→通過」に変更してください。
添付のエアブラシは『透明度置換』設定になっています。
これは指定の不透明度の値より濃く塗れないという設定になります。
線の調整にお役立てください。(塗り見本は『クロスハッチング・ランダム』です。)
※透明度置換傾けはペンタブの傾け機能を利用してブラシカーソルの太さが変わるように設定しています。(傾け機能がついていないタブレットではご利用になれません。)
タブレットに対しペンを垂直に立てるとブラシカーソルが太く、傾けると細くなります。
※ブラシの「ブラシ濃度」の筆圧設定に「ランダム」が入っています。これはベタッと塗ると素材感が出やすいので、あえてムラが出るように入れています。不要でしたらオフにしてください。
オートアクションの中身はこの2つです。(真ん中は説明文字のみ)
塗った後にキャンバスを引いて見ると、左図のように線が変に飛びます。これはノイズトーンと同様の現象です。100%表示で見た状態が印刷に出る状態です。
しかしやはり見づらいので、オートアクションの『線画化フォルダを結合』を実行してください。
※必ず当素材フォルダを選択してからアクションを再生してください。
線画化効果レイヤーを増やしたい場合は『線画化効果レイヤー+見本レイヤー+塗りレイヤー』までをまとめて複製してください。
線画化効果レイヤーの線の向きをパースに合わせて変形してご利用いただけます。
変形方法は線画効果レイヤーを
◯(オブジェクトツール使用)タイリング枠を自由変形
◯必要範囲外をマスク→(選択範囲を解除した状態で)自由変形
◯ラスタライズ→必要範囲外を削除→自由変形
◯ラスタライズ→必要範囲外を削除→メッシュ変形
の4パターンあります。
ご自分のやりやすい方法で変形してください。見本レイヤーを表示させると全体の線が見えるので変形しやすいです。
※変形で線の間隔が開きすぎたり狭すぎたりすると、線のバランスが悪くなったりしますのでご注意ください。
部分的に線を変形することもできます。
効果線レイヤーをラスタライズ→該当部分を自由変形→(変形で空いた穴を白で埋める)
「自由変形」と「メッシュ変形」を格子枠2x2で変形をかけた場合の例です。
「メッシュ変形」は「自由変形」と違ってパースの圧縮がかかりません。
ただし線に歪みが出ることもありますので、ご利用の際は慎重に使い分けてください。


 MVP ◆This user has contributed greatly to the management of the community, by posting many great responses to the questions asked. Once every three months, MVPs are determined based on the points earned during that period and will be recognized accordingly.
 New Valuable Player (NVP) ◆These are the next-best contributors to the community after MVPs. This is awarded to users who have not yet won an MVP award, based on the number of points they have earned.
 Official Expert ◆Chosen out of all MVP awardees, who are already proof of excellence, this is a testimony of outstanding correspondence in the community. After careful screening, they are appointed by CELSYS and assume their position.Note: Formally called “Evangelists”
 Official Moderator of CELSYS ◆Moderators are official CELSYS staff members who are fluent in Japanese as well as various other languages. Moderators are not experts on the software or illustration, so they are not able to directly answer your questions. However, moderators provide communication and language support to ensure that everyone can smoothly communicate with each other.
 CELSYS official accountThe Official Administrator Account