Please check the material details in the regular version (ID: 1863817).
Free sample [Moff B]
It is a little bent to express the flow of hair.
It becomes the hair root on the tip and the bottom.
Basic drawing
It is the state drawn from left to right by the default setting.
Drawing lines are centered.
The direction of the hair can be customize with the 《 tool property 》.
tool property
(1) brush size, particle size
The brush and particle size are connected by the default setting.
If you remove the check, you can adjust the numbers separately.
Top/brush size: 15 particle size: 15 (initial setting)
Medium & brush size: 20 particle size: 10
Bottom & brush size: 10 particle size: 15
★ After you have selected another brush from the brush shape.
The brush size follows the drawing object to the destination.
The particle size remains in the default setting (15).
Please make adjustments at any time.
brush tip
(2) Thickness
You can scale the original to the horizontal vertically.
A: 100 (initial setting) B: horizontal 150 C: Vertical 150
(3) Flip left, flip vertical
You can adjust the hair flow.
You can change it more quickly than spraying effect-orientation 》.
D: No left and right, no vertical (initial setting) e: Flip left, no vertical
F: No left and right, flip vertical g: Flip left, flip vertical
(4) spraying effect
You can adjust the amount of hair.
It is in the indicator display.
The explanatory picture is show slider.
You can switch to "▲ (→)" by clicking on each item in the sub tool detail palette.
Particle density
You can change the density of the hair in the right and left direction.
H: particle density 8 (initial setting) I: particle density 5 j: Particle density 3
spray deviation
The density of the hair can be changed in the range of the brush size.
K: 50 (initial Setting) L: 100 m: 1
direction of particle
You can adjust the hair flow.
You can change the angle more delicately than the flip vertical.
N: 45 (initial setting) o: 0 P: 315
(5) stroke interval
The density of the hair can be changed to the direction of line.
The distance changes more simply than particle density 》.
Draw vector layer and then customize
Object tool, tool property, or sub tool detail.
Change the number of each item.
* Bezier curve to draw to reduce the control point display.
In advance [moff B] register to preset.
After drawing a line in the bezier curve, select [Moff B] from brush shape.
It is recommended vector layer easy to change the correction after ★ drawing .
However, increasing the number of object may stress the drawing .
Because it depends on the operating environment, please try drawing Zaku in the sample first.
Sample (simply draw)
A state in which an arc is drawn from the top left to the bottom by the initial setting.
Sample (after drawing with vector, modified by numerical modification, etc.)
When you display the Drawing center line ↓ like this.
Change the number to long hair ↓
The drawing sample is included as a bonus for the regular version (ID: 1863817).
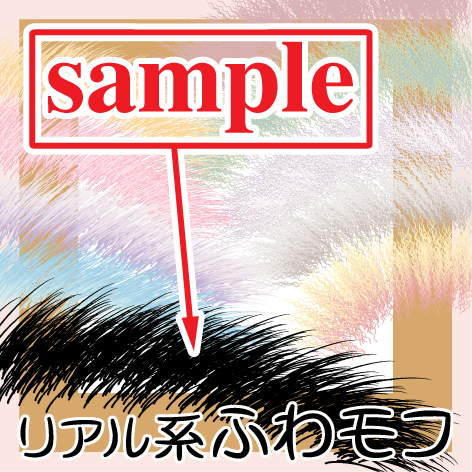
Please enjoy fluffy Mofumofu ☆
素材の詳細は正規版(ID:1863817)でご確認ください。
試供品【モフB】
毛の流れを表現するため少し曲がっています。
上が毛先、下が毛根になります。
基本描画
初期設定で左から右へ描画した状態です。
描画線は中心にあります。
毛の向き等は《ツールプロパティ》でカスタマイズできます。
ツールプロパティ
(1)ブラシサイズ、粒子サイズ
初期設定でブラシと粒子サイズは連動するようになっています。
チェックを外せば別々に数値を調整できます。
上・ブラシサイズ:15 粒子サイズ:15(初期設定)
中・ブラシサイズ:20 粒子サイズ:10
下・ブラシサイズ:10 粒子サイズ:15
★描画後、別のブラシを《ブラシ形状》から選択し直した場合。
ブラシサイズは先の描画オブジェクトに従います。
粒子サイズは初期設定( 15 )のままです。
随時、調整をお願いします。
ブラシ先端
(2)厚さ
原画を水平垂直方向に拡大縮小できます。
a:100(初期設定) b:水平 150 c:垂直 150
(3)左右反転、上下反転
毛の流れを調整できます。
《散布効果→向き》よりも手っ取り早く変更できます。
d:左右なし、上下なし(初期設定) e:左右反転、上下なし
f:左右なし、上下反転 g:左右反転、上下反転
(4)散布効果
毛量を調整できます。
*通常《インジケータ表示》になっています。
説明画は《スライダー表示》です。
《サブツール詳細パレット》で各項目の《▲(→)》をクリックして切り替えできます。
粒子密度
左右方向に毛の密集具合が変更できます。
h:粒子密度 8(初期設定) i:粒子密度 5 j:粒子密度 3
散布偏向
ブラシサイズの範囲内で毛の密集具合が変更できます。
粒子の向き
毛の流れを調整できます。
《左右反転》《上下反転》よりも繊細な角度変更ができます。
(5)ストローク 間隔
線の方向へ毛の密集具合が変更できます。
《粒子密度》よりもシンプルに間隔が変わります。
ベクターレイヤーに描画してからカスタマイズ
オブジェクトツールの《ツールプロパティ》または《サブツール詳細》で
各項目の数値を変更する様子です。
*制御点の表示を少なくするため、描画にベジェ曲線を使いました。
あらかじめ【モフB】を《プリセットに登録》。
ベジェ曲線で線を描いたあとブラシ形状から【モフB】を選択。
★描画後に訂正変更しやすいベクターレイヤーがオススメです。
ただ、オブジェクト数が増えると描画にストレスを感じるかもしれません。
動作環境にもよりますので、まずはサンプルでザクザクお試し描画をしてみてください。
サンプル(単純に描画)
初期設定で左上から右下へ向けて、連続して弧を描いた状態。
サンプル(ベクターで描画後、数値変更等で加工調整)
描画中心線を表示すると↓こんな感じ。
数値変更して長毛に↓
描画サンプルは正規版(ID:1863817)にオマケとして付きます。
ふわふわモフモフをエンジョイしてください☆


 MVP ◆This user has contributed greatly to the management of the community, by posting many great responses to the questions asked. Once every three months, MVPs are determined based on the points earned during that period and will be recognized accordingly.
 New Valuable Player (NVP) ◆These are the next-best contributors to the community after MVPs. This is awarded to users who have not yet won an MVP award, based on the number of points they have earned.
 Official Expert ◆Chosen out of all MVP awardees, who are already proof of excellence, this is a testimony of outstanding correspondence in the community. After careful screening, they are appointed by CELSYS and assume their position.Note: Formally called “Evangelists”
 Official Moderator of CELSYS ◆Moderators are official CELSYS staff members who are fluent in Japanese as well as various other languages. Moderators are not experts on the software or illustration, so they are not able to directly answer your questions. However, moderators provide communication and language support to ensure that everyone can smoothly communicate with each other.
 CELSYS official accountThe Official Administrator Account