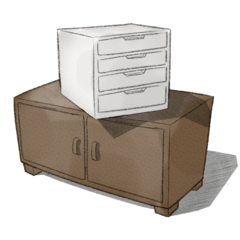

간단한 개체와 그림에 대한 원근 가이드로 구성 가능한 10x10 오픈 체크 박스 3D 모델입니다. A 10x10 open, checkered box 3D model, composable as a perspective guide for simple objects and figures.


- 우발적인 움직임을 방지하기 위해 "빠른 원근 상자 개체" 개체를 선택하지 않도록 설정합니다. 이 작업을 수행 하지 않고 마우스를 선택 하 고 사용 하는 경우 실수로 이동 하 고 카메라를 조정 하는 대신 개체를 회전 수 있습니다.
- 백페이스 컬링을 활성화하여 측면을 숨길 수 있습니다.
- 그림자를 사용하지 않도록 설정하고 "광원 적용" 비활성화
- 윤곽선 비활성화
- 레이어 불투명도 낮추기
- 카메라 "원근" 설정을 늘립니다.
설정이 당신을 귀찮게하지 않는 경우 설정을 변경할 필요가 없습니다.
- 3D 재질을 캔버스에 드래그합니다. 이렇게 하면 기본 설정이 있는 새 3D 레이어가 됩니다.
- [작동] 또는 [오브젝트] 도구를 사용하여 카메라 각도와 위치를 편집합니다. 설정은 [도구 속성] 또는 [하위 도구 세부 사항] 창에 표시됩니다. (위의 권장 설정을 사용하여 도움을 줍니다.
- 마우스 휠을 사용하여 카메라 초점 거리를 늘리거나 줄입니다.
- 너무 밝거나 너무 어두운 경우 레이어 불투명도를 조정할 수 있습니다.
- 원하는 설정이 있으면 레이어를 재료 창으로 드래그하여 레이어로 저장할 수 있습니다. 그런 다음 설정 프로세스를 반복할 필요가 없습니다.


- disable selection of the "Quick Perspective Box Object" object to prevent accidental movement. If you don't do this, and you select and use the mouse, you can easily accidentally move and rotate the object instead of adjusting the camera.
- enable backface culling to hide sides facing away from you.
- disable shadows and disable "apply light source"
- disable outlines
- lower the layer opacity
- increase the camera "Perspective" setting.
If the settings aren't bothering you, there's no need to change the setting.
- Drag the 3D material onto the canvas. This makes a new 3D layer with your default settings.
- Use the [Operation] or [Object] tool to edit the camera angle and position. The settings will be visible in the [Tool Property] or [Sub Tool Detail] window. (Use the recommended settings above to help you out)
- Use the mouse wheel to increase or decrease the camera focal length.
- You can adjust the layer opacity if it's too light or too dark.
- Once you have the settings you want, you can save it as a Layer by dragging the layer into your Materials window as your own material. Then you don't have to repeat the setup process.


물자 Material
-
기본 재질 Default material
할당 Allocate
-
기본 레이아웃 Default layout
각도 Angle
-
새로운 각도 New angle


