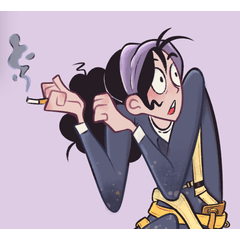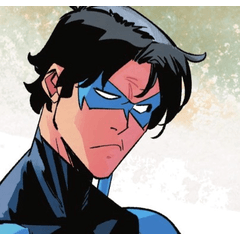

참조 레이어를 사용하여 가장자리를 교차하지 않도록 하는 지우개 병합(팁페이지 참조) Flatting Eraser that uses a reference layer to avoid crossing edges (see page for tips)
CLIP STUDIO PAINT 를 사용하면 참조 레이어를 사용하여 가장자리를 보고 가장자리의 한쪽에만 칠할 수 있습니다. 이것은 기본 기능입니다. 누구나 [참조 레이어의 선을 교차하지 않음]을 활성화하고 몇 가지 기본 설정을 지정하기만 하면 모든 브러시가 이 작업을 수행하도록 할 수 있습니다.

Erase Along Edge 는 가장자리 감지 기능[오버플로 방지] 기능이 있는 지우개로, 모양 선이 모든 곳에서 완전히 닫히지 않은 경우에도 색상을 정리할 수 있습니다!
색상보다 참조 레이어를 사용하여 지우는 것이 더 제어하기 쉽고 더 즐거울 수 있다고 느꼈습니다.

이 지우개는 내 gumroad/ko-fi 상점에서 찾을 수 있는 Tapioca 디지털 페인팅 브러시 세트의 평탄화 도구 중 하나에 포함되어 있습니다.
참조 레이어를 설정하는 것을 잊지 마십시오!

- 선화 레이어를 선택합니다 .
- 등대 버튼을 눌러 참조 레이어로 설정합니다.
- 그런 다음 색상 레이어를 선택하고 지우기 도구를 사용할 수 있습니다. 참조 레이어를 사용하여 가장자리가 어디에 있는지 판단합니다.
브러시 크기 + 십자 커서를 사용하면 가장자리가 확인된 위치를 볼 수 있습니다.


원의 중심이 어디인지 확인하려면 CLIP STUDIO PAINT의 [환경 설정...] 의 커서 >커서 모양에서 커서 유형을 변경할 수 있습니다.
"브러시 크기와 십자가"는 브러시의 반경을 원으로 표시하고 중앙에 작은 십자가를 표시합니다. 이렇게 하면 특히 화면이 없는 태블릿을 사용하는 경우 가장자리가 확인된 위치를 확인하는 데 도움이 됩니다.
----
추가 정보
왜 또는 언제 이런 식으로 지워야합니까?
오버플로 방지 기능이 있는 브러시는 반경 내에 있는 미니 페인트 통 도구처럼 작동합니다.

페인팅에 오버플로 방지를 사용하면 구멍이 많은 색상이 될 수 있습니다. 내부 선이 복잡할수록 이 방법이 문제를 일으킬 수 있습니다.

얼룩을 칠한 다음 바깥쪽 가장자리를 지우면 내부 구멍을 피할 수 있습니다. 모양에 따라 이렇게 지우는 것이 더 쉬울 수 있습니다.

바깥쪽 교차하는 선도 있는 경우 수동으로 지워야 할 수 있습니다. 이것은 바깥 쪽 선을 처리해야하는 경우 사용하기에 가장 좋은 지우개가 아닐 수도 있습니다. 그러나 전체 플랫과 같은 경우, 특히 첫 번째 단계에서는 많은 시간을 절약할 수 있습니다.

이것은 선이 항상 닫혀 있지는 않지만 여전히 빠르고 대략적으로 채우고 싶은 스케치 및 거친 애니메이션에 특히 유용합니다.

올바른 단축키를 사용하면 이 지우개와 다른 지우개 및 평탄화 도구 간에 쉽게 전환하여 다양한 경우에 빠르게 적응할 수 있습니다. 이 지우개는 채색 레이어의 작은 부분을 빠르게 변경, 편집 및 정리 해야 할 때 자주 꺼내는 것입니다.


어떤 경우에는 [둘러싸고 채우기]와 같은 경우에 더 좋고 빠른 채우기/병합 도구가 있습니다. 그러나 때로는 지우개가 필요합니다. 다른 도구가 있다는 것을 알면 그 중 하나가 상황에 적합하지 않은 경우 더 많은 옵션을 얻을 수 있습니다.

CLIP STUDIO PAINT의 가장자리 감지는 앤티앨리어싱되지 않으므로 지워진 가장자리가 매우 들쭉날쭉해질 수 있습니다. 고해상도로 작업하거나 라인이 완전히 불투명한 경우에는 큰 문제가 되지 않습니다. 그러나 100%로만 작업하는 경우 필터>흐림>[스무딩] 또는 약간의 가우시안 블러를 적용하여 거칠기를 제거해야 할 수 있습니다.
---
이 부분에서는 CLIP STUDIO PAINT 가장자리 감지가 어떻게 작동하는지 설명합니다.
가장자리 감지는 어떻게 작동합니까?
대부분의 브러시에서 이 가장자리 감지 기능을 활성화할 수 있습니다. 확인란은 CSP 1.10에서 [참조 레이어의 선을 교차하지 않음]으로 표시되어 있습니다. 이 옵션이 표시되지 않으면 [보조 도구 상세] 창에서 활성화해야 할 수 있습니다.


가장자리 감지는 브러시 반경에 국한된 미니 페인트 통 도구처럼 작동합니다. 중심에서 가장자리를 확인하기 시작하고 가장자리 또는 브러시의 반경이 보이면 멈춘 다음 효과를 제한합니다.

원 의 반경 내에서 가장자리가 완전하지 않으면 브러시의 효과가 가장자리의 반대쪽으로 돌아갑니다 .

때로는 가장자리가 투명하거나 충분히 가벼우면 간격으로 계산됩니다. 이 경우 브러시의 효과는 선이 매우 밝은 틈이 있는 것처럼 가장자리의 다른 쪽을 계속 돌게 됩니다.
이 임계값을 변경하려면 [색 여백]을 조정할 수 있습니다 . 가장자리의 일부로 가장 밝은 선에서도 멈추려면 영(0)으로 설정합니다.

[영역 확대/축소] 는 설정한 픽셀 수만큼 가장자리를 지나 효과를 밀어냅니다. 이것은 색상이 선과 부드러움, 질감 또는 앤티 앨리어싱 아래에 들어갈 수 있도록 유용합니다. 1 또는 2로 충분할 수 있지만 경우에 따라 5 또는 10 이 필요할 수 있습니다.
세 가지 [배율 모드]는 픽셀을 확장하는 방법을 결정하며, 이는 모서리나 텍스처에서 가장 두드러집니다.
- [직사각형]은 모서리에서 상자로 확장됩니다.
- [둥근]은 모퉁이에서 원으로 확장됩니다.
- [가장 어두운 픽셀로]는 최대 영역 배율로 확장을 시도하지만 픽셀이 가장 어둡거나 불투명해진 것을 감지하면 여전히 중지됩니다. 이것은 선이나 가장자리의 부드러움이나 두께가 가변적일 때 유용할 수 있지만 때로는 채우기가 불완전해 보일 수도 있습니다.

가장자리가 잘못 보이면 다른 설정으로 실험해 보십시오.
지원해 주셔서 감사합니다!
내 가게를 방문하여 수백 가지 다른 브러시를 볼 수 있습니다! - @PharanBrush

Clip Studio Paint lets you use a reference layer to see edges and only paint on one side of the edge. This is a basic feature. Anyone can make any brush do this by just enabling [Do not cross lines of reference layer] and setting some basic settings.

Erase Along Edge is an eraser with edge detection [anti-overflow], for cleaning up colors even when the shape lines are not fully closed everywhere!
I felt that it might be both more controllable and more enjoyable to erase using a reference layer than color with it.

This eraser in included among my flatting tools in my Tapioca Digital Painting Brush Set you can find in my gumroad/ko-fi shop.
DON'T FORGET TO SET THE REFERENCE LAYER!

- Select the lineart layer.
- Press the lighthouse button to set it as a reference layer.
- Then you can select your color layer and use the erase tool. It will use the reference layer to judge where the edge is.
The Brush size + Cross Cursor lets you see where the edge is checked.


If you want to see where the center of the circle is, you can change the cursor type in Clip Studio Paint's [Preferences...] under Cursor>Shape of Cursor.
"Brush size and cross" will show the radius of the brush as a circle, and a small cross in the center. This helps you see where the edge is checked especially if you are using a screenless tablet.
----
Extra information
Why or when should I erase this way?
A brush with Anti-overflow works like a mini paint bucket tool that stays inside its radius.

If you use anti-overflow for painting, you can end up with colors that are full of holes. The more complicated the inner lines are, more this method might cause problems.

If you just paint a blob and then erase the outer edges instead, you avoid the inner holes. Depending on the shape, it can be easier to erase like this.

If there are also outer intersecting lines, you may still have to erase them manually. This may not even be the best eraser to use if outer lines need to be handled. But for things like overall flats, especially in the first stages, this can save a lot of time.

This is especially useful for sketches and rough animation, where your lines aren't always closed, but you still want to quickly and roughly give them a fill.

With the right hotkeys, you can easily switch between this and other erasers and flatting tools to quickly adapt to different cases. This eraser is something I pull out quite often when I just quickly need to change, edit and clean up small section of a coloring layer.


In some cases, there are better and faster fill/flatting tools for cases like this like [Enclose and Fill]. But sometimes, an eraser is what you need. Knowing you have different tools will give you more options in case one of them doesn't work well for a situation.

Clip Studio Paint's edge detection isn't antialiased so your erased edges can end up very jagged. This isn't a big problem if you work at high resolutions or your lines are fully opaque. But if you only work at 100%, you may need to apply Filter>Blur>[Smoothing] or a slight gaussian blur to remove some of the roughness.
---
This part just explains how Clip Studio Paint edge detection it works
How does its edge detection work?
You can enable this edge detection feature in most brushes. The checkbox is labeled [Do not cross lines of reference layer] in CSP 1.10. If you don't see this option, you may need to enable it in the [Sub Tool Detail] window.


The edge detection works like a mini paint bucket tool, confined to the radius of the brush. It starts checking for the edge from the center and stops when it sees an edge or the radius of the brush, then limits its effect there.

If the edge is not complete within the radius of the circle, the effect of the brush goes around to the other side of the edge.

Sometimes, if the edge is transparent or light enough, it will be counted as a gap. In this case, the effect of the brush will still go around the other side of the edge as if there is a gap where the line was very light.
To change this threshold, you can adjust [Color margin]. Set it to zero (0) if you want it to stop at even the lightest lines as part of the edge.

[Area scaling] pushes the effect past the edge by the number of pixels you set. This is useful so the color can go under the lines and any softness, texture or antialiasing that it has. 1 or 2 can be enough but in some cases, 5 or 10 may be required.
The three [Scaling modes] determine how it extends the pixels, which is most noticeable either on corners or textures.
- [Rectangle] expands at the corners as a box.
- [Round] expands at corners as a circle.
- [To darkest pixel] tries to expand by the maximum area scaling but still stops when it detects that the pixel has become its darkest/most opaque. This can be useful if the lines or edge has variable softness or thickness, but sometimes the fill can also look incomplete.

If the edges look wrong, try experimenting with different settings.
Thanks for your support!
You can visit my store for hundreds of other brushes! - @PharanBrush


