

I made a material collection of trumpet 3D model, hand holding trumpet pose and whole body pose
トランペット3Dモデルとトランペットを持つ手のポーズと全身のポーズを素材集にしてみました
With basic poses
Faster setup time
Model
A set of a trumpet model and a basic pose for the whole body to hold it
If you are not good at making poses, if you have difficulty understanding the shape of the hand holding the trumpet, or if you want to save time, please use this page.
==============================================================
Trumpets are also distributed free of charge.
I don't need a pose, so if you just want a trumpet,
Content ID: Only trumpets are distributed at 2149473
========================================================
Hold the trumpet in the basic pose holding the trumpet
In the beginning
Trumpet Holding Basic Pose
and
Load the trumpet body

Put the trumpet in the "child" of the posed model at this stage

When the trumpet is included in the pose model, it will ask you about the "object origin".
Dictate the left hand

When the left hand is designated as the origin, the trumpet follows the movement of the left hand.
At this stage, the size and alignment of the trumpet
(Please note that if you adjust the position and size first before this, the position of the trumpet will shift if you specify the "object origin" at the end.)
Alignment of size angle, etc.

It takes some getting used to to aligning the position, but if you think of it as practice because it is also the basis for aligning other materials...

Make full use of the route manual to adjust

Once the trumpet is aligned with the pose, you can move the model freely.
If you adapt an existing pose
As shown in the figure below, once the pose can be done freely, when adapting the existing pose to the model, the pose flows to the tip of the hand rather than the "left hand of the object origin".


The position of the hand from the left hand and the trumpet will change,
Attached as is
If you apply the "Trumpet Left Hand Pose", it will return to the original way of holding the trumpet ↓


After changing to this adapted hand and fingertip pose, change the angle of the wrist to the angle you like
Other Attached Poses
"Right Hand Hand Pose 001 for Trumpet" when you want to play the right hand side
You can change the pose of "Trumpet Standing Pose Left Foot Up" by loading it after holding the trumpet in the basic pose.
Please refer to the figure below for changing the position of the trumpet piston.

It is necessary to change the position of the model slightly depending on the type (because there are differences in the size of the hand), but use duplication etc.
You can also march with a large number of people, so please enjoy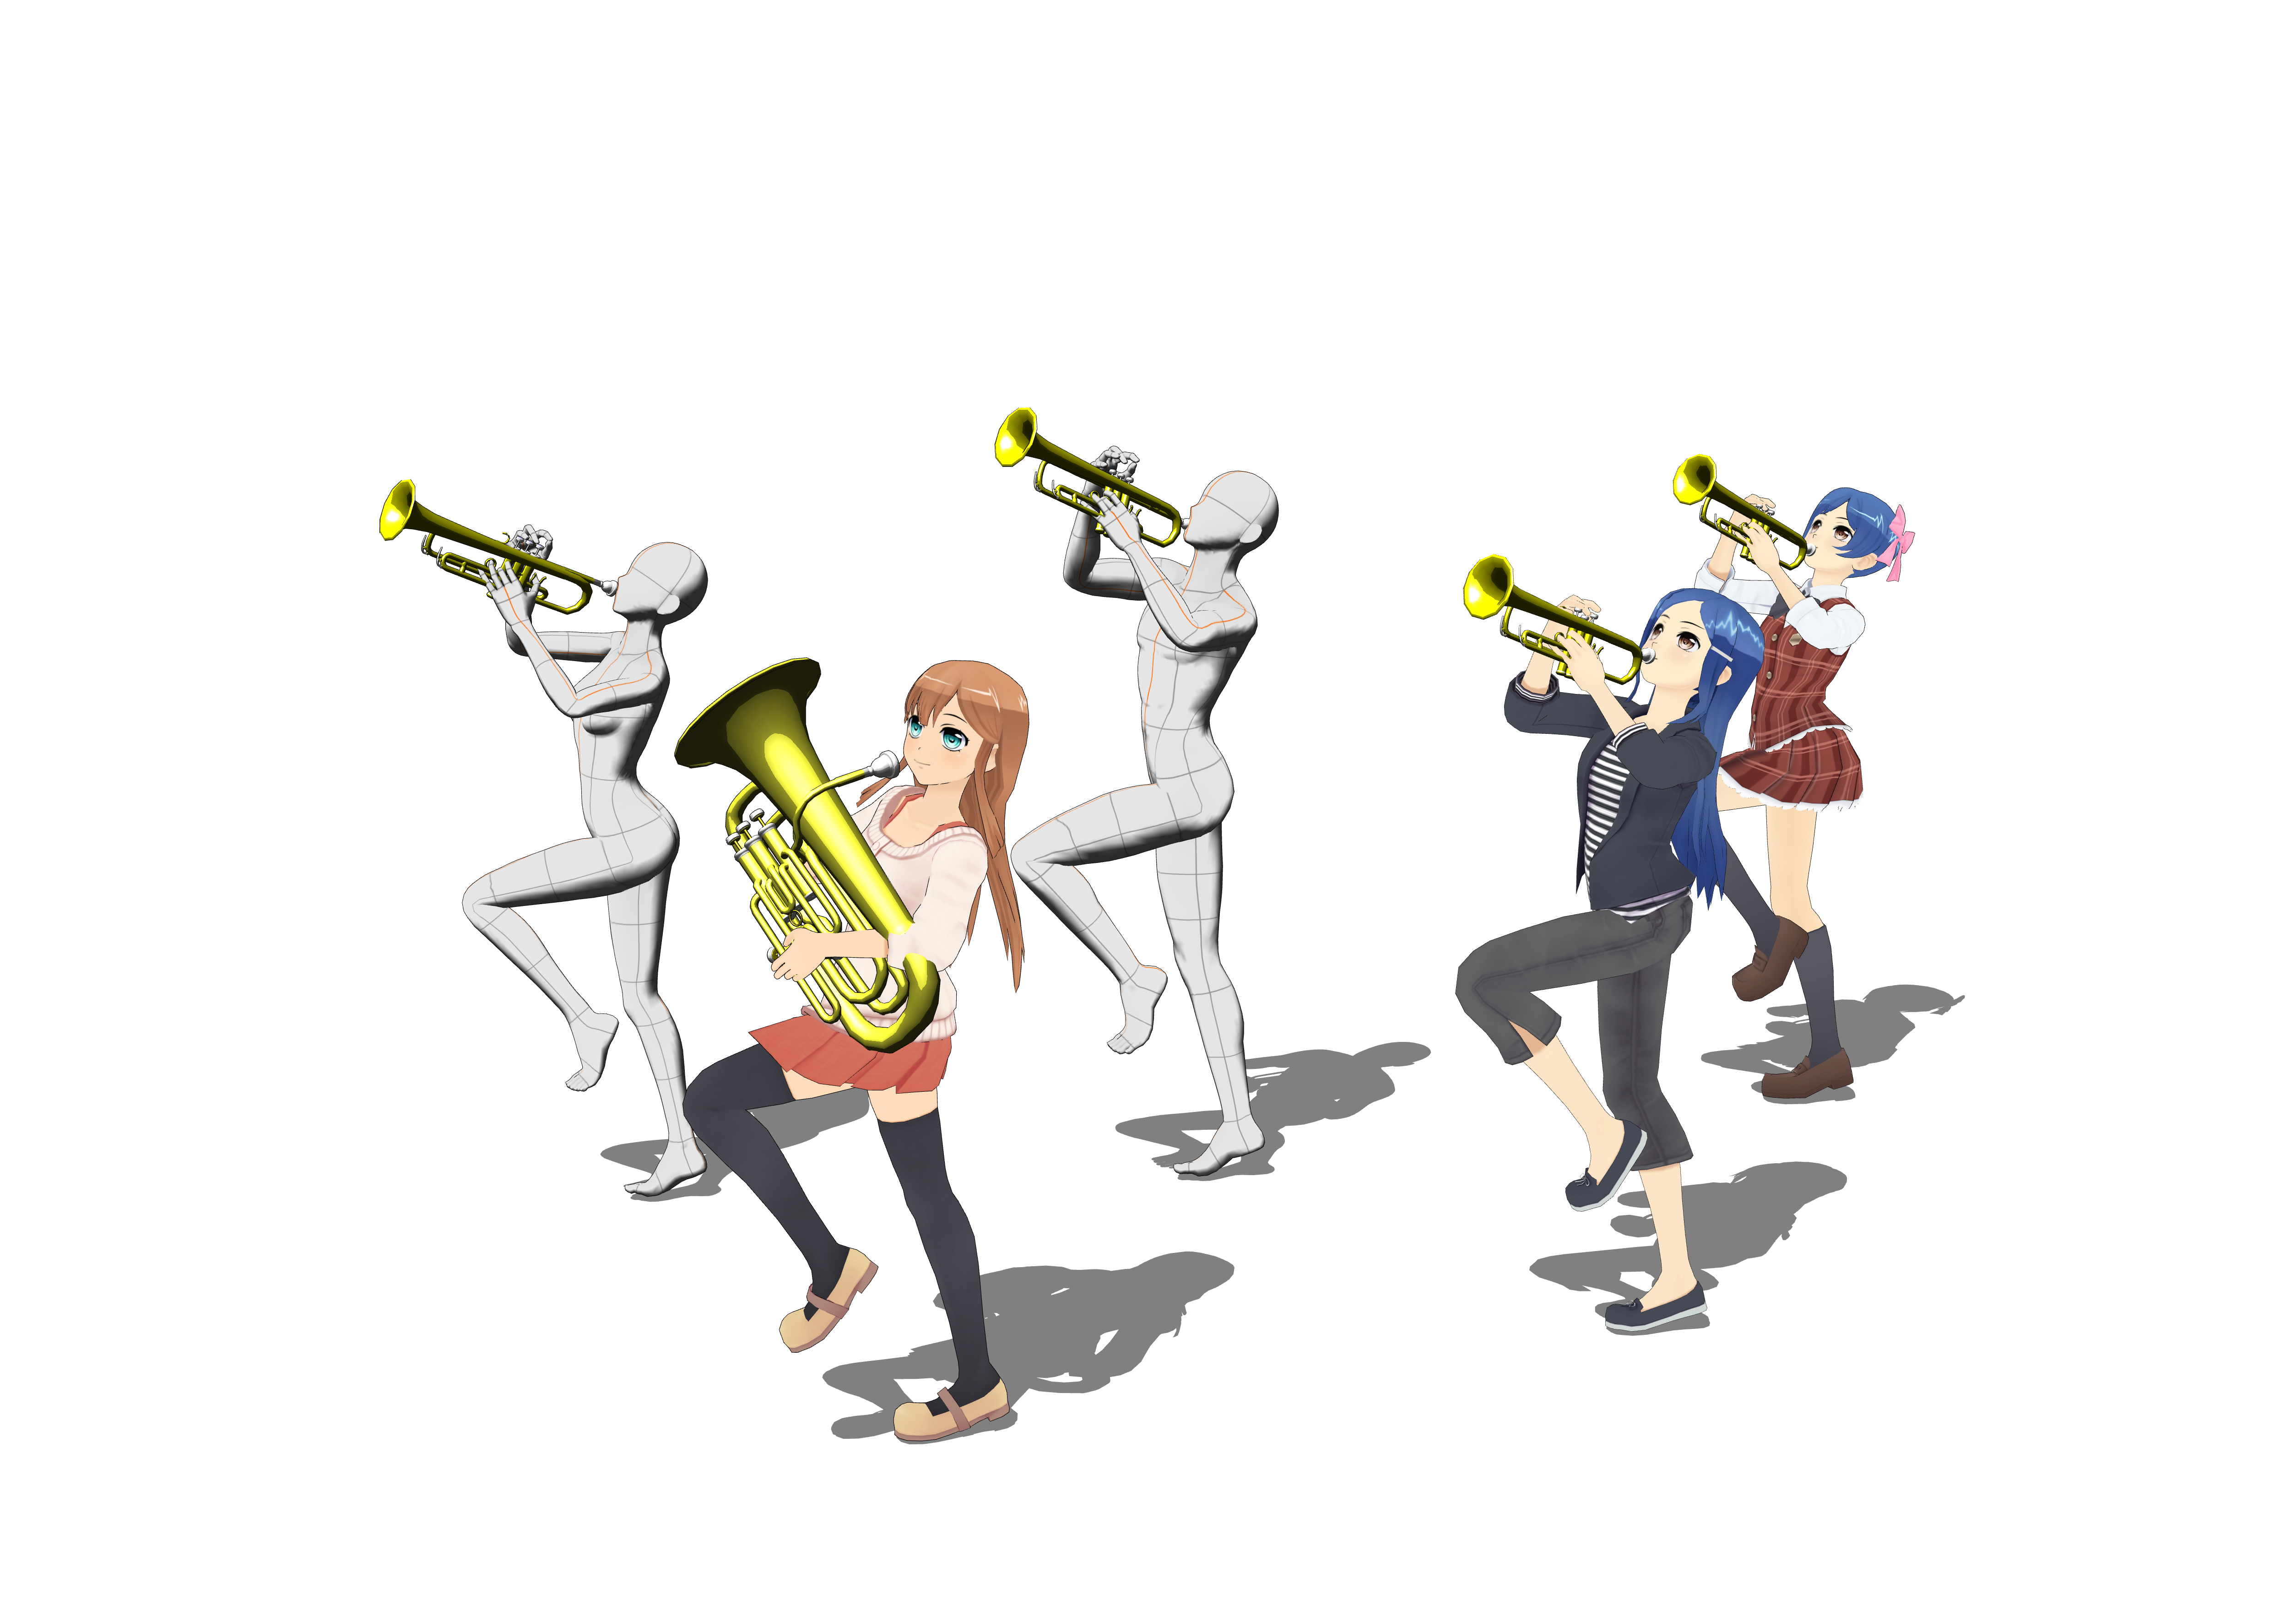

基本ポーズが付いて
セットアップまでにかかる時間が短縮できる
モデルです
トランペットモデルとそれを持たせる全身の基本ポーズとをセットにしました
ポーズを作るのが苦手な方、トランペットを持つ手の形が分りにくい方、時間短縮したいという方はこちらをご利用ください
==============================================================
トランペット単体も無料で配布しております
ポーズはいらないから、トランペットだけ欲しいという方は
コンテンツID:2149473にてトランペットのみ配布しております
========================================================
トランペット持ち基本ポーズにトランペットを持たせます
初めは
トランペット持ち基本ポーズ
と
トランペット本体を読み込みます
この段階でトランペットをポーズモデルの「子供」に入れます
ポーズモデルにトランペット内包されると「オブジェクト原点」を聞いて来るので
左手を指示します
左手を原点に指定した段階で、左手の動きにトランペットが追従するようになっていますので
この段階で、トランペットの大きさと位置合わせをします
(これ以前に、位置、大きさ合わせを先ににやってしまうと、最期に「オブジェクト原点」指定をするとトランペットの位置がズレてしまうので注意です)
大きさ角度などの位置合わせ
位置大きさ合わせには慣れが必要ですが、他の素材を位置合わせする基本にもなるので練習だと考えていただければ・・・
ルートマニュピレターを駆使して調整してください
一旦、ポーズにトランペットの位置が合えばそこからはモデルを自由に動かせます
既存のポーズを適応させると
下図のように一旦ポーズが自由にできるようにした後、既存のポーズをモデルに適応させる場合、「オブジェクト原点の左手」よりも手の先の方にもポーズが流れ込むので
左手先からの手とトランペットの位置関係が変わってしまいますが、
そのまま添付されている
「トランペット用左手ハンドポーズ」を適応していただければ、元のトランペットの持ち方に戻ります↓
この適応された手と指先のポーズに変更した後、手首の角度を好きな角度に変更します
他の添付ポーズ
「トランペット用右手ハンドポーズ001」は右手側を演奏位置にしたい時に
「トランペット立ちポーズ左足上げ」は基本ポーズにトランペットを持たせた後に読み込ませるとポーズ変更できます
トランペットのピストン位置の変更は下図を参考にしてください
モデルにタイプによって多少の位置変更は必要(手の大きさの違いなども有るので)ですが複製など使って
多人数の行進などもできるのでお楽しみください
Category 1 カテゴリ1


Other materials by テスラ1141


Popular “Material catalog” materials


New materials


Badges
-
 MVP ◆This user has contributed greatly to the management of the community, by posting many great responses to the questions asked. Once every three months, MVPs are determined based on the points earned during that period and will be recognized accordingly.
 -
 New Valuable Player (NVP) ◆These are the next-best contributors to the community after MVPs. This is awarded to users who have not yet won an MVP award, based on the number of points they have earned.
 -
 Official Expert ◆Chosen out of all MVP awardees, who are already proof of excellence, this is a testimony of outstanding correspondence in the community. After careful screening, they are appointed by CELSYS and assume their position.Note: Formally called “Evangelists”
 -
 Official Moderator of CELSYS ◆Moderators are official CELSYS staff members who are fluent in Japanese as well as various other languages. Moderators are not experts on the software or illustration, so they are not able to directly answer your questions. However, moderators provide communication and language support to ensure that everyone can smoothly communicate with each other.
 -
 CELSYS official accountThe Official Administrator Account