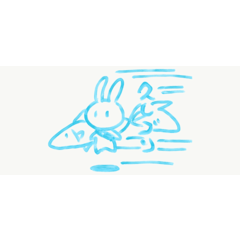

It is a auto action that can process simple fill layers in a watercolor style, and a set of tools that seem useful to use together.
It is border of watercolor on the border with the transparent, but there is a slight paleness on the inside, and the overall paint is uneven.
⬛︎Set contents︎ ⬛
・Watercolor style auto action small/large
・Make the edges of the paint rattle auto action
・12 gradient set species
(Useful for increasing the number of colors and the amount of information after processing)
・Unpainted brush
(Easily reproduce unpainted paint)
・Paper texture
(When the auto action is not enough paper)
シンプルな塗りレイヤーを水彩風に加工できるオートアクションと、共に使うと便利そうなツールのセットです。
透明部分との境に水彩境界が、内側にはほんのり淡さが、全体的に塗りムラが生まれます。
⬛︎セット内容⬛︎
・水彩風オートアクション 小/大
・塗りのフチをガタガタにするオートアクション
・グラデーションセット12種
(加工後の色数や情報量を増やすのに便利)
・塗り残しブラシ
(塗りに手軽に塗り残しを再現)
・紙質テクスチャ
(オートアクションでは紙感が足りない時に)


is made assuming a single layer in an extremely normal state, but we are trying to manage to execute it in a state such as "multiplication layer" or "opacity protected".2. Check "Watercolor style" from the auto action, select it, and ▶press ︎.
I tried and adjusted the "small" with a postcard size of 350 dpi and the "large" with an A4 size of 350 dpi. The thickness of the border of watercolor and the size of the unevenness change.
In the folder (2) named "Watercoloring", the layer being processed remains. If you feel that it may be dark or thin in (3), please display the folder and play with the opacity.


Like "watercolor style", we are trying to manage to execute it in a state such as "multiplication layer" or "opacity protected", but for the time being, we are making it assuming a layer in a very normal state.2. From the auto action, check "Fuchi rattling" and select it, and ▶press ︎.
If the canvas size is large, you may not feel much difference.
The folder being processed cannot be used for adjustment later, so I delete it before exiting it, but if you undo it, it will come out.


一枚の極めて通常状態のレイヤーを想定して作っていますが、一応「乗算レイヤーになっている」「不透明度保護されている」等の状態のまま実行してもなんとかなるよう試みています。2.オートアクションから「水彩風」にチェックを入れ選択し、▶︎を押す
「小」はポストカードサイズ350dpi、「大」はA4サイズ350dpiで試しながら調整しました。水彩境界の太さやムラの大きさが変わります。
「水彩加工中」という名前のフォルダー②には加工中のレイヤーが残っています。③で「濃いかも」「薄いかも」と感じた際は、フォルダーを表示して不透明度等をいじってみてください。


「水彩風」と同じく「乗算レイヤーになっている」「不透明度保護されている」等の状態のまま実行してもなんとかなるよう試みてはいますが、一応一枚の極めて通常状態のレイヤーを想定して作っています。2.オートアクションから「フチガタガタ」にチェックを入れ選択し、▶︎を押す
キャンバスサイズが大きいとあまり差を感じないかも。
加工中のフォルダーは後からの調整に使えないので消去してから終了にしていますが、アンドゥすれば出てきます。


auto action オートアクション
gradient set グラデーションセット
brush ブラシ
texture テクスチャ


