

This is an experimental auto action that mimics the scattering of a sub-surface easily.
サブサーフェス スキャタリングをお手軽に真似る実験的オートアクションです。
What is this?
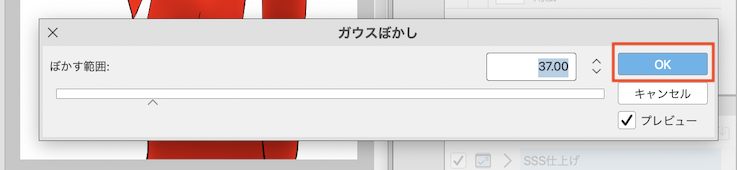
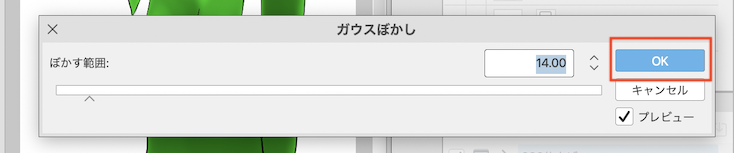
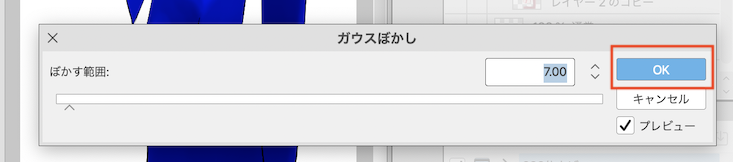
Use the gaussian blur to mimic the sub-surface scattering.


Twitter tag
#sss_autoaction
#SSSオートアクション使ってみた
Index
- Tutorial 1
- Tutorial 2
- Tips
- SSS Radius Sheet
- Example
Tutorial 1
Now let's get started
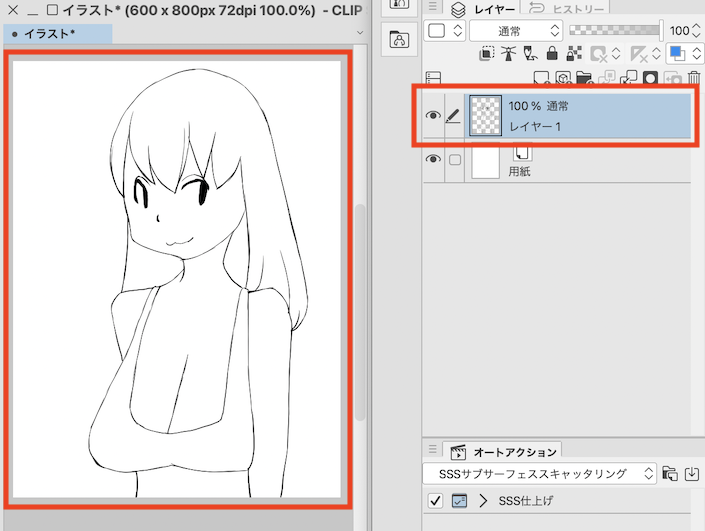
- Create new The canvas.

- Draw a line.
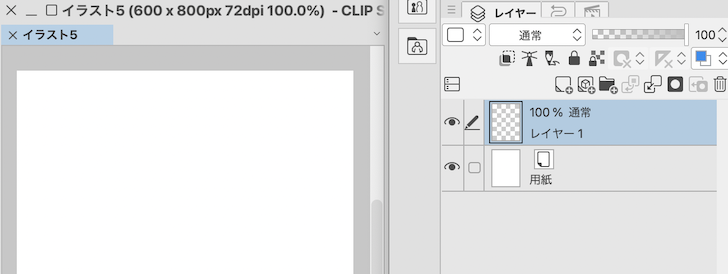
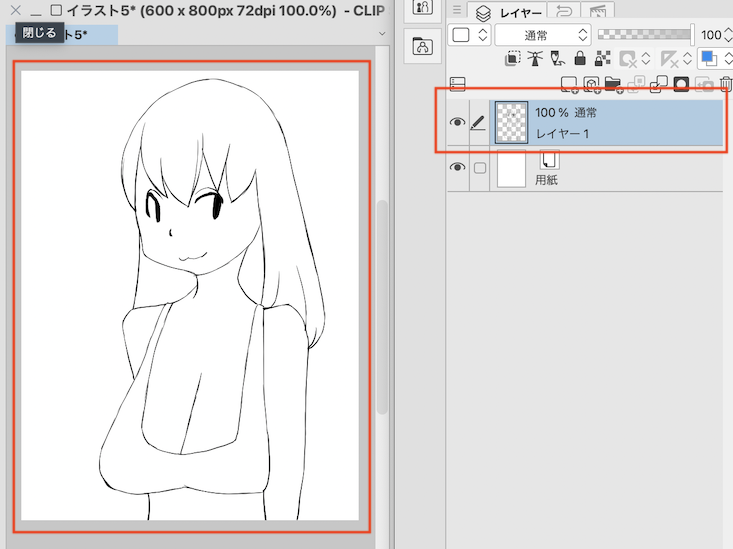
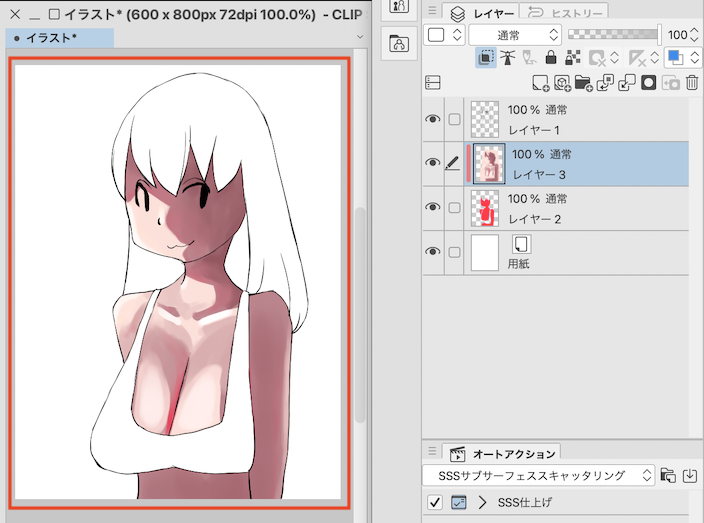
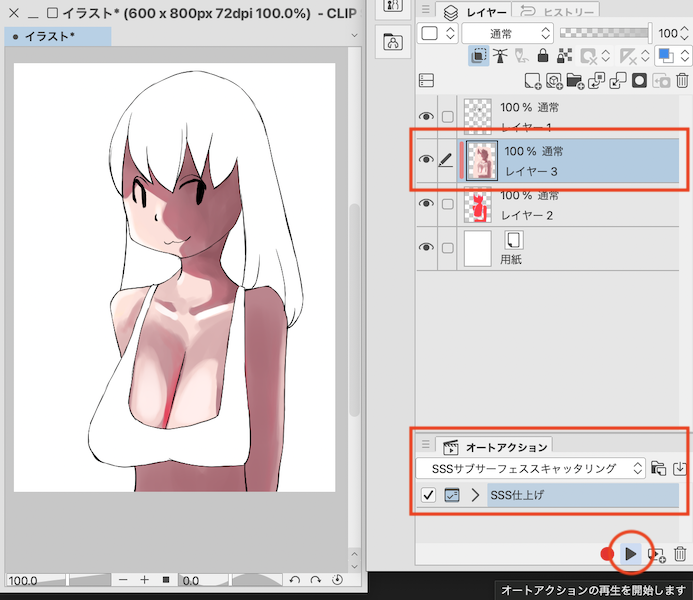
- Add a layer.
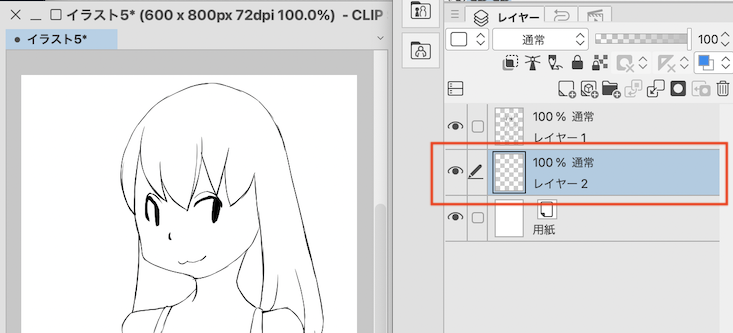
- I paint color with a brush.
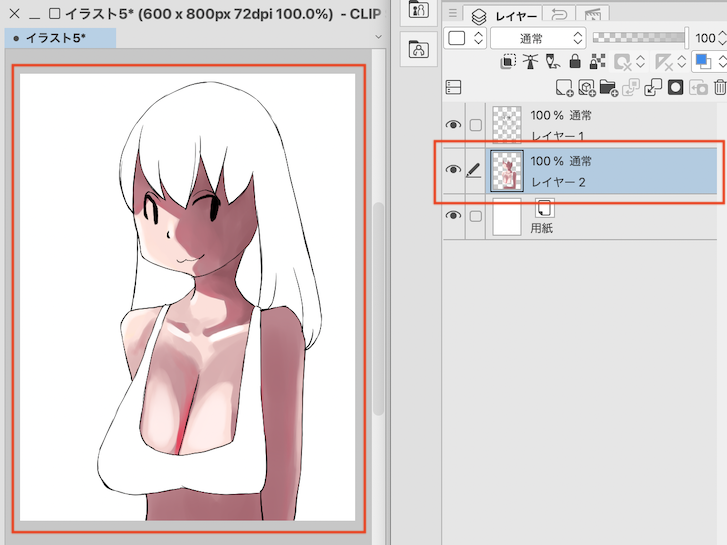
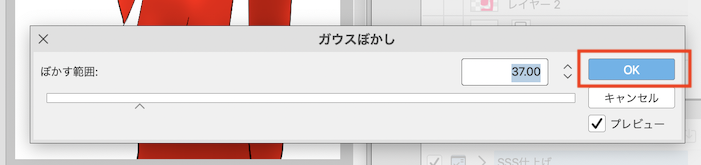
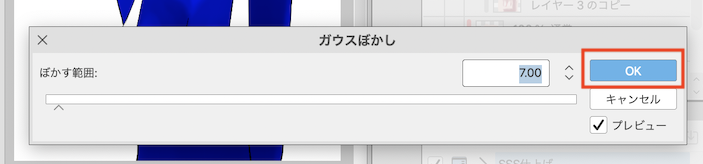
- Run the auto action.
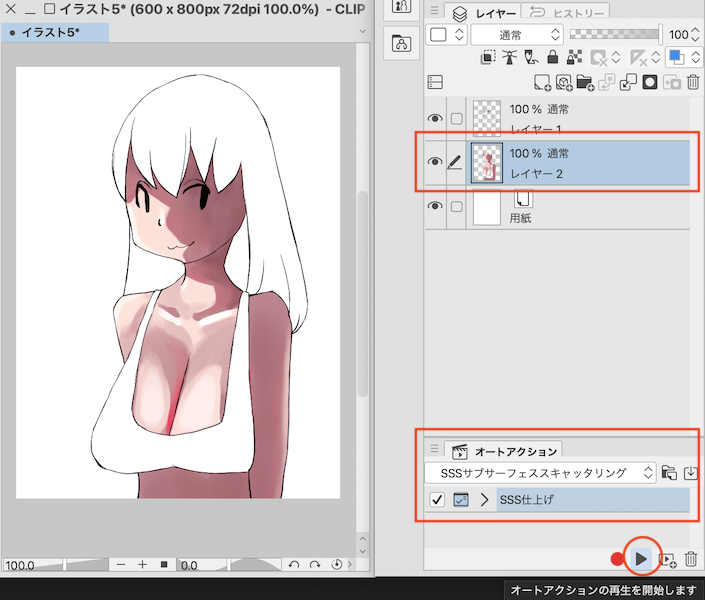
- Click OK.
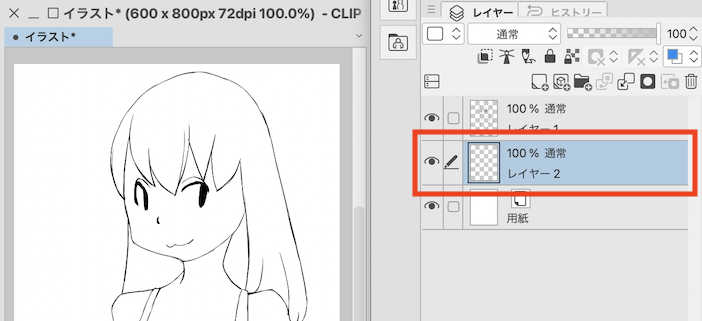
- Add a layer.
Draw hair and clothes.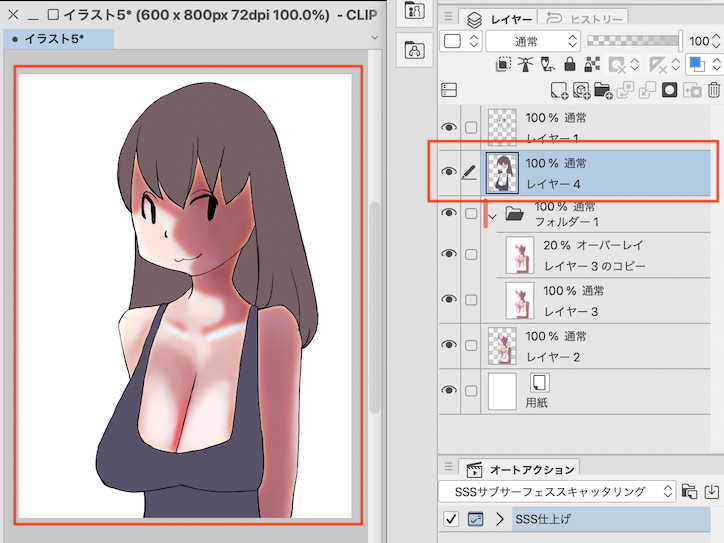
- Draw a highlight.
- It is complete.


Tutorial 2
Let's finish beautifully.
- Create new The canvas.

- Draw a line.
- Add a layer.
- Fill your skin with the color you like.
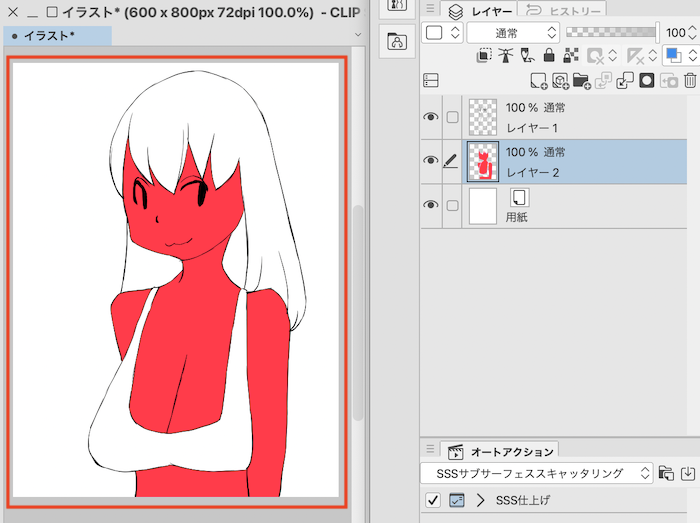
- Add a layer.

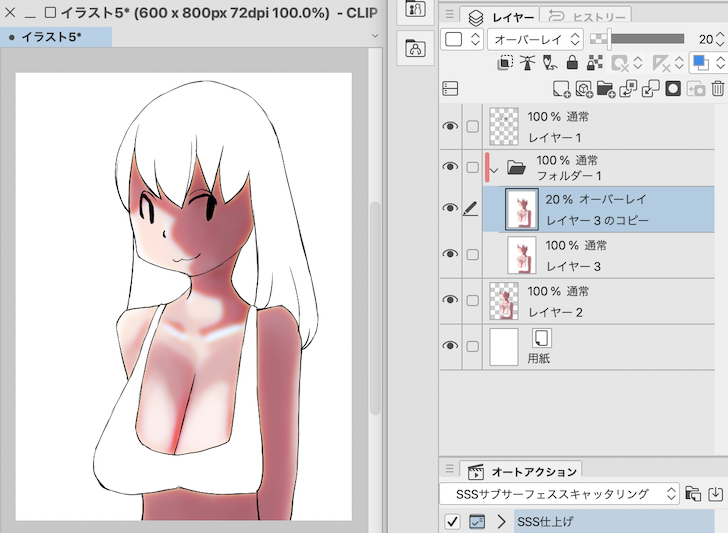
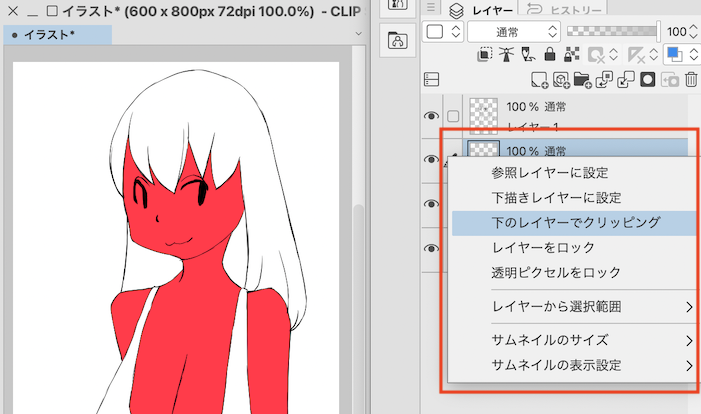
- Set the layer to clipping.

- I paint color with a brush.
- Tip: Let's paint over the line.

- Run the auto action.
- Click OK.
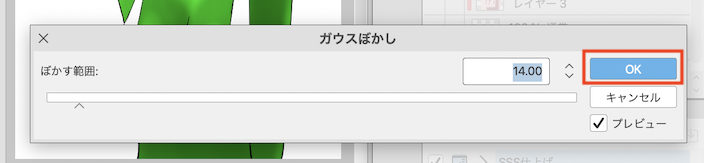

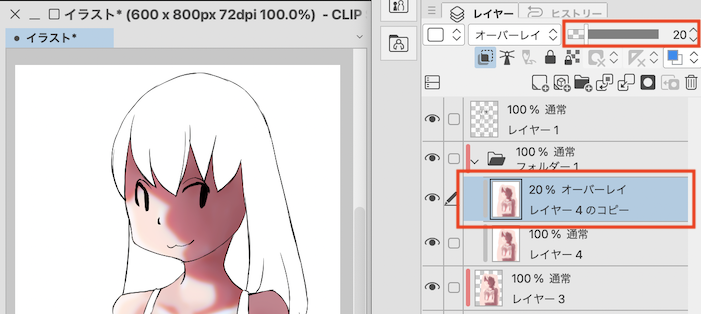
- (Tips) You can adjust the strength.
- Add a layer.
Draw hair and clothes.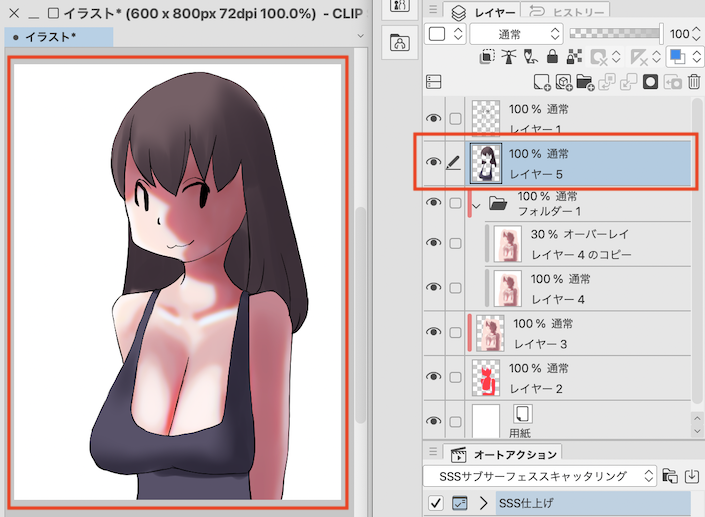
- Add a layer.
Set the combine mode to addition (light emitting).
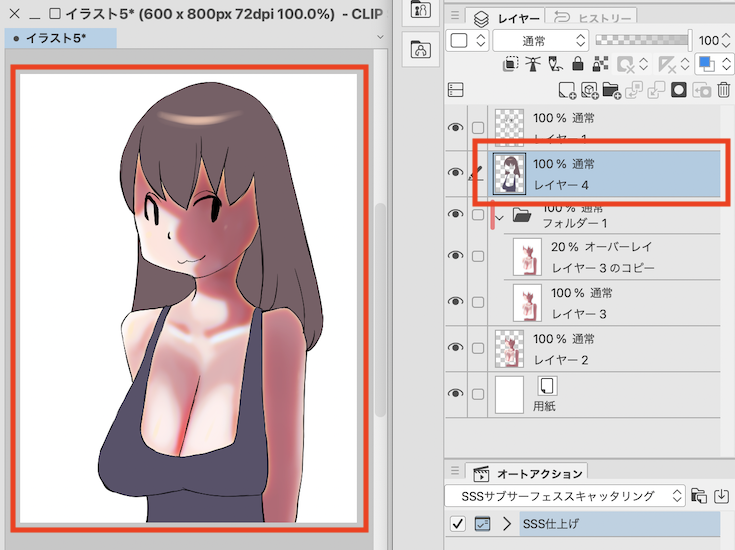
Draw a highlight.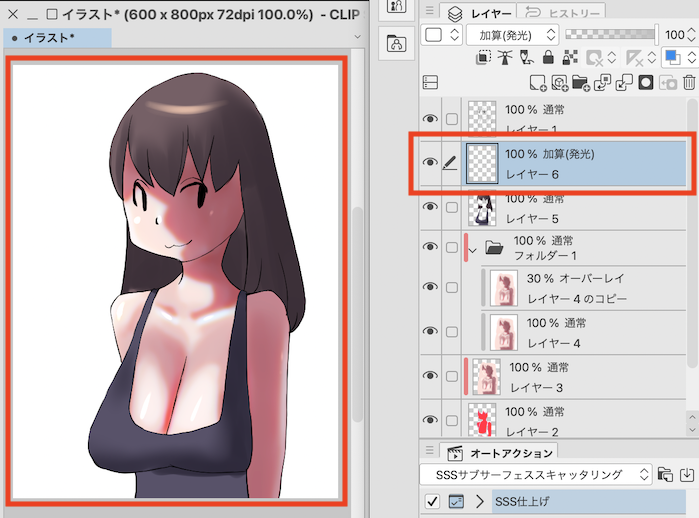
- It is complete.


Let's enjoy it by changing the amount of the blur.
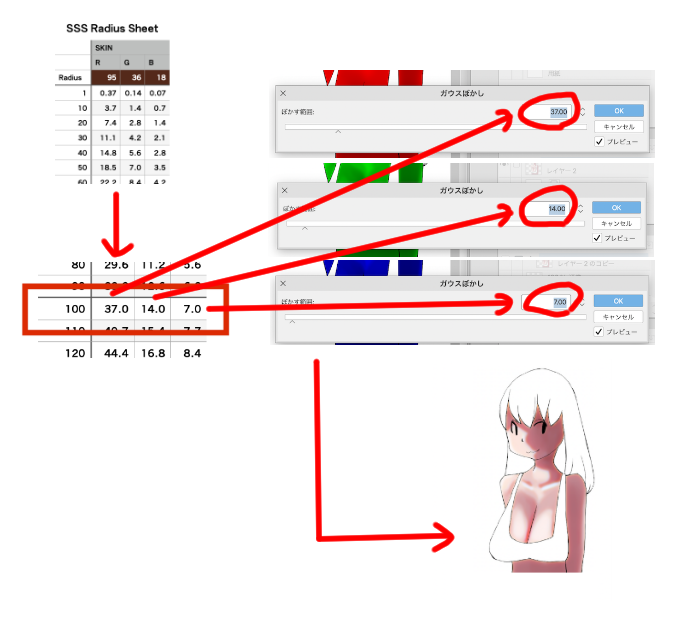
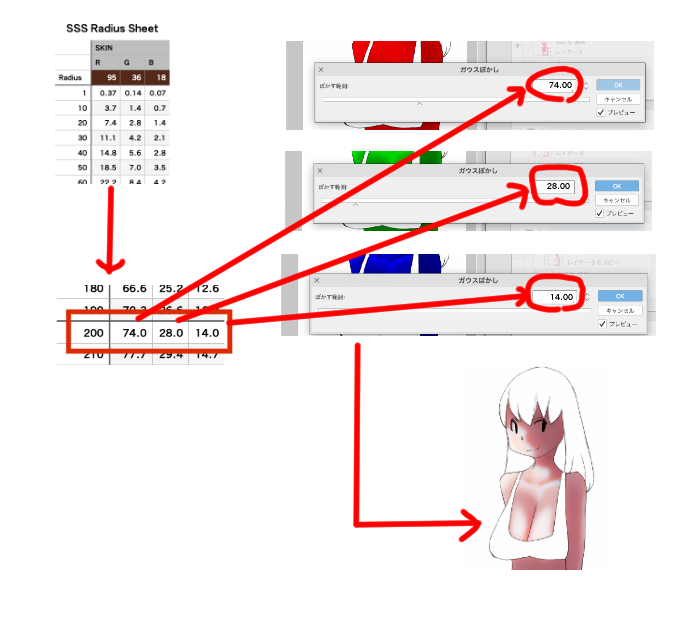
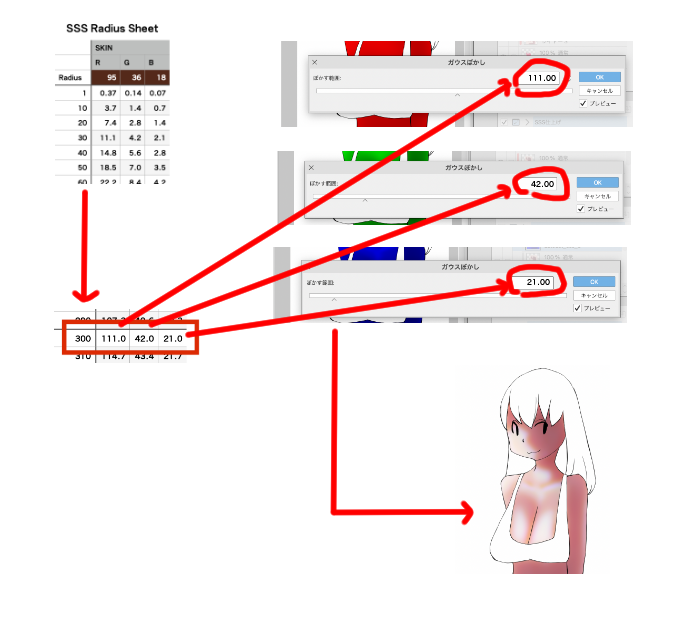


SSS Radius Sheet


Example


これは何ですか?
ガウスぼかしを使用して、サブサーフェス スキャタリングを模倣します。
Twitter tag
#sss_autoaction
#SSSオートアクション使ってみた
目次
- Tutorial 1
- Tutorial 2
- Tips
- SSS Radius Sheet
- Example
Tutorial 1
さあ始めましょう
- キャンバスを新規作成します。
- 線を描きます。
- レイヤーを追加します。
- 筆で色を塗ります。
- オートアクションを実行します。
- OKをクリックします。
- レイヤーを追加します。
髪と服を描きます。 - ハイライトを描きます。
- 完成です。
Tutorial 2
美しく仕上げましょう
- キャンバスを新規作成します。
- 線を描きます。
- レイヤーを追加します。
- 好きな色で肌を塗りつぶします。
- レイヤーを追加します。
- レイヤーをクリッピングに設定します。
- 筆で色を塗ります。
- (Tips)線からはみ出すようにペイントしましょう。
- オートアクションを実行します。
- OKをクリックします。
- (Tips)強さを調整できます。
- レイヤーを追加します。
髪と服を描きます。 - レイヤーを追加します。
合成モードを加算(発光)に設定します。
ハイライトを描きます。 - 完成です。
ぼかしの量を変えて楽しみましょう。
SSS Radius Sheet
Example


Other materials by しんニャ

Popular “Auto Action” materials


New materials


Badges
-
 MVP ◆This user has contributed greatly to the management of the community, by posting many great responses to the questions asked. Once every three months, MVPs are determined based on the points earned during that period and will be recognized accordingly.
 -
 New Valuable Player (NVP) ◆These are the next-best contributors to the community after MVPs. This is awarded to users who have not yet won an MVP award, based on the number of points they have earned.
 -
 Official Expert ◆Chosen out of all MVP awardees, who are already proof of excellence, this is a testimony of outstanding correspondence in the community. After careful screening, they are appointed by CELSYS and assume their position.Note: Formally called “Evangelists”
 -
 Official Moderator of CELSYS ◆Moderators are official CELSYS staff members who are fluent in Japanese as well as various other languages. Moderators are not experts on the software or illustration, so they are not able to directly answer your questions. However, moderators provide communication and language support to ensure that everyone can smoothly communicate with each other.
 -
 CELSYS official accountThe Official Administrator Account