* Be sure to read the following instructions when using.
The guarantee of the data damage and the trouble by using this auto action cannot be done at all, and approve it.
Inner contents
All auto action, so please drag and Drop auto action window after downloading.
• High precision extract line (x3)
• High precision LT conversion (x3)
Improves accuracy by performing a three-fold resolution of the extract line & LT conversion, which can be done from the layer property.
The output line art is monochrome (can be switched from layer property to gray).
Low-load extract line (x2)Low-load LT conversion (x2)
High precision conversion is heavy, so please use this if you do not work well.
Because it is the line drawing extraction at double resolution, accuracy is inferior slightly.
Instructions (please read)
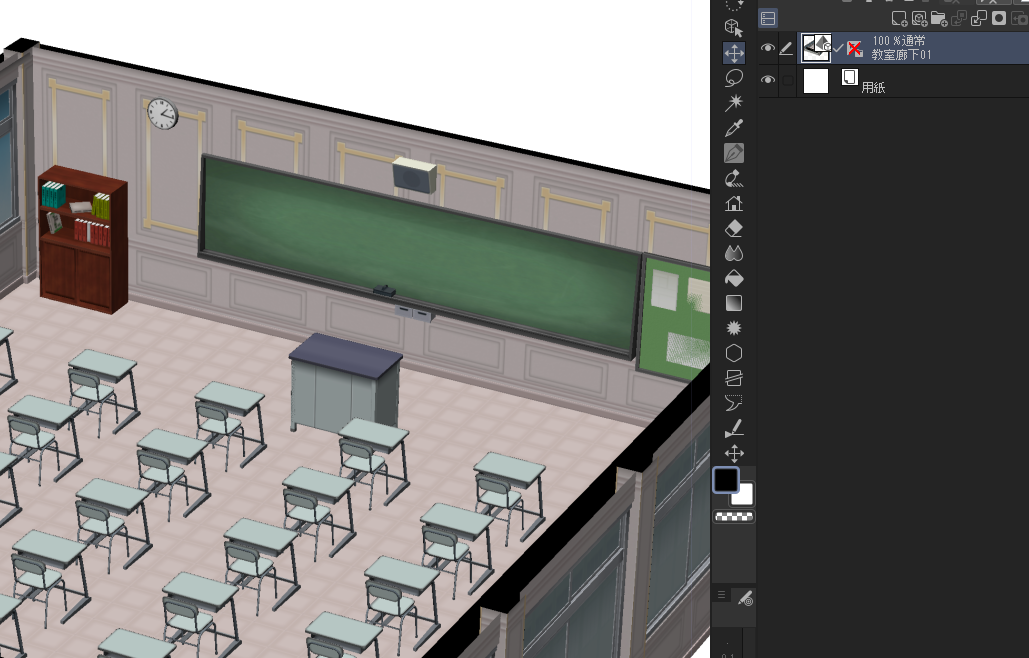
1. Load the 3D Object you want to convert.

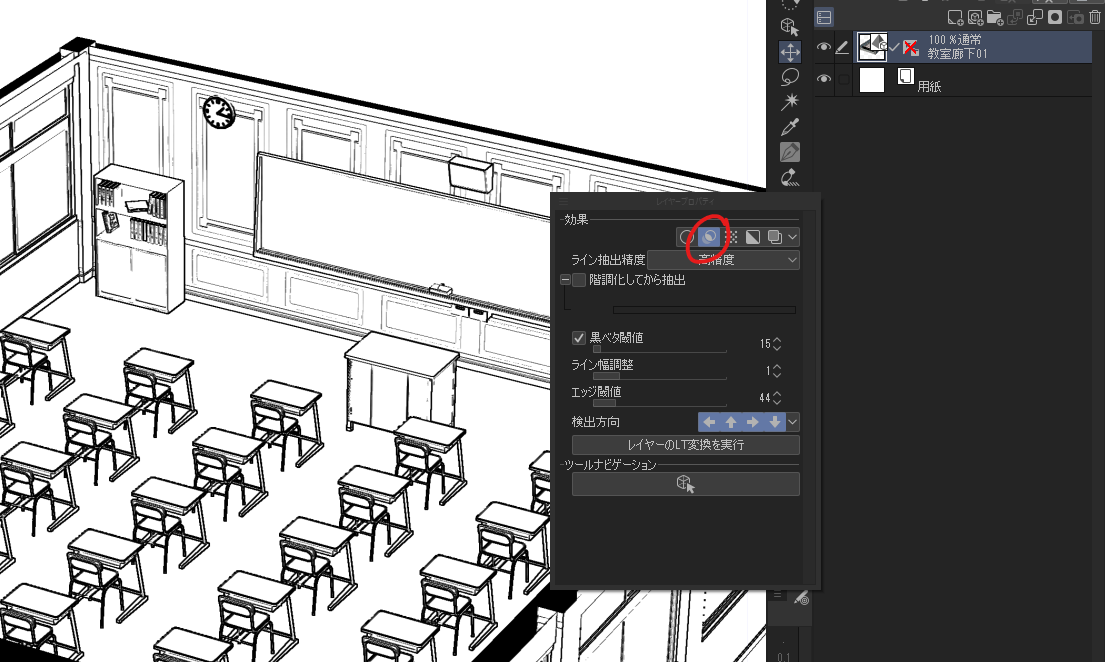
2. Turn the extract line on from the Layer property and adjust the gray to disappear.
At this stage, it is better to make it slightly thick. (No adjustment required for LT conversion)

! Note
If you perform an action without first extract line from Layer property, you will see an error similar to the following:
Please be sure to Press "No" because the active manuscript will be closed when you continue the action .
3. switch to the Operation tool (object) and make sure that the 3D layer is selected.
If it is selected correctly 3D Object will revert to a colored state instead of a line drawing.
3-ex. If you want to extract multiple models in a layer at once, select all from the tool property object list by Shift & click.
4. Verify that Nothing is open on the right side of the currently open tab , and then run the auto action.
In the case of the LT conversion, the dialog box will appear, so be sure to adjust it if necessary.
5. The original 3D layer becomes blue, and the layer of the line drawing extracted on the back is output.
6. Fix the gap and hide the original layer to complete.
6-ex. The output layer is originally a gray color, so you can adjust the thickness of the first from the layer property.
You can also smooth the line by making the expression color gray or color.
Comparison verification
extract line
LT Conversion
※使用する際は以下の使用方法を必ず読むようにしてください。
このオートアクションを使用したことによるデータ破損・トラブルの保証は一切出来かねますので、ご了承ください。
内容物
全てオートアクションなので、ダウンロードした後オートアクションウィンドウにドラッグ&ドロップしてください。
・高精度ライン抽出(x3)
・高精度LT変換(x3)
レイヤープロパティから行うことができるライン抽出&LT変換を3倍解像度で行うことで精度を高めます。
出力された線画はモノクロです(レイヤープロパティからグレーに切り替え可)。
・低負荷LT変換(x2)
高精度変換は負荷が重いため、上手く動かない場合はこちらを使ってください。
2倍解像度での線画抽出なので、やや精度は劣ります。
使用手順(必ずお読みください)
1.変換したい3Dオブジェクトを読み込みます。

2.レイヤープロパティからライン抽出をONにし、グレーが消えるように調整します。
この段階ではやや太めにしたほうが丁度良くなります。(LT変換の場合は調整不要)
!注意!
初めにレイヤープロパティからライン抽出を行わずにアクションを実行すると以下のようなエラーが表示されます。
このままアクションを続行すると作業中の原稿が閉じられてしまうので必ず「いいえ」を押すようにしてください。
3.操作ツール(オブジェクト)に切り替えて、3Dレイヤーを選択されていることを確認します。
正しく選択されている場合は3Dオブジェクトが線画ではなく素の色付き状態に戻ります。
3-ex.レイヤー内の複数モデルを一度に線画抽出したい場合は、ツールプロパティのオブジェクトリストからShift&クリックで全てを選択してください。
4.現在開いているタブの右側に何も開いていないことを確認し、オートアクションを実行します。
LT変換の場合はダイアログボックスが出るので、必要に応じて調整してください。
5.元の3Dレイヤーが青くなり、背面に抽出された線画のレイヤーが出力されます。
6.ズレを修正して元のレイヤーを非表示にすれば完成です。
6-ex.出力されたレイヤーは元々は表現色がグレーなので、先の濃さをレイヤープロパティから調整することが可能です。
表現色をグレーorカラーにすることで線を滑らかにすることも出来ます。
比較検証
・ライン抽出
・LT変換


