

It is a set of material to be able to draw the original Opal easily. 簡単にオリジナルのオパールが描ける素材のセットです。
"Simple Opal" is a tool set that the original Opal can easily be drawn by action, a gradation, a brush.
 Created in the groundwork 1
 Made in base 2
 Prepared in the groundwork 3
It also satisfied check the layer structure in the .clip file (template) in the set.


 Painted Black
 Transparent and erased state
 Repeated several times


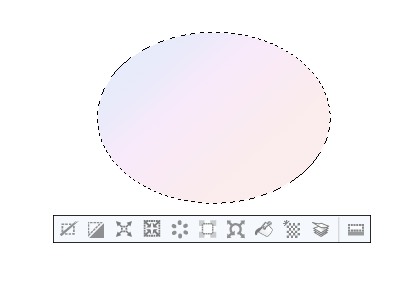
The ① new layer creates a jewel form with a suitable tool, and fill it in the included gradation "Opal base".
This time I created a gem form with ellipse tool and fill in "Opal base 1".

Create a glitter layer by creating a "dodge" layer on top of the ② ① layer and clipping it.
Sets the foreground color to black and the background color to white.


③ glitter layer with "opal" brush.
Fill it with black ink → erase it with transparent ink, it becomes it seems that while repeating.
 Painted Black
↓
 Transparent and erased state
↓
↓
↓
 Repeated several times
I think that it is good to refer to the photograph of a genuine opal.
④ Sparkling layer auto action "tone curve".
A random color arrives at Twinkle, and the depth comes out.

⑤ Glitter with the new "dodge" layer created on top of the layer, you draw a shadow with the color burn layer and you're done.
Brushes used pre-installed airbrush.

Sample images are created in 350dpi.
「かんたんオパール」は、アクション、グラデーション、ブラシによってオリジナルのオパールが簡単に描けるツールセットです。
下地1で作成下地2で作成下地3で作成また、セットにある.clipファイル(テンプレート)でレイヤー構造をご確認戴けます。
黒で塗った状態
透明で消した状態
数回繰り返した状態
①新規レイヤーに宝石の形を適当なツールで作成し、付属のグラデーション「オパール下地」で塗りつぶします。
今回は楕円選択ツールで宝石の形を作成し、「オパール下地1」で塗りつぶしました。
②①のレイヤーの上に「覆い焼き(発光)」レイヤーを作成してクリッピングさせ、きらきら用レイヤーを作ります。
描画色を黒、背景色を白に設定します。
③きらきら用レイヤーに「オパール」ブラシできらきらを描きます。
黒インクで塗りつぶす→透明インクで消す、を繰り返しているうちにそれっぽくなってきます。
黒で塗った状態 ↓
透明で消した状態 ↓
↓
↓
数回繰り返した状態本物のオパールの写真などを参考にしてみると良いと思います。
④きらきらレイヤーにオートアクション「トーンカーブ」を実行します。
きらきらにランダムな色が着き、奥行きが出てきます。
⑤きらきらレイヤーの上に作成した新しい「覆い焼き(発光)」レイヤーでハイライトを、「焼き込みカラー」レイヤーで影を描き、完成です。
ブラシはプリインストールのエアブラシを使用しました。
作例は350dpiで作成しております。
Simple Opal かんたんオパール


Other materials by 姫川たけお


Popular “Material catalog” materials


New materials


Badges
-
 MVP ◆This user has contributed greatly to the management of the community, by posting many great responses to the questions asked. Once every three months, MVPs are determined based on the points earned during that period and will be recognized accordingly.
 -
 New Valuable Player (NVP) ◆These are the next-best contributors to the community after MVPs. This is awarded to users who have not yet won an MVP award, based on the number of points they have earned.
 -
 Official Expert ◆Chosen out of all MVP awardees, who are already proof of excellence, this is a testimony of outstanding correspondence in the community. After careful screening, they are appointed by CELSYS and assume their position.Note: Formally called “Evangelists”
 -
 Official Moderator of CELSYS ◆Moderators are official CELSYS staff members who are fluent in Japanese as well as various other languages. Moderators are not experts on the software or illustration, so they are not able to directly answer your questions. However, moderators provide communication and language support to ensure that everyone can smoothly communicate with each other.
 -
 CELSYS official accountThe Official Administrator Account