일반
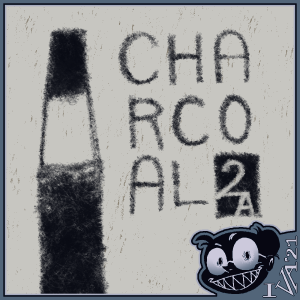
여기에는 제한된 질감, 브러시 및 자동 작용과 브러시 팁 모양 재질이 포함됩니다. 이 카탈로그의 전체 범위를원하시면 아래 업로드에서 [CHARCOAL] 팩(콘텐츠 ID#1836935)을 참조하십시오.
텍스처 소재는 600dpi로 스캔한 문자 크기의 용지(8"x11")와 A4 용지에 그려졌습니다. 600dpi에서 1000pxxx1000px의 캔버스에 CSP의 브러시 팁 모양을 그렸습니다.
브러쉬
뇌졸중은 목탄 연필처럼 둔하고 두껍게 되어야합니다. 희미한 긁힘 효과를 얻기 위해 최소한의 펜 압력으로 그립니다. 브러쉬 색상은 모든 색상이 될 수 있습니다. 브러쉬 사이즈가 작아도 추천입니다.
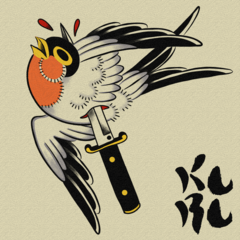
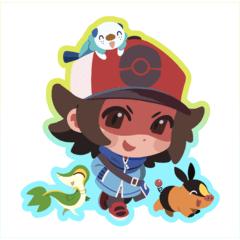
A5 용지 크기로 샘플 아트를 그린 후 폭 2500픽셀(35.76% 작음)으로 재확장되었습니다. 내 더피 키메라를 즐기십시오! IVA©2021
지우개는 반죽된 지우개를 모방하고 완전히 불투명하지 않습니다.
당신이 당신을 위해 가장 좋은 생각 효과를 달성하기 위해 설정에 실험 주시기 바랍니다!
텍스처
대부분의 텍스처는 순수한 검은색으로, 흰색 픽셀이 투명하다는 것을 의미하며,"charcoal001"을 제외하고는 흰색 픽셀이 투명하지 않습니다. 크기를 재설정할 때 큰 크기입니다.
(성적증명서: 이 샘플은 원래 A4 용지 크기로, 너비 2000픽셀 또는 원래의 28.60%로 재조정됨)
텍스처는 원래 회색 스케일에 있지만 흑백으로 변경할 수 있습니다! 부드러운 가장자리를 원한다면 회색을 사용합니다. 또는 투명 픽셀이 없는 "바삭바삭한"을 원한다면 모노크롬으로 변경합니다.
표현식 색상을 변경하는 방법: 흑백→그레이/ 그레이→모노크롬
검정색의 "두께"를 조정하는 방법 (알파 임계값)
이 조정 기능은 흑백 식 색상에만 해당되지만 임계값을 조정한 후에는 임계값을 회색으로 변환하거나 색상으로 변환할 수 있습니다.
MIX 버전은 어둡고 두껍습니다. 두 개의 텍스처를 결합하여 만들었습니다. 이것은 처음에 흑인을 채우기위한 것입니다 (일명. 스포팅). 하지만 당신은 여전히 당신이 그들과 함께 원하는 무엇이든 할 수 있습니다. (아래는 예를 발견하는 것입니다)
위의 아트워크 샘플은 원래 캐릭터(OC), IVA©2019입니다.
레이어 속성 > 레이어 색상에서 텍스처의 색상을 변경할 수도 있습니다.
자동 작업
사용 방법:
1. 텍스처 레이어 선택
2. 자동 행동 "숯 그레이 & 색상"을 재생
3. doulble 클릭 그라데이션지도 레이어를 클릭하고 자신의 선택
4. (선택 사항) 레이어의 불투명도 조정
5. 폴더 "CHARCOAL GRAD MAP"의 불투명도 조정 및 혼합 모드를 변경합니다.
이모탈란트
- 브러시 설정을 조정하는 것이 마음에 들지 않으면 브러시 크기를 상대적으로 작게 유지하는 것이 좋습니다.
- 거의 모든 텍스처에는 흰색이 없습니다. 나는 흰색 부분이 중요하다고 생각하지 않았다, 하지만 당신은 여전히 픽셀의 색상을 변경할 수 있습니다!
- "CharCOAL GRAD MAP" 폴더 아래의 모든 항목은 그라데이션 맵의 영향을 받습니다. 이 텍스처 효과를 격리하려면 폴더를 잘라내거나 폴더를 평평하게 하거나 영향을 원하는 영역을 마스킹할 수 있습니다.
- 이러한 자산을 실험하는 재미를!
결론
나는 이것이 그것을 필요로하는 사람에게 도움이되기를 바랍니다! 이러한 자산을 사용할 때 오류 나 문제가 발생하면 메시지를 보입니다. (⓿⓿)/
GENERAL
This includes a limited scope of textures, brushes, and an autoaction, plus the brush tip shape materials. If you want the full scope of this catalogue, please see [ CHARCOAL ] Pack (Content ID#1836935) in my uploads below.
Texture materials were drawn on a letter sized paper (8"x11") and A4 paper, scanned in 600dpi. I drew the brush tip shapes in CSP, on a canvas of 1000px by 1000px, in 600dpi.
BRUSHES
The stroke is supposed to be dull & thick like charcoal pencils. Draw with minimal pen pressure to get the faint scratchy effect. Brush colour can be any colour. I recommend the brush size to be small.
I drew the sample art in A5 paper size, rescaled to 2500pixels wide (35.76% smaller). please enjoy my derpy chimeras!IVA©2021
The eraser imitates a kneaded eraser and is not fully opaque.
Feel free to experiment on the settings to achieve the effect you think is best for you!
TEXTURE
Most of the textures are pure black, meaning the white pixels are transparent (ie. there are no white pixels) except for "charcoal001". These are big when you reset their size.
(transcript: this sample is originally in A4 paper size, rescaled to 2000 pixels wide or 28.60% from the original)
The textures are originally in greyscale, but you can change them to monochrome! Use Grey if you want soft edges. Or change to Monochrome if you want it "crispy", no transparent pixels.
How to Change Expression Color: Monochrome→Grey / Grey→Monochrome
How to adjust "thickness" of black (Alpha Threshold)
This adjustment feature is exclusive to monochrome expression colour, but after you adjust the threshold you can convert it into grey or rasterise it.
The MIX versions are darker and thicker. I made them by combining two textures. This is initially intended for filling blacks (aka. spotting). But you can still do whatever you want with them. (below is spotting example)
artwork samples above are of my original characters (OCs), IVA©2019
You can also change the colour of the textures in Layer Property > Layer Color.
AUTOACTION
how to use:
1. select the texture layer
2. play the autoaction "Charcoal GREY>COLOUR"
3. doulble click gradient map layer and choose your own
4. (optional) adjust opacity of any of the layers
5. adjust opacity and change blending mode of the the folder "CHARCOAL GRAD MAP"
IMORTANT
- If you don't like adjusting brush settings, I recommend you keep the brush size relatively small.
- Almost all of the textures don't have white. I didn't think the white parts are important, but you can still change the colour of the pixels!
- Anything below the "CHARCOAL GRAD MAP" folder will be affected by the gradient map. To isolate this texture effect, you can either: clip the folder, flatten the folder, and/or mask the area you want affected.
- Have fun experimenting with these assets!
CONCLUSION
I hope this helps anyone who needs it! Message me if you encounter any errors or problems in using these assets. (⓿v⓿)/


