



I thought it would be nice to have a digital ruler that I could use with my senses like an analog rib ruler or circumferential ruler, so I made it for my own use.
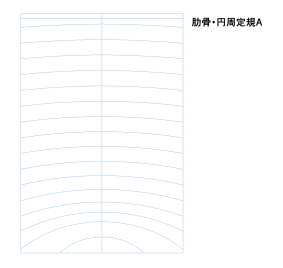
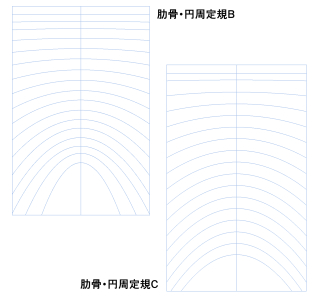
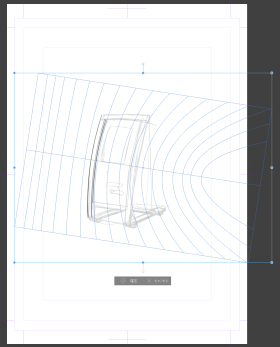
Strong and weak lines can be drawn with pen pressure according to the ruler, so I think it will suit those who are not good at correct line width or uniform lines from vector drawing.
The data is probably not that heavy.
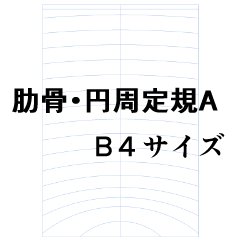
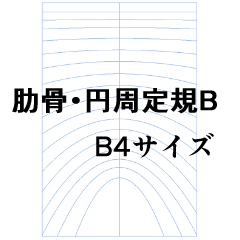
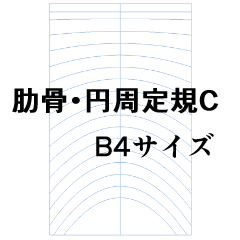
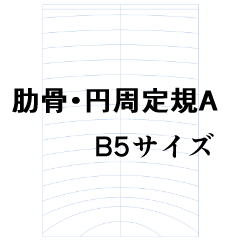
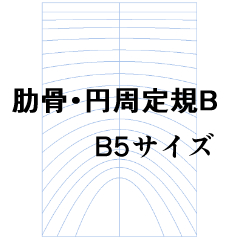
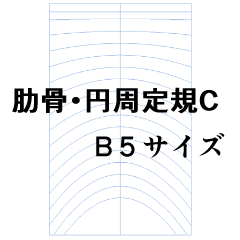
It contains three types: Rib / Circumferential Ruler A, Rib / Circumference Ruler B, and Rib / Circumferential Ruler C.
B and C have tighter curves than A.
Use something that is easy to use.
On all three sheets, the top line and the middle line are vertical and horizontal, so you can draw a little straight line.
Detailed usage
①
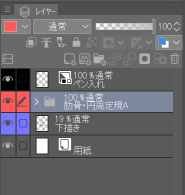
Place the rib and circumferential ruler folders at a layer location that is easy to see.
Recommended is at the top or directly below the pen insertion layer.
The reason is that when you move the ruler, it transforms or move layer "folder by folder".
It may be troublesome, but I think you will get used to it relatively quickly.
②
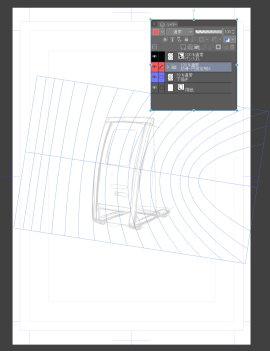
Align the rib and circumference ruler with the transform tool to the curve of the ruler to the curve of the draft.
If you scale up ruler or reduce it according to the size of the object you are drawing, it will be easier to work later. (Because it makes it easier to deform)
When the curve matches, select the penning layer and draw a line.
③
When the line is drawn, select the Ribs and Circumferential Ruler folder again and draw a line to match the other draft lines by transforming or move layer. Repeat.
* When you are done using the ribs and circumference ruler, delete or hide the folder. It's okay to leave it as it is, but it's probably or rather absolutely disturbing.
That's all for the basics, but please work in a way that is easy for each of you.
Have a good drawing life!
アナログの肋骨定規や円周定規のように感覚で使えるデジタル定規があればいいなぁと思い、自分で使う用に作った定規です。
定規に合わせて強弱ある線が筆圧で引けるので、ベクター作画からの線幅修正とか均一な線が苦手な人に合うと思います。
データはたぶんそこまで重くないです。
肋骨・円周定規A、肋骨・円周定規B、肋骨・円周定規Cの3種類が入っています。
BとCはAよりもカーブがきついものが入っています。
使いやすい物を使用してください。
3枚とも、一番上の線と中央の線は垂直・水平線となっているので、ちょっとした直線も引けます。
詳しい使い方
①
肋骨・円周定規フォルダを視認しやすいレイヤー位置に配置します。
おすすめは一番上かペン入れレイヤーの真下です。
理由としては定規を動かす時に、「フォルダごと」変形したりレイヤー移動するからです。
面倒くさいかもしれませんが、割とすぐ慣れると思います。
②
肋骨・円周定規を変形ツールで下描きの曲線に定規のカーブを合わせます。
描くモノのサイズに合わせて定規を拡大・縮小すると後々作業しやすくなります。(変形がしやすくなるので)
カーブが合えばペン入れレイヤーを選択し線を引きます。
③
線が引けたら再び肋骨・円周定規フォルダを選択し、変形するかレイヤー移動で他の下描き線に合わせ線を引きます。これを繰り返します。
※肋骨・円周定規の使用が終わったらフォルダを削除するか非表示にしてください。そのままにしても大丈夫ですが、たぶんというか絶対に邪魔です。
基本的な使い方は以上となりますが、各々がやりやすい方法で作業してください。
それでは良いお絵描きライフを!
For B4 size B4サイズ用
For B5 size B5サイズ用


Popular “Material catalog” materials


New materials





Badges
-
 MVP ◆This user has contributed greatly to the management of the community, by posting many great responses to the questions asked. Once every three months, MVPs are determined based on the points earned during that period and will be recognized accordingly.
 -
 New Valuable Player (NVP) ◆These are the next-best contributors to the community after MVPs. This is awarded to users who have not yet won an MVP award, based on the number of points they have earned.
 -
 Official Expert ◆Chosen out of all MVP awardees, who are already proof of excellence, this is a testimony of outstanding correspondence in the community. After careful screening, they are appointed by CELSYS and assume their position.Note: Formally called “Evangelists”
 -
 Official Moderator of CELSYS ◆Moderators are official CELSYS staff members who are fluent in Japanese as well as various other languages. Moderators are not experts on the software or illustration, so they are not able to directly answer your questions. However, moderators provide communication and language support to ensure that everyone can smoothly communicate with each other.
 -
 CELSYS official accountThe Official Administrator Account