

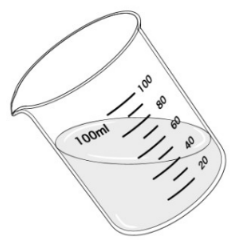
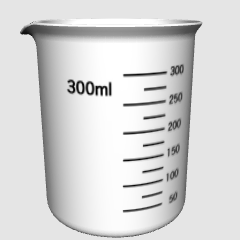
It is a beaker that can be adjusted in size in 5 steps.

You can choose 100ml, 200ml, 300ml, 500ml and 1000ml scales from the materials.
↓ For the size, change the value of the object scale as shown below and match it.

↓ I lined up 5 beakers on the desk. Simply drag and drop on the 3D material on your desk and it will land correctly on your desk.
Even if you change the object scale, it does not move while sitting correctly on the desk, so you do not have to make detailed adjustments by yourself.

The material is divided into "inside", "outside" and "water surface". By drawing these three separately and overlapping them, it becomes easier to create a glass-like expression that can see through the inside.
↓ Outside and inside


↓ This is what happens when you overlap.

The height of the water surface can be adjusted freely. Of course, the surface of the water can also be hidden.


No matter what angle you choose, you can draw the scale correctly, so you don't have to worry about making the scale mesh bias yourself.
[How to correctly draw the surface of the water when angled]
When angled, it is quite difficult to draw the correct water surface ellipse that matches the perspective.

Therefore, we will use another part "horizontal plane". This is just a thin side.
First, tilt the beaker.

Next, align the "surface of the water" in an appropriate position as if cutting the beaker.

↓ First, draw the "outside" and "inside" as usual

↓ Draw "inside" and another part "horizontal plane".

↓ Erase the unwanted part, leaving only half of the ellipse.

↓ Duplicate the ellipse and rotate it 180 degrees.

↓ Combine the two to create a perfect ellipse.

↓ If you match this ellipse to the image of the beaker above, you can draw a picture that matches the perspective almost perfectly.

↓ Now you can correctly draw the horizontal plane even if the beaker is angled. This method is equally available for other cups and glasses.

5段階で大きさを調節できるビーカーです。
マテリアルから100ml、200ml、300ml、500ml、1000mlの目盛りを選ぶことができます。
↓大きさはオブジェクトスケールの値を下の数値のように変えて合わせます。
↓ビーカーを5つ机の上に並べてみました。ただ単に机の3D素材の上にドラッグアンドドロップするだけで、正しく机の上に着地します。
オブジェクトスケールを変えても机の上に正しく乗ったまま動かないので、自分で細かい位置調整をする必要がありません。
素材は「内」「外」「水面」に分かれています。この3つを別々に描き出して重ねることで、内側が透けて見えるガラスらしい表現が楽になります。
↓外側と内側
↓重ねるとこうなります。
水面の高さは自由に調節できます。もちろん、水面は非表示にもできます。
どんな角度にしても、目盛りが正しく描けるので、自分で目盛りをメッシュ偏見させるなどの苦労が必要なくなります。
【斜めにした時の水面を正しく描く方法】
斜めにした時に、パースに合った正しい水面の楕円を描くのはなかなか難しいです。
そこで、別パーツ「水平面」を使います。これはただの薄い一枚の面です。
まず、ビーカーを傾けます。
次に、「水面」を適当な位置に、ビーカーをぶった切るように合わせます。
↓まず、通常通り「外」と「内」を描き出します
↓「内」と、別パーツ「水平面」を描き出します。
↓いらない部分を消して、楕円の半分だけを残します。
↓楕円を複製して、180度回転させます。
↓2つを合わせて、完全な楕円を作ります。
↓先ほどのビーカーの画像にこの楕円を合わせると、ほぼ完璧にパースに合った絵が描けます。
↓これでビーカーを斜めにしても水平面を正しく描くことができます。この方法は、他のカップやグラスでも同様に利用できます。
Category 1 カテゴリ1


Other materials by 金田二


Popular “Material catalog” materials


New materials


Badges
-
 MVP ◆This user has contributed greatly to the management of the community, by posting many great responses to the questions asked. Once every three months, MVPs are determined based on the points earned during that period and will be recognized accordingly.
 -
 New Valuable Player (NVP) ◆These are the next-best contributors to the community after MVPs. This is awarded to users who have not yet won an MVP award, based on the number of points they have earned.
 -
 Official Expert ◆Chosen out of all MVP awardees, who are already proof of excellence, this is a testimony of outstanding correspondence in the community. After careful screening, they are appointed by CELSYS and assume their position.Note: Formally called “Evangelists”
 -
 Official Moderator of CELSYS ◆Moderators are official CELSYS staff members who are fluent in Japanese as well as various other languages. Moderators are not experts on the software or illustration, so they are not able to directly answer your questions. However, moderators provide communication and language support to ensure that everyone can smoothly communicate with each other.
 -
 CELSYS official accountThe Official Administrator Account