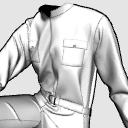
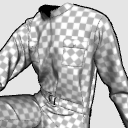
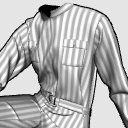
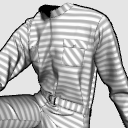
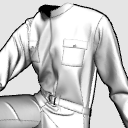
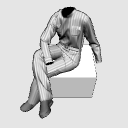
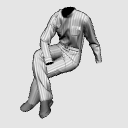
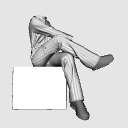
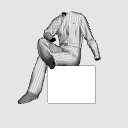
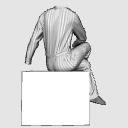
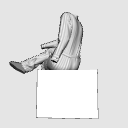
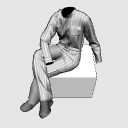
Since it is 3D, you can check it by turning it around to the angle of "I want to know the folds of this angle!!"
Not only will I refer to this pose, but I will also refer only to the wrinkles of the knees.
You can also use it.
Seen from various angles
You can also observe wrinkles on clothes, such as the viewpoint of looking up from below at the person sitting on the stairs.
This 3D product is for clothes only.
The body is not attached.
※Not movable
The wrinkles on clothes change depending on the pose every time you move.
However, CLIP STUDIO does not have a function to realistically simulate the movement of wrinkles depending on the material, so it is fixed.
◆Surface Material◆
The surface material has white lines, plain white, vertical stripes, horizontal stripes, and gray checkerboard.
Please use checkerboard and horizontal stripes as a guide when inserting the pattern.
You can use it as a reference for wrinkles only, or you can rasterize 3D and use it as it is, and please use it to shorten the time of drawing.
If you remove the apply light source check box, you can extract only the outline neatly.
◆ It is 90 yen per item in yen ◆
Some people may feel that it is a little expensive when you look at it as a clippy, but this 3D clothing model is 90 yen per yen.
Try to multiply your hourly rate by the time you spend looking for the wrinkles you want to draw.
Haven't it been a few hours since you noticed that you were looking for reference materials?
Repeat.
One 3D model is 90 yen in yen.
By the way, simple actual clothes and 3D clothes can often be made faster with actual clothes.
By the way, even with the same data, the download data of the pattern (blueprint of the full-size clothes) that can actually make pants is sold for 990 yen.
But the wrinkle reference 3D model is this price!
It may be difficult to understand if you don't have something to compare with, but it takes more time and effort than real clothes, and 90 yen is an insanely study price.
◆ How to easily draw wrinkles like that ◆
If you use it visually, please skip the information here.
For devices where actions aren't available
Call up the 3D model and adjust it to your preferred angle.
Create a new layer and draw a noticeable wrinkle on that layer.
(The color of the wrinkle lines has been changed for clarity.)
In fact, please draw it in your favorite color)
Select the model in the 3D layer and open the [sub tool detail palette]. (When you select 3D, press the spanner icon that appears below)
If you clear the [apply light source] check box on the [Shadow] tab, only the outline line will be displayed.
If there is an outline line that disappears, turn on the light source once and shoot the place where the line disappears.
In order to make it easier for me to draw illustrations, not as a modeler, I made a texture in advance and pasted lines that increase the amount of information about the clothes, such as seams and folds.
For PC version
The contour line is
1 Select a model on a 3D layer.
2 Open layer property.
3 Press border effect.
4 Change the contour line width with thickness of edges.
5 Set the outline color to your favorite color with the border color.
Now you can edge it in an instant.
When shading is not needed
Select the model in the 3D layer and open the [sub tool detail palette].
(When you select 3D, press the spanner icon that appears below)
If you clear the [apply light source] check box on the [Shadow] tab, only the outline line will be displayed.

Even with the same model, changing the direction of the light source changes the wrinkles that appear.
If you write it all, it will be noisy, so please thin it out nicely and write it.
Using auto action
In the case of the PC version, if you use auto action, it will automatically export the line art.
If you use the auto action, it will automatically export the line art.
I've made a auto action adjusted for dosing, which you can download for free from the assets.
https://assets.clip-studio.com/ja-jp/detail?id=2210430
You can also go from "See more" of "Another material from Usako Dressmaking Workshop" below.
Using
Call up the 3D model.
When using auto action, turn off shadows because it is easier to use without shadows.
How to remove shadows
Select 3D.
Press the spanner mark to open the sub tool detail.
Uncheck Cast shadows for this model.
Press the play button in the auto action Toolbox.
Then, it will automatically make a line drawing like this.
* If the image is small, the lines will be rough.
Clothes can be stacked on the same layer as the drawing doll.
Call the drawing doll and put the clothes you want to use on the same layer.
When you bring 3D to the canvas by dragging and dropping, it will appear where you release it on the canvas, so it is easier to align it if you drag and drop 3D to the same layer instead of on the canvas.
Since the mesh is finer for the convenience of expressing wrinkles realistically, the operation may be slightly affected depending on the specifications of the terminal you are using.
We are not responsible for operational problems due to specifications.
If you feel heavy, adjust the angle of the 3D and the direction of the light, then right-click on the layer palette → image with rasterize.
There are also 5 types of sleeves only.
There are also skirts and trouser yukatas, so please use the ones that can be used from other materials of the Usako dressmaking workshop below to save time and improve quality.
A real sewing teacher makes it with 3D modeling software dedicated to clothes.
I make 3D models of various clothes because of my work, so if you want information on new 3D models, please follow us!
Depending on the touch to be drawn, please adjust it by deformation.