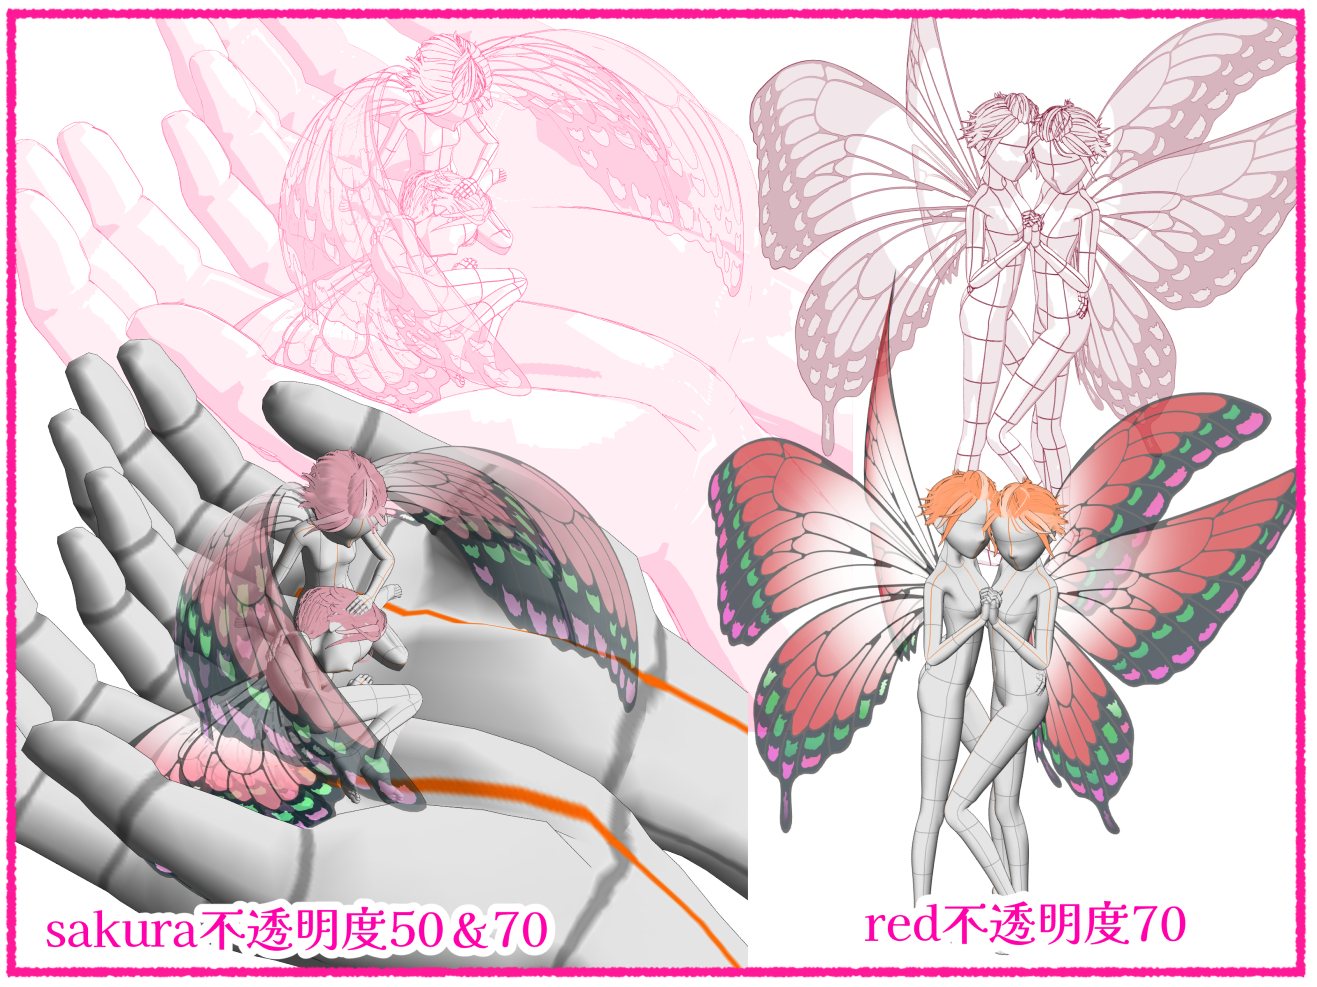
・ 3D material 2 pieces "Trial Fairy Feather A" opacity 70 Pink and Gray
・ 1 pose Fairy posing talking
・ Body shape 1 piece fairy slender height body
Above * Only one feather is for the trial version. Hair is not included.
【Overview】
◆ The attached DEMO set has pink and gray feathers, and the gray is hidden. Please try changing the display as appropriate.
【Example of use】

◆ This is an example of the deployment set of the commercial version. I think it can cover most of the feather shapes that are likely to be used in illustrations and manga.
◆LT conversion and influence of ambient light◆
At the time of shooting× it is 8000px600dpi. It can be seen through even with LT conversion.
The feathers of the color are a lighter adjustment, but if you don't want shadows at all, turn off shadows.
Only the gray for Atari is darkened so that the ambient light 0.5~1.0 is easy to handle.
◆How to adjust feathers◆
In the case of a pre-placed set, everything is installed and the shape is adjusted, so if you use it as it is, you do not need to touch it.
Below is how to attach wings to your favorite body or transform them according to your image.
If you do not need it, please skip to the [Settings, etc.] item.
◇Wearing
From → [sub tool] [object list], drag and drop it to the model you want to feather,
Select [Attach to] → [Torso (part to be attached)].
After fine-tuning the size and position of the wings, the installation is complete. It is easier to adjust the reference axis to the object.
Once you put it on, it will follow you even if you change the pose, position, and size.
Of course, you can also wear it after adjusting the pose, but it is easier to put it on first.
◇Deformation by shape keys
It can be easily transformed with just a combination of 5 knobs.
(I'm doing it with GIFs, but it's easier if you make the shape and reset appear on the tool property first.) )
Of course, you can also flap your wings with just the shape keys. It is symmetrical, so it is one touch.
You can add a complicated expression depending on how you combine the shape keys, so
Try different combinations.
Reset the shape keys to restore it.
◇ You can grab it with the mouse and move it individually (for those who want to stick to it)
You can directly drag the wings to grab them and move them. Since it moves around the base, you can intuitively fine-tune the angle and rotate. You can also adjust the angle at the manipulator of the bones.
However, the larger the shape key transforms, the more you get used to the adjustment.
Resetting the pause will bring it back.
・ Specifications of Fairy Wing A Number of polygons 2606 (lighter one)
Breadth 288cm
Length 184cm
・Model 3D drawing figure
Height 158.7cm 6.7 Head Body Slender
Adjusted to be easy to use for fairy illustrations.
* Both the wings and the model are human-sized, so please make the fairy smaller or the other model larger when juxtaposing it with other models.
* [File]→[Preferences]→[3D]→ [Model settings] item is selected.
Drawing dolls may apply. Please change it according to your needs.
・rendering settings [sub tool detail]→ [Environment]→[rendering settings]
The back side will be completely dark, so please uncheck the backface culling.
As for the lighting method, Gouraud is probably recommended.
There is no normal map in it, so the reflection may just be dazzling with a phone.
I think the rest is fine to your liking.
【Bonus】
I put on a simple fairy cane. It's as easy to move as the other props.
Tinker Bell please.
【Product Version】
The full version has both wings.
In the product version, there is a pose set that has been developed in colors, shapes, opacity, and placed and attached. Please take a look.
Please search by "manimani", "fairy", "feather" or ID.
Product version ID2162300 "Fairy Feather A Red System"
※Notes※
・Ver.3.0 and earlier versions may not work properly.
・Prices and contents of materials are subject to change without notice.


 ◆ This is an example of the deployment set of the commercial version. I think it can cover most of the feather shapes that are likely to be used in illustrations and manga.


 ◆製品版の配置セットの例です。イラストや漫画で使いそうな羽の形は大体カバーできると思います。


