

A set of auto-actions for finishing touches! Edit your colors in a new way that can't normally be done with exiting Clip Studio tools and filters.
An auto-action suite meant for final adjustments by letting you use adjustment layers with a saturation mask applied.
(It only works on the selected layer, so be sure to merge everything into a new layer before using these auto-actions.)


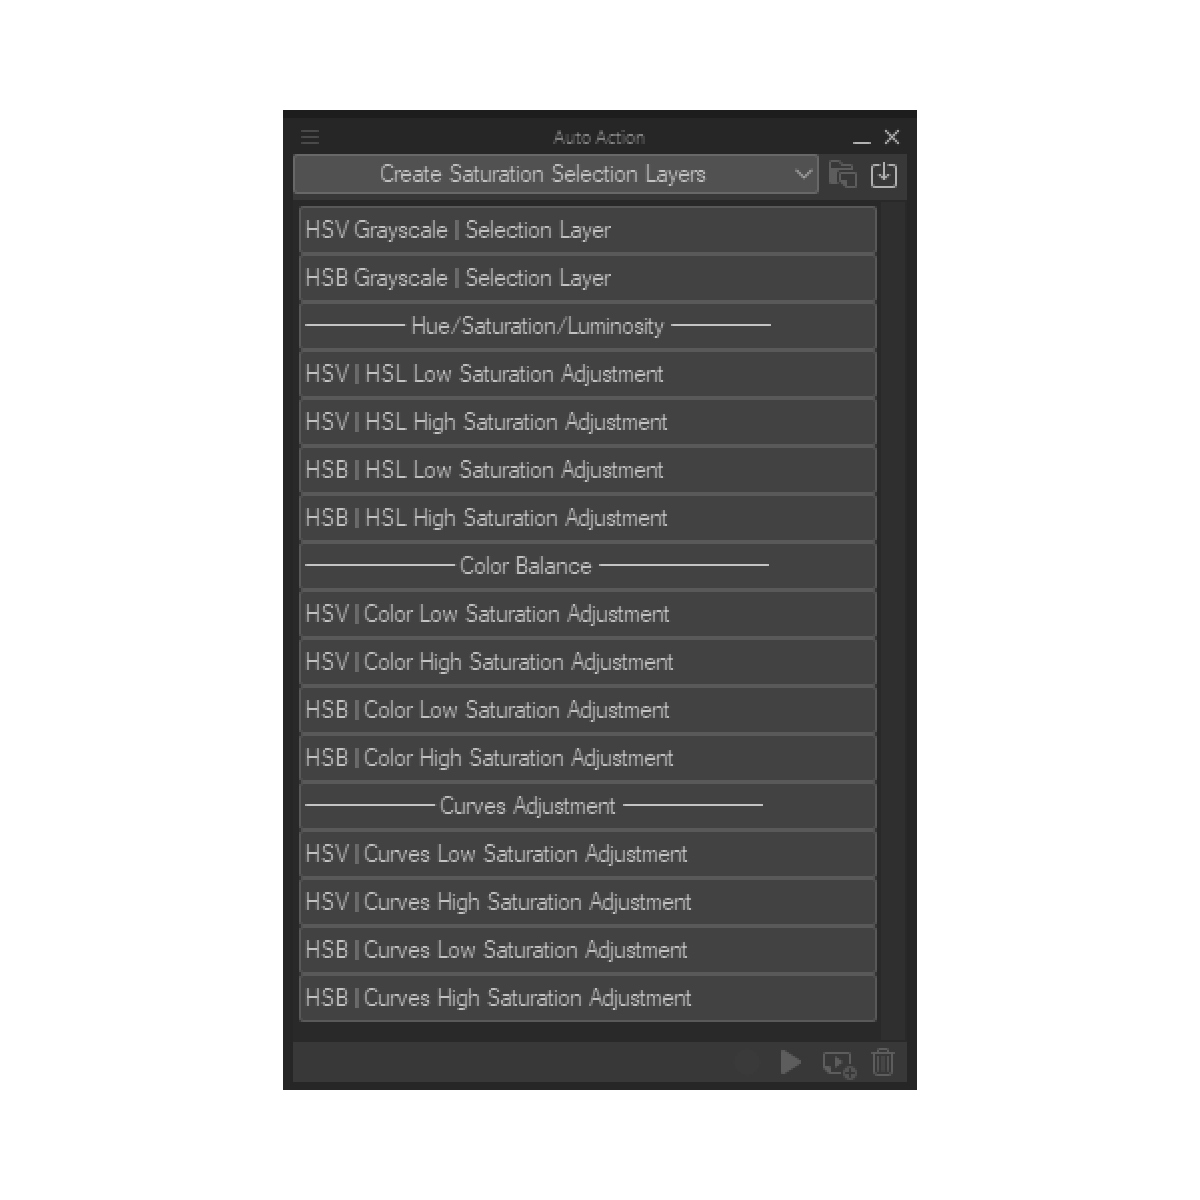
The set is organized as the following:
- 2 actions for creating a selection layer of the saturation map itself
- One action is for creating a saturation map based on Brightness, another action creates a saturation map based on Value.
- Once a selection layer is created, you can simply double-click on the layer icon to automatically create a selection. Then, while you have a selection, you can create any adjustment layer to automatically apply that selection as a mask.
- Useful for when you want to have more control over your adjustments by having the raw saturation data.
- Useful for when you want to create advanced gradient map layers!
- For lazy people like me who want to just adjust the colors right away. I chose H/S/L, Color Balance, and Curves as the adjustment layers because those are the three adjustment layers I use most often.
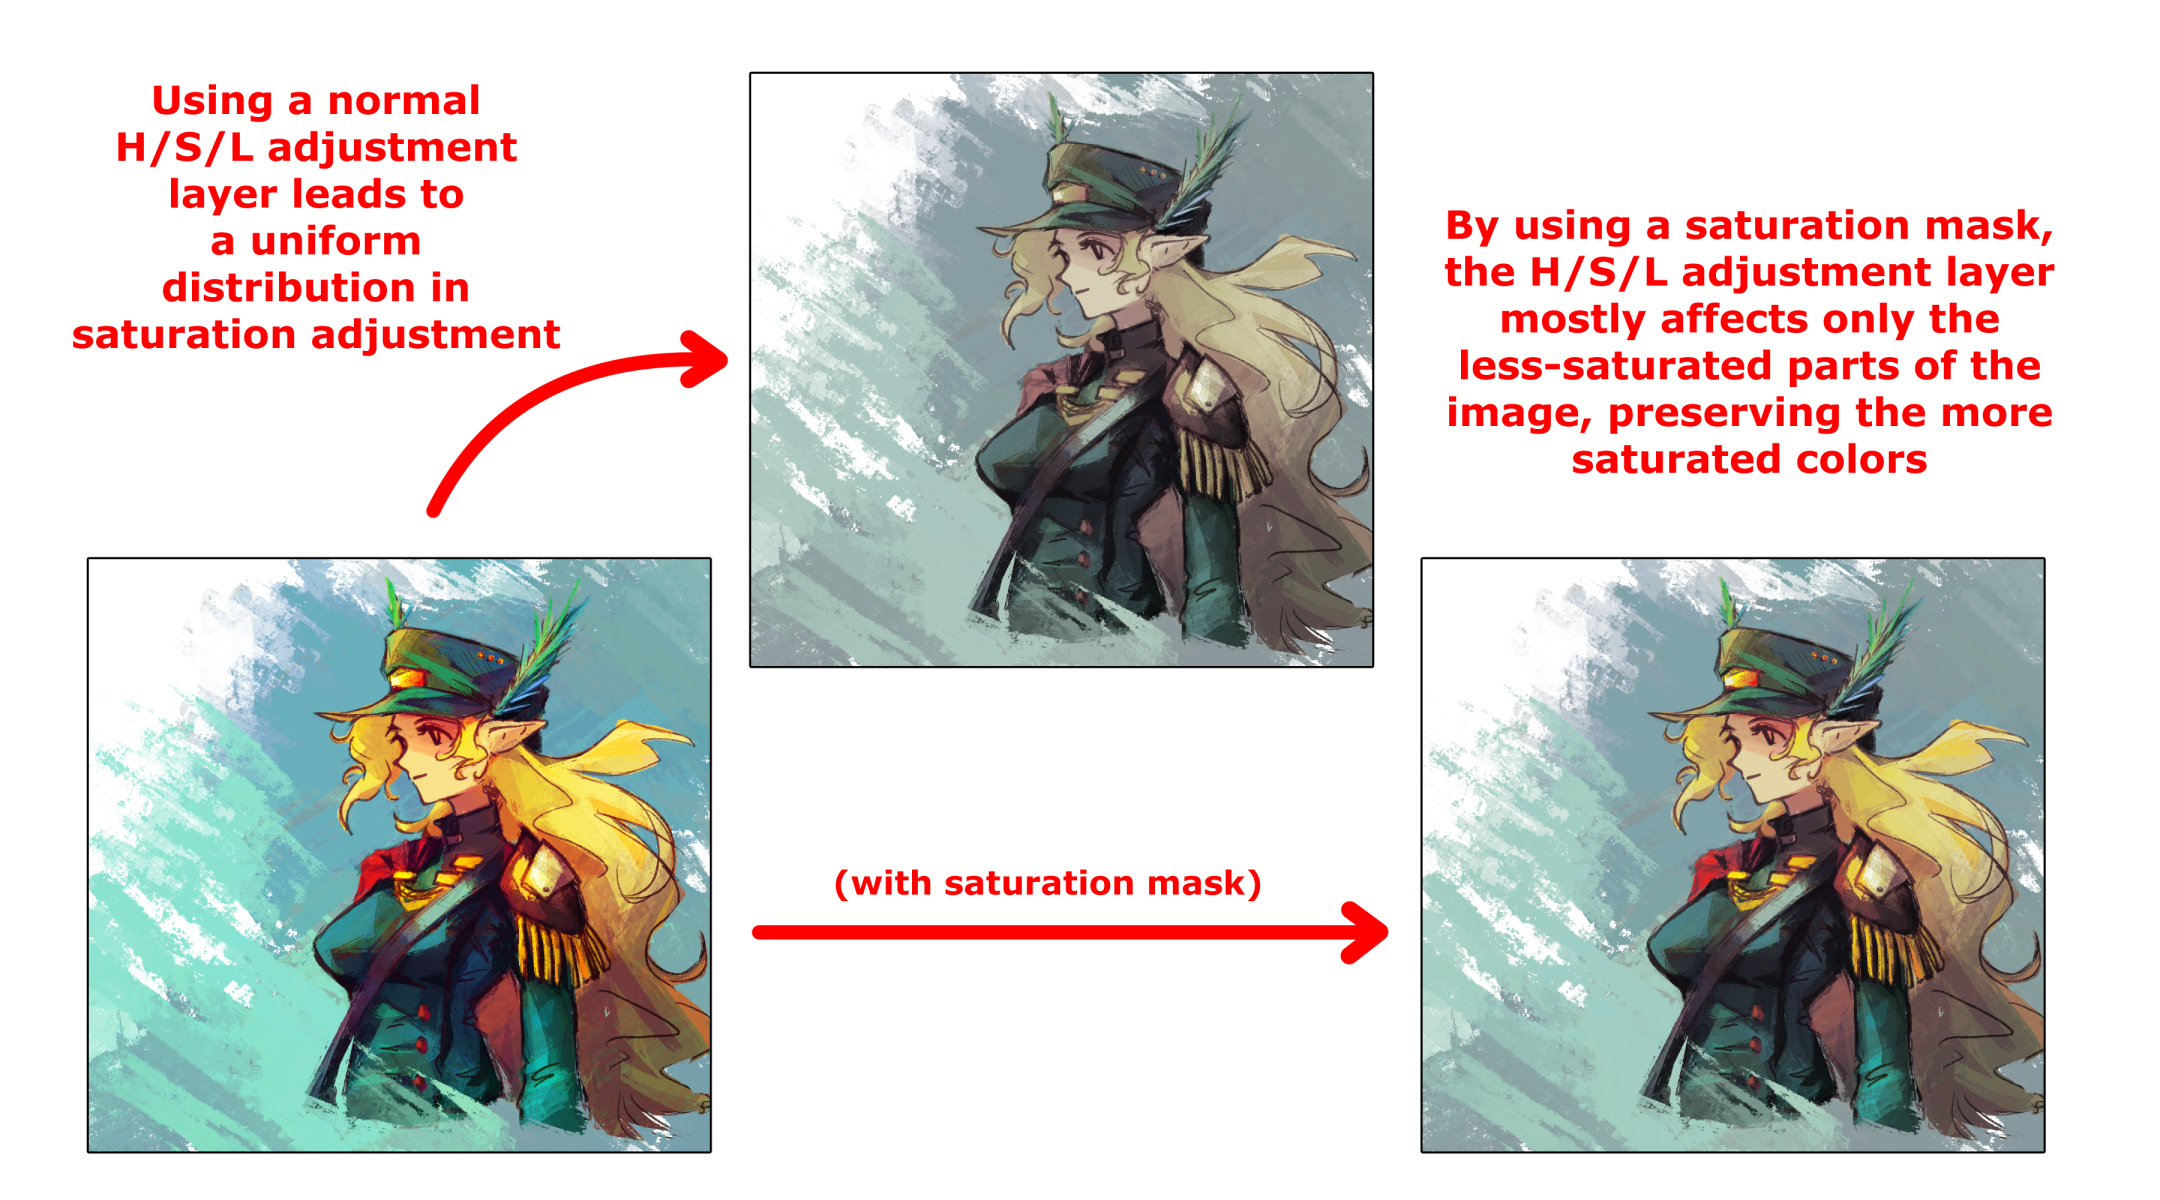
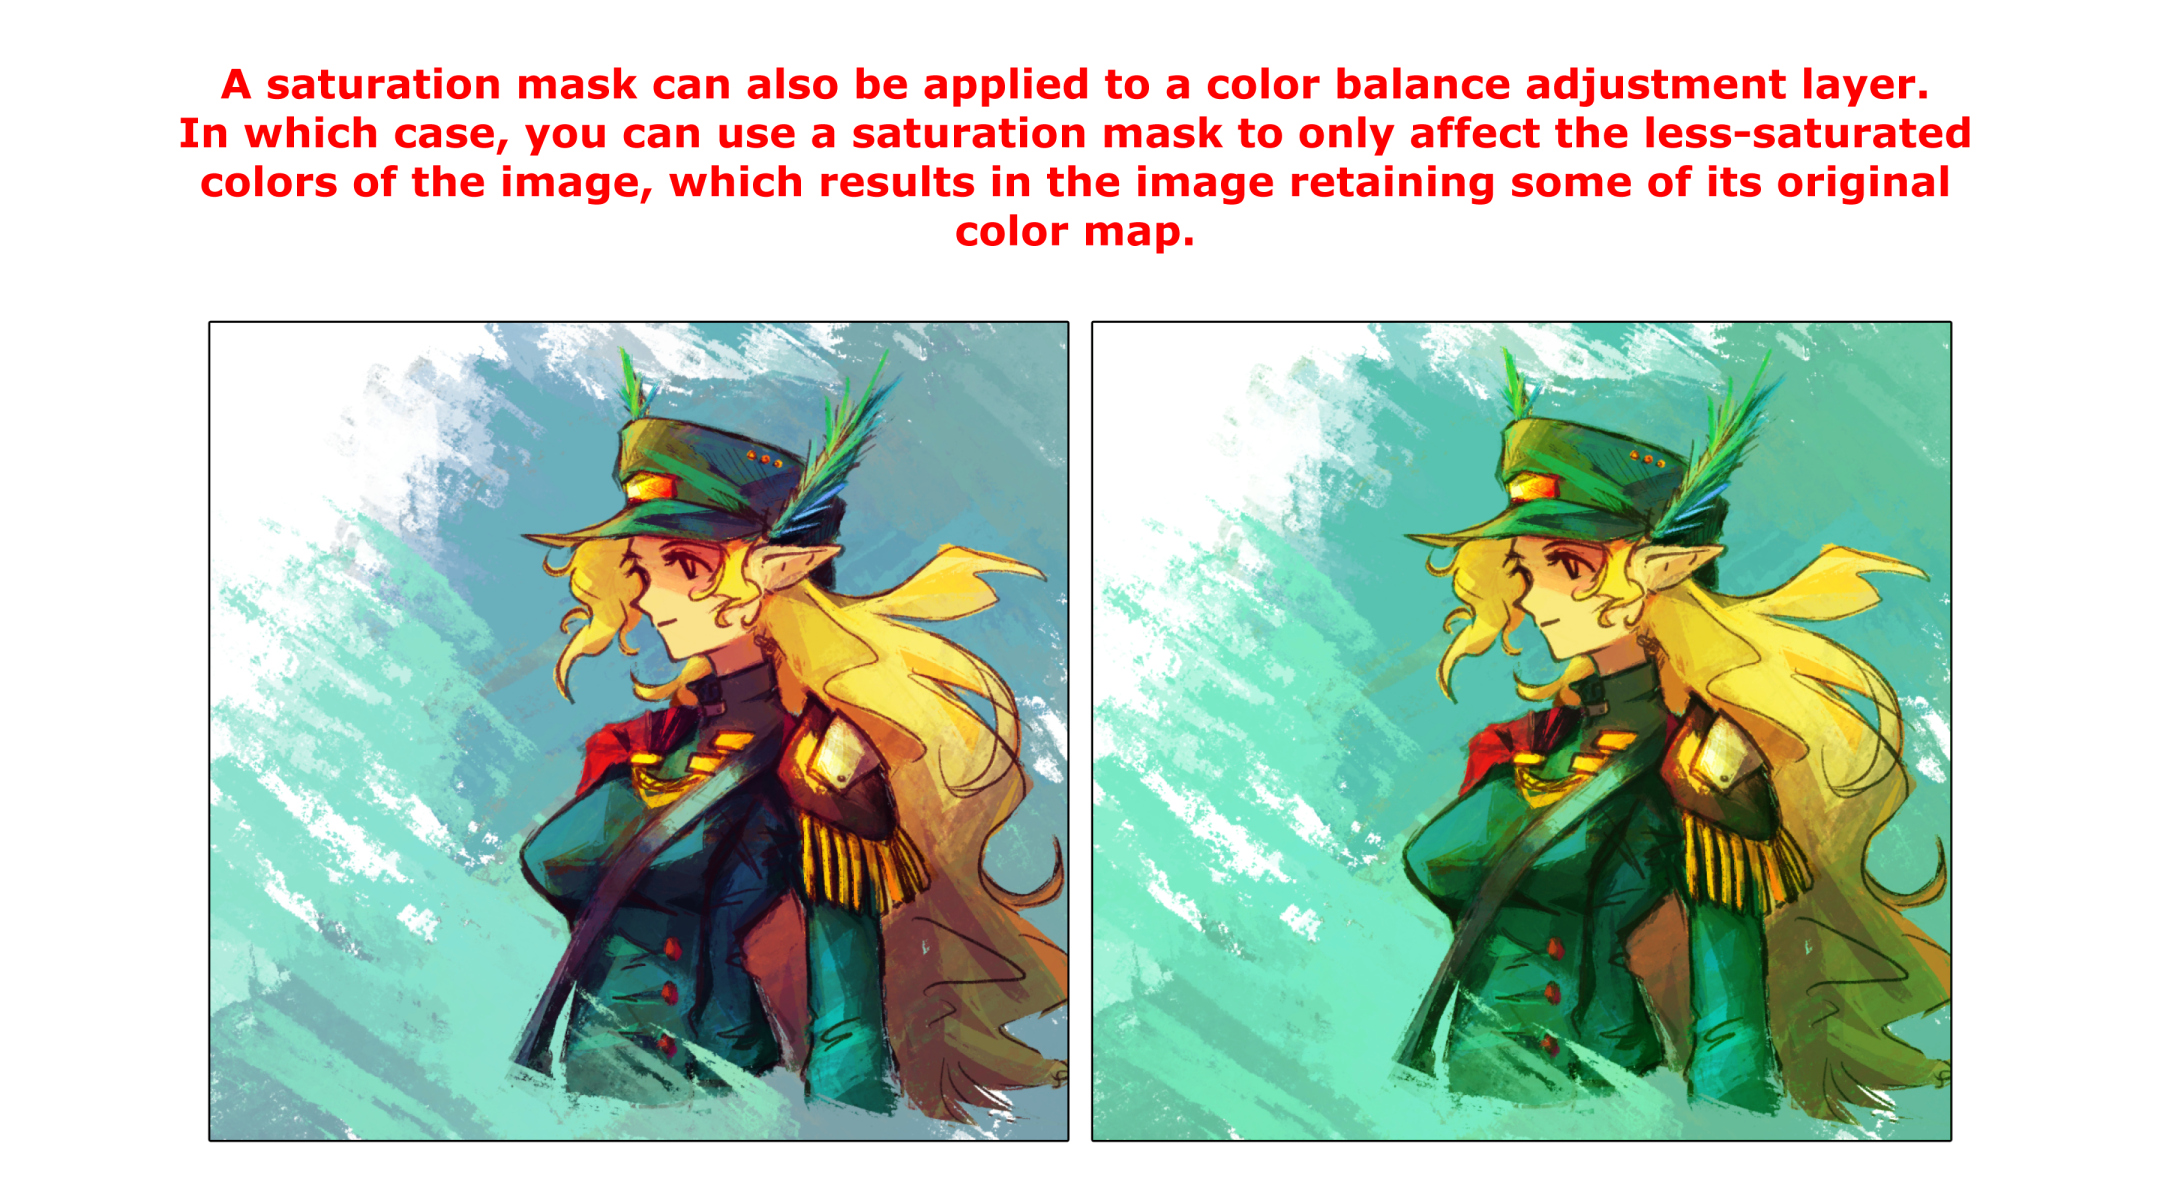
- Choose 'Low Saturation' to create adjustment layers that will affect less-saturated colors.
- Choose 'High Saturation' to create adjustment layers that will affect more-saturated colors.

The difference between an HSB and an HSV saturation map is very technical, I would suggest just playing around with both HSB and HSV adjustments to see how it will affect your drawings!
***These auto-actions are very history-intensive, and uses a lot of different steps to reach the desired effects. If you wish to undo changes, I would advise just simply deleting the created layers instead of using 'Undo'.
Auto Action

Update history
Ver. 1 - March 19 2024


Other materials by Ffgghhjj


Popular “Material catalog” materials


New materials


Badges
-
 MVP ◆This user has contributed greatly to the management of the community, by posting many great responses to the questions asked. Once every three months, MVPs are determined based on the points earned during that period and will be recognized accordingly.
 -
 New Valuable Player (NVP) ◆These are the next-best contributors to the community after MVPs. This is awarded to users who have not yet won an MVP award, based on the number of points they have earned.
 -
 Official Expert ◆Chosen out of all MVP awardees, who are already proof of excellence, this is a testimony of outstanding correspondence in the community. After careful screening, they are appointed by CELSYS and assume their position.Note: Formally called “Evangelists”
 -
 Official Moderator of CELSYS ◆Moderators are official CELSYS staff members who are fluent in Japanese as well as various other languages. Moderators are not experts on the software or illustration, so they are not able to directly answer your questions. However, moderators provide communication and language support to ensure that everyone can smoothly communicate with each other.
 -
 CELSYS official accountThe Official Administrator Account