

A auto action that creates a shadow color from gray and color information.
There are instructions on how to use it, so please check the explanation.
グレーとカラーの情報から影色を作成するオートアクションです。
使い方に手順がありますので、解説を確認してください。
⚠️ Let's ⚠️ save the file before running auto action

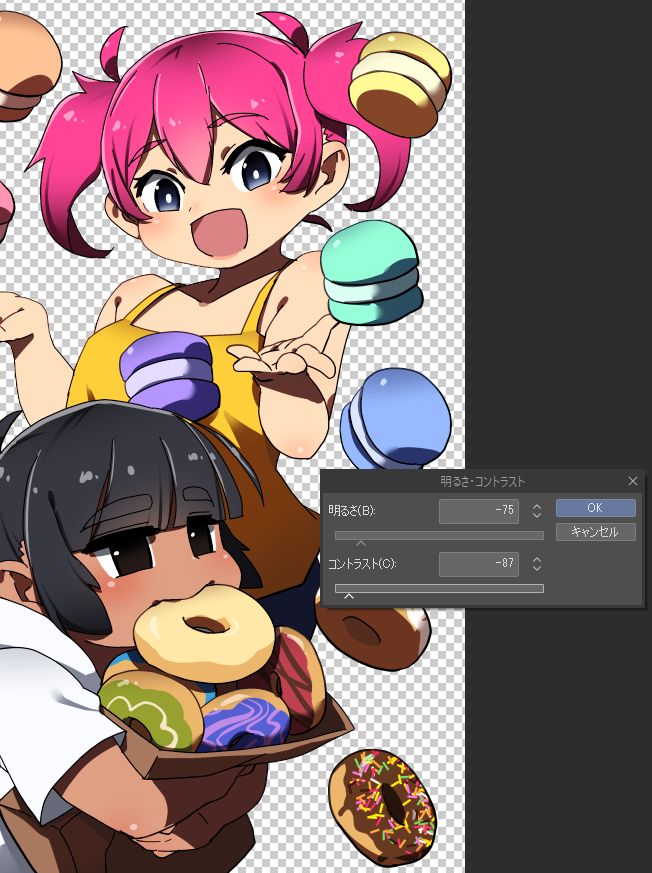
This auto action is a auto action to create a shadow color (3) from a gray layer (1) that specifies the shade of the shadow, and a layer (2) with a color that specifies the color.
We have prepared an explanatory video, so please check this as well.
CLIP STUDIO Shadow Color Creation auto action Explanation First Part How to Usehttps://youtu.be/3d8ZMt5SKcw

■Essential procedures for playing auto action
Sample file 1.clip
https://drive.google.com/file/d/14Yk0Wu_LYY4bMb147KpZEa7endn7Kp4W/view?usp=sharing

- Make sure that there are two layers, color and gray, and that the color layers are in the top order. In addition, the color layer is selected.
- Select the shadow color creation auto action and press the play button.
How to create color and gray layers

- Layers of color should be painted in standard colors. (1)
- The gray layer is based on a gray with a brightness (V) or luminance (L) of 60%, with a color lower than 60% to darken the shadow color and a color closer to white if it is higher. Paint it in gray with a reference of 60% gray. (2)
■ Adjust the created shadow color and describe the layer
We have prepared an explanatory video, so please check this as well.
CLIP STUDIO Shadow color creation auto action Commentary Second part Adjustment
https://youtu.be/J9zWFXqLgcg


 Sample file for checking adjustment 2.cliphttps://drive.google.com/file/d/1w5y1IEnhQhVFa9JqqQTm1qP9cnEizZoC/view?usp=sharing


 60~100 colors approaching grey white
 0~20 colors approaching gray black
 0~40 grey bluish color
 0~40 gray saturation and brightness
 Shifting high-saturation green to blue
 Low brightness and contrast
 Low saturated hue
 Low saturation brightness and contrast
 Overall hue
 Overall brightness and contrast
 Shifting the color around red ~ purple to blue
 Move colors around green to blue
- layer name "5 : Low Lightness" applies to colors with a brightness (V) specified in the color layer of 0~70%.
- For layer name "6 : Low Saturation Hue" and "7 : Low Saturation", colors with a saturation (S) specified in the color layer are 0~20%.
Sample file for checking adjustment 3.clip
https://drive.google.com/file/d/15tADPusocCi6VC6Wyl-kHqnd0_Bz54sh/view?usp=sharing
Replace color and gray layers with folders
- Color and gray layers can be replaced with folders.
- Create folders for color and gray, and create layers of color and gray information within each.
- When playing shadow color auto action, close the folder, sort the color folder at the top as in the layer, select the color folder, and then play.
Sample file1_folder.cliphttps://drive.google.com/file/d/1InhaGprIpso04G-jDW2cfY8yxtGtRPnL/view?usp=sharing
■Others
- "The selection was not created." or "Currently invert selected area cannot run. Do you want to run it?" If such a dialog is displayed, select "OK" or "Yes (Y)" as it is. Appears when the color layer does not use a color close to red, or when a specific range of saturation or brightness is not used.
- Even with the same white shadow, if the saturation (S) is slightly increased, a blue-gray color that is close to the color wheel is created.
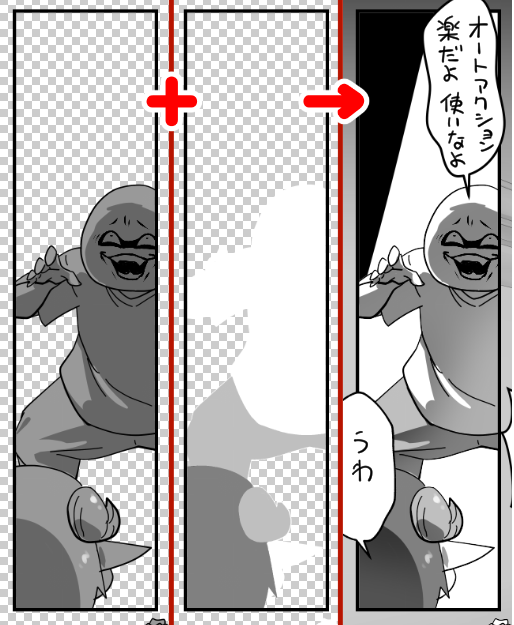
- I also use the shadow color creation auto action to create comics that I print in gray. It's easy!

CLIP STUDIO PAINT PRO Version: 2.0.1 has been confirmed.
⚠️オートアクション実行前にファイルの保存を行いましょう⚠️
このオートアクションは影の濃淡を指定するグレーのレイヤー(1)と、色を指定するカラーのレイヤー(2)から影色(3)を作成するオートアクションです。
解説動画を用意していますのでこちらも合わせて確認してください。
CLIP STUDIO 影色作成オートアクション 解説 前編 使い方https://youtu.be/3d8ZMt5SKcw
■オートアクションを再生するにあたって必須な手順
サンプルファイル1.clip
https://drive.google.com/file/d/14Yk0Wu_LYY4bMb147KpZEa7endn7Kp4W/view?usp=sharing
- カラーとグレーの2つのレイヤーが存在し、かつカラーのレイヤーの並び順が上である事を確認する。更にカラーのレイヤーを選択状態にする。
- 影色作成オートアクションを選択し、再生ボタンを押す。
■カラーとグレーのレイヤーの作成方法
- カラーのレイヤーは標準となる色で塗ってください。(1)
- グレーのレイヤーは明度(V)もしくは輝度(L)が60%のグレーを基準に、60%より低ければ影色は暗く、高ければ白に近付く色が作成されます。60%のグレーを基準としたグレーで塗ってください。(2)
■作成された影色の調整とレイヤーの説明
解説動画を用意していますのでこちらも合わせて確認してください。
CLIP STUDIO 影色作成オートアクション 解説 後編 調整
https://youtu.be/J9zWFXqLgcg
60~100のグレーの白に近付く色 0~20のグレーの黒に近付く色 0~40のグレーの青みがかった色 0~40のグレーの彩度・明度 高彩度の緑を青に寄せる 低明度の明るさ・コントラスト 低彩度の色相 低彩度の明るさ・コントラスト 全体の色相 全体の明るさ・コントラスト 赤~紫周辺の色を青に寄せる 緑周辺の色を青に寄せる- レイヤー名「5 : 低明度」ではカラーのレイヤーで指定した明度(V)が0~70%の色が対象になります。
- レイヤー名「6 : 低彩度色相」「7 : 低彩度」ではカラーのレイヤーで指定した彩度(S)が0~20%の色が対象になります。
調整確認用サンプルファイル3.cliphttps://drive.google.com/file/d/15tADPusocCi6VC6Wyl-kHqnd0_Bz54sh/view?usp=sharing
■カラーとグレーのレイヤーをフォルダに置き換える
- カラーとグレーのレイヤーはフォルダに置き換える事ができます。
- カラーとグレー用のフォルダを作成し、それぞれの中にカラーとグレーの情報のレイヤーを作成してください。
- 影色オートアクションを再生する際にはフォルダを閉じ、レイヤーの時と同じくカラーのフォルダを上に並び替え、カラーのフォルダを選択してから再生してください。
サンプルファイル1_フォルダ版.cliphttps://drive.google.com/file/d/1InhaGprIpso04G-jDW2cfY8yxtGtRPnL/view?usp=sharing
■その他
- 「選択範囲が作成されませんでした。」「現在 選択範囲を反転 は、実行できません。実行しますか?」といったダイアログが表示される場合はそのまま「OK」まはた「はい(Y)」を選択してください。カラーのレイヤーに赤に近い色を使用していなかったり、特定の範囲の彩度、明度が使用されていない場合に表示されます。
- 同じ白の影でも彩度(S)を少し上げると、カラーサークルに近い青い灰色などが作られます。
- 私はグレースケールで印刷する漫画も影色作成オートアクションを使って作成しています。楽だよ!
CLIP STUDIO PAINT PRO Version: 2.0.1にて動作を確認しています。


Other materials by 矩形波


Popular “Auto Action” materials


New materials


Badges
-
 MVP ◆This user has contributed greatly to the management of the community, by posting many great responses to the questions asked. Once every three months, MVPs are determined based on the points earned during that period and will be recognized accordingly.
 -
 New Valuable Player (NVP) ◆These are the next-best contributors to the community after MVPs. This is awarded to users who have not yet won an MVP award, based on the number of points they have earned.
 -
 Official Expert ◆Chosen out of all MVP awardees, who are already proof of excellence, this is a testimony of outstanding correspondence in the community. After careful screening, they are appointed by CELSYS and assume their position.Note: Formally called “Evangelists”
 -
 Official Moderator of CELSYS ◆Moderators are official CELSYS staff members who are fluent in Japanese as well as various other languages. Moderators are not experts on the software or illustration, so they are not able to directly answer your questions. However, moderators provide communication and language support to ensure that everyone can smoothly communicate with each other.
 -
 CELSYS official accountThe Official Administrator Account