A gradient character that you sometimes want to use in a comic or color illustration
But I pulled a gradient and pulled it back from something different... Troublesome!
It is a layer set that I made to eliminate the.
You can adjust the gradation easily by drawing a variety of border decorations and gradients, just by writing a letter.
There are four different types of black-and-white tone colors.
I check the color/350dpi and monochrome/600dpi of CLIP STUDIO PAINT EX.
The image below is an image sample.
And monochrome
-Color
Use
Drag the material to the layer area to expand it.
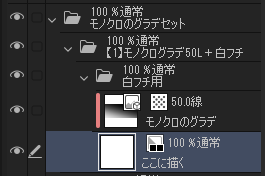
Draw here as you like.
It will be drawn in a specific color, even though you are currently choosing what color.
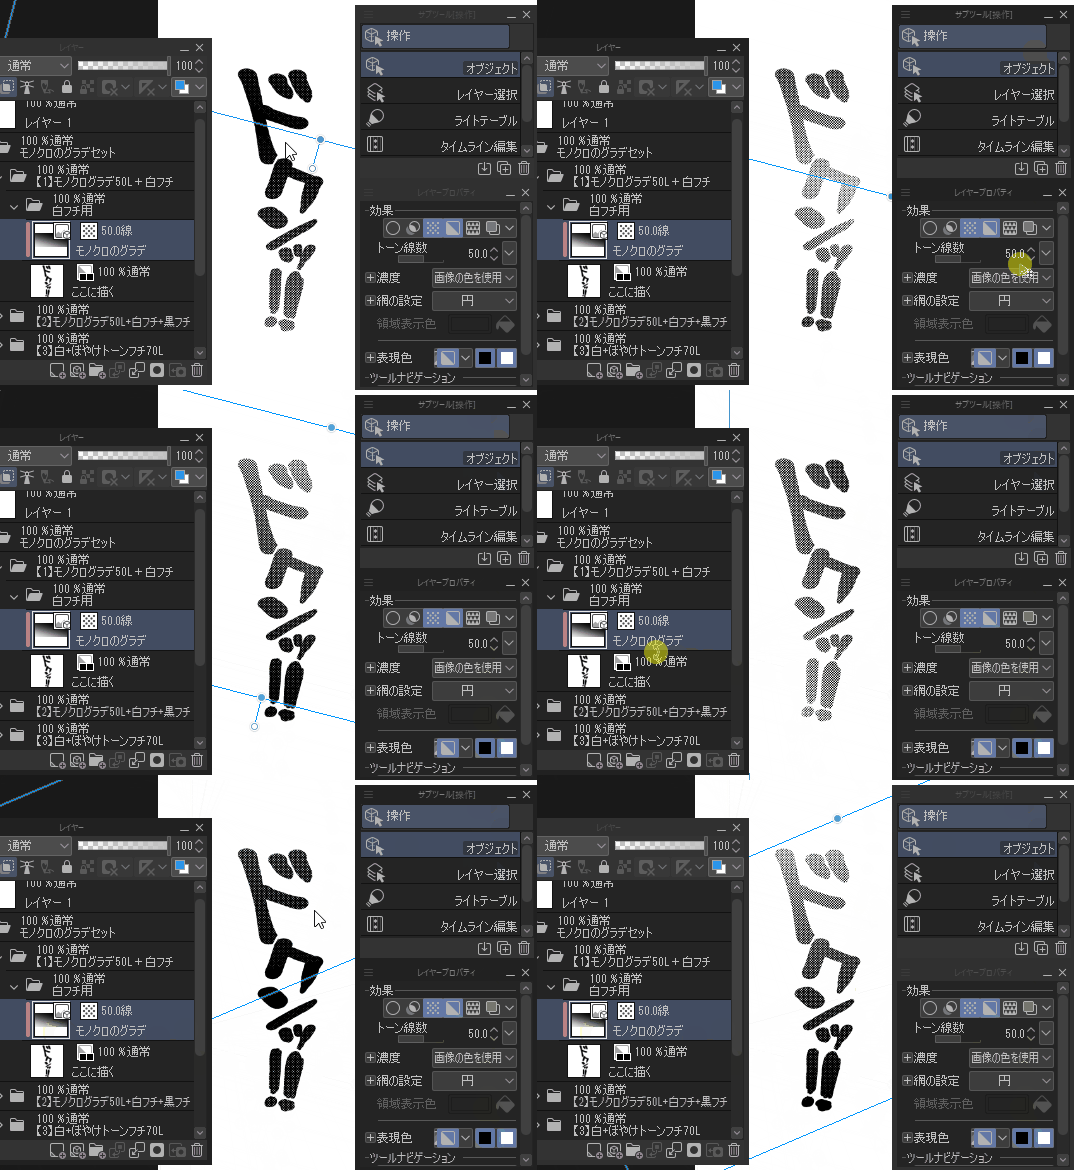
Fiddle layer property about thickness of edges fineness or number of lines of tone Y.
And if you want to adjust the gradation, object → to move and select the scale and rotation in operation
It is possible to change it while confirming the light and dark and stage of gradation in the sense.
3 [4] How to draw white letters
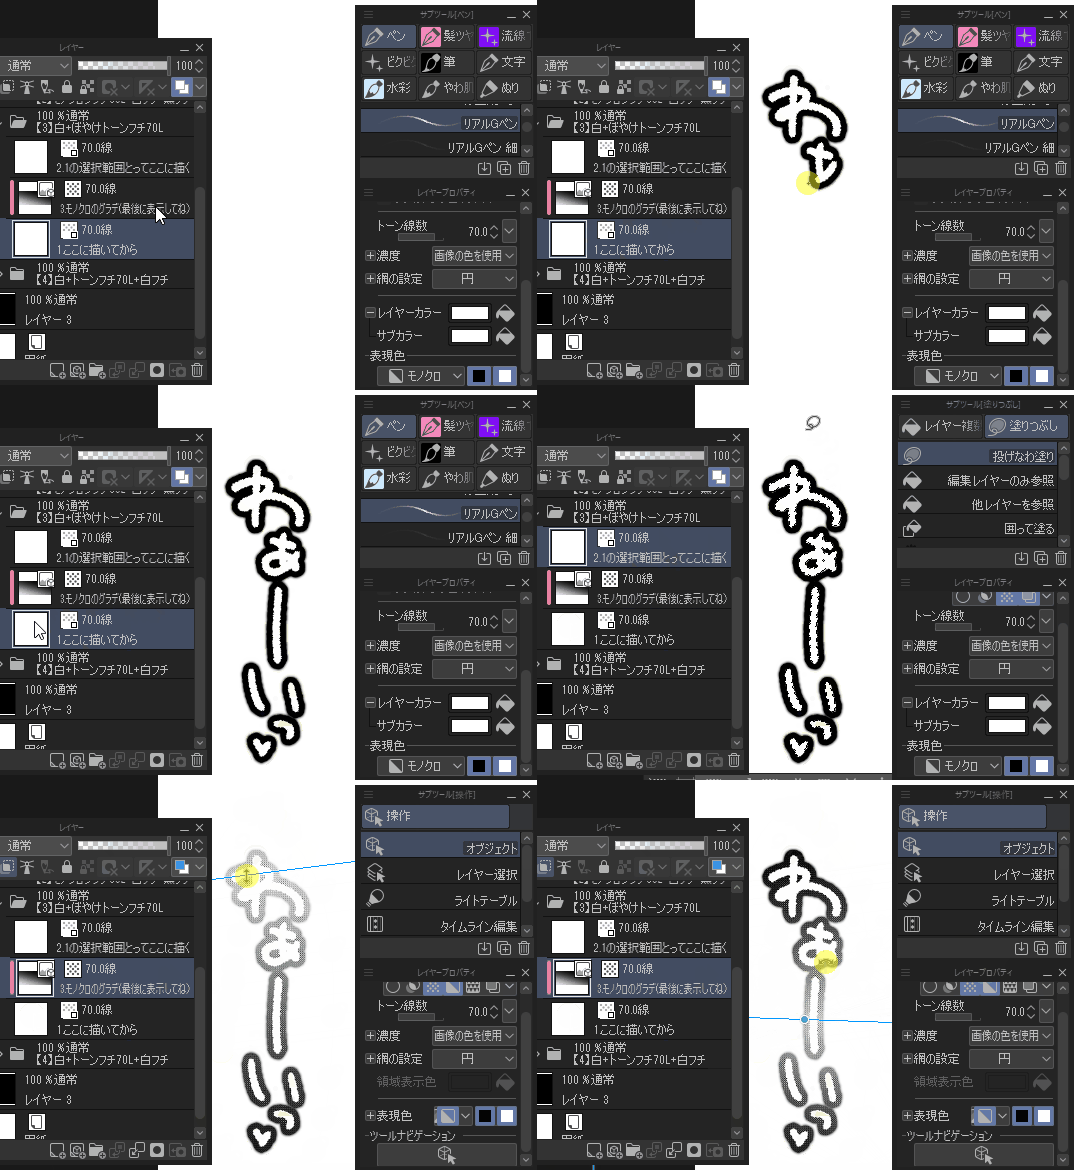
1. Draw a character in the bottom layer of each folder "1 . Draw here."
2. Select only the characters you drew. You can Ctrl + left-click the Rayer Samne that you drew ON the PC.
Other Ipads can be used with the edge keyboard, such as command (CTRL) + Rayer Sumnetup .
3. In the top layer of the folder"2.1 selection draw here" fill the remains selection.
4. The middle layer in the folder"3. ◯ gradation (last display)" is displayed, and the rest is freely scaled and rotated, and it is plum favorite.
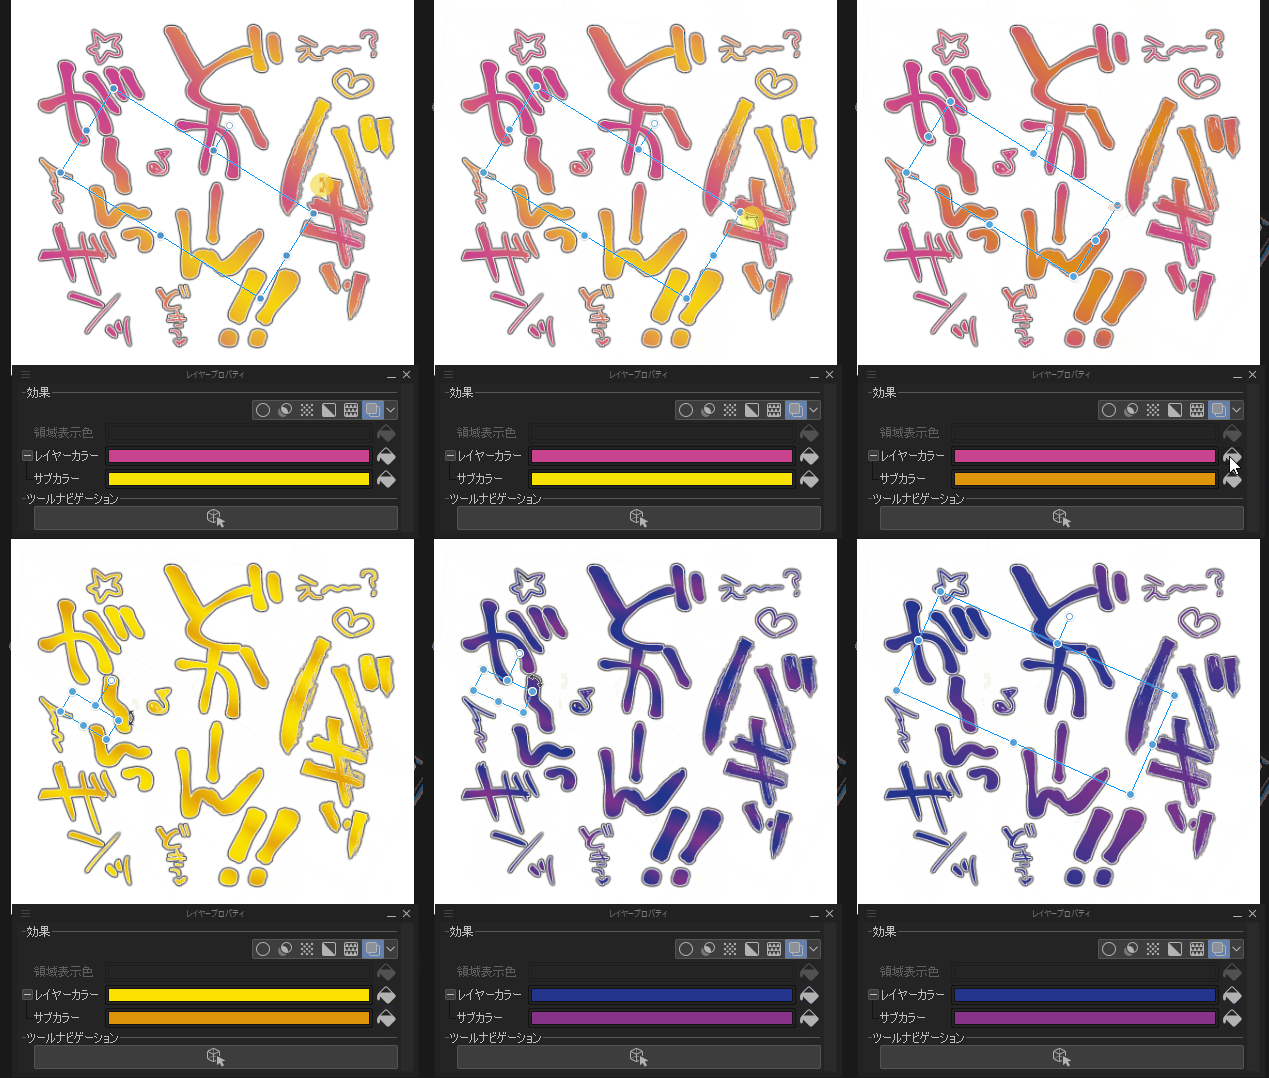
The basic operation of the color version is the same as the monochrome version, but the gradation hue is changed freely by a layer color and sub color, and various gradients can be made.
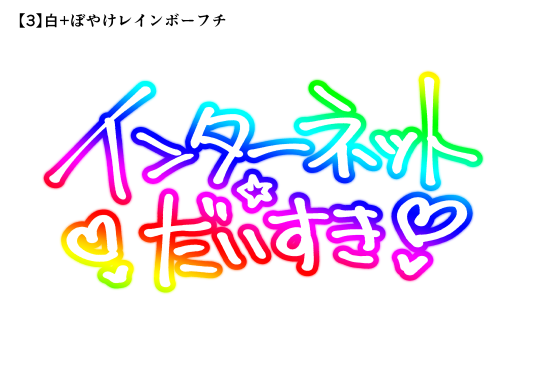
The place is very close to the train.
The way is the same.
It might be interesting to reflect gradient map.
! Note
There seems to be the thing that the export bugs when exporting the image while putting a lot of folders including image material in a file.The probability of the bug occurrence is reduced when erasing it except the folder used when exporting it.
漫画やカラーイラストでたまに使いたくなるグラデーション文字
でもいちいちグラデーション引いてなんか違ったから引き直して…はめんどくさい!
ってのを解消するために作ったレイヤーセットです。
文字を描くだけで色んなフチ装飾とグラデーションが反映され、後から簡単にグラデを調整できます。
モノクロトーン・カラー(・レインボー)で各4種類分です。
CLIP STUDIO PAINT EXのモノクロ/600dpiとカラー/350dpiで動作確認してます。
下記の画像はイメージサンプルです。
・モノクロ
・カラー
【使い方】
素材をレイヤーエリアにドラッグして展開します。

ここに描くに好きなように描いてください。
自分が現在何色を選んでいても特定の色で描画されます。
フチの太さ細さやトーンの線数ありなしについてはレイヤープロパティでいじれます。
そしてグラデの調整をしたい時はオブジェクト→操作で拡大・縮小・回転を選んで動かすと
感覚でグラデの明暗や段階を確かめながら変更する事ができます。

【3】【4】の白文字の描き方について

1.各フォルダ内最下層「1.ここに描いてから」のレイヤーに文字を描きます。
2.そこで描いた文字のみを選択します。PCだと描いたレイヤーサムネをCtrl+左クリックする事でできます。
IPad他はエッジキーボード等を使用してcommand(ctrl)+レイヤーサムネタップでできます。
3.フォルダ内最上位のレイヤー「2.1の選択範囲とってここに描く」に選択範囲そのままの部分を塗りつぶします。
4.フォルダ内真ん中のレイヤー「3.◯◯のグラデ(最後に表示してね)」を表示し、あとは自由に拡大縮小回転して好きな塩梅にします。
カラー版の基本操作についてもモノクロ版と同じですがグラデーションの色合いについてはレイヤーカラーとサブカラーで自在に変化させられるので、色んなグラデーションが作れます。


レインボーグラデもすぐ作れるように入れてます。
やり方は同じです。
グラデーションマップを反映させるのも面白いかもしれません。
!注意!
画像素材含めたフォルダをたくさんファイルに入れたまま画像を書き出す際書き出しがバグる事があるようです。書き出し時は使用するフォルダ以外は消すとバグ発生の確率が少なくなります。


