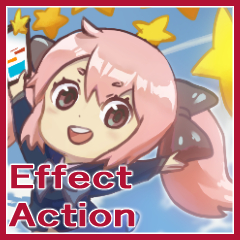

A set of basic auto action such as effects, adjustment layers, and textures. Eleven kinds. エフェクト、調整レイヤー、テクスチャ等の基本的なオートアクションのセットです。11種類。
-Layer adjustment layer with ★ mark
Fiddling with opacity and numbers
You can adjust a little how the effect takes.

(-There is a time when the impression of the picture is different from the saturation-100 in the hue relation.)

[Effect] Blurred

* Layer of effect comes out as "normal" layer, butIt is gorgeous and beautiful even if it is on the screen.
There is a simple glow that adds up the adjustment layer on the level correction and adjusts it.
Effect Glow


[Effect] partly luminous
Press the button where you want the light to be on the integrated layer.


[Effect] chromatic aberration

You can have three layers with a mask in the full erase state.
The necessary parts (such as the band of the face and the noise to want to look beautiful)

After you press the button on the integrated character layer to perform the action,
Let me move behind the characters.
Blur background blur with mask
Press the button on the integrated background layer.
The background blur layer has a mask on it
Please try to cut unnecessary places.

[Tex] perlin noise


Each effect has three layers, so you can
Just leave the texture layer you want compared to the other to clear it.
(Some pictures are also included in some tests, so some images are different)
・★マークのついたレイヤー・調整レイヤーは
不透明度や数値をいじって
エフェクトのかかり方を多少調整できます。

(・色相の関係で彩度-100の方だと絵の印象と違う時があります。

[効果]ぼやけ

*効果のレイヤーが「通常」レイヤーとして出てきますが、スクリーンにしても華やかで綺麗です。
そこにレベル補正の調整レイヤーを上に足して調整すると簡易グローに。
[効果]グロー


[効果]一部発光
統合レイヤー上で発光させたい場所を選択した状態でボタンを押してください。


[効果]色収差

全消し状態のマスクがついているレイヤーが3つできます。
それぞれ必要な部分(綺麗に見えてほしい顔部分やノイズの帯等)を

統合したキャラレイヤー上でボタンを押してアクションを実行した後、
キャラの後ろにレイヤーを移動させてください。
[ぼかし]背景ぼかし_マスク付
統合した背景レイヤー上でボタンを押してください。
背景ぼかしレイヤーにはマスクがついているので
不必要な場所は加筆して削ってください。

[tex]パーリンノイズ


それぞれの効果がかかった3つのレイヤーができますので
見比べて必要なテクスチャレイヤーだけ残して他は消去してください。
(見本画像には一部テストで作ったときの画像も入っているので、少し絵が違うものもあります)
Category 1 カテゴリ1
Update history
I made a mistake in the software that can be supported, so we corrected it
We have been re-published.
We are very sorry.
対応可能ソフトを間違えており、それを訂正させていただきましたので
再公開させていただきました。
誠に申し訳ございませんでした。


