
And float the clouds in the Sky auto action (また空に雲を浮かべるオートアクション) また空に雲を浮かべるオートアクション
Content ID:1872040
-
253
by
 ◆
◆
◆
perlin noise on canvas is auto action to create sky and clouds キャンバスにパーリンノイズで空と雲を作成するオートアクションです
auto action float clouds in the sky

The auto action of the Clouds
Select and play a command on the auto action
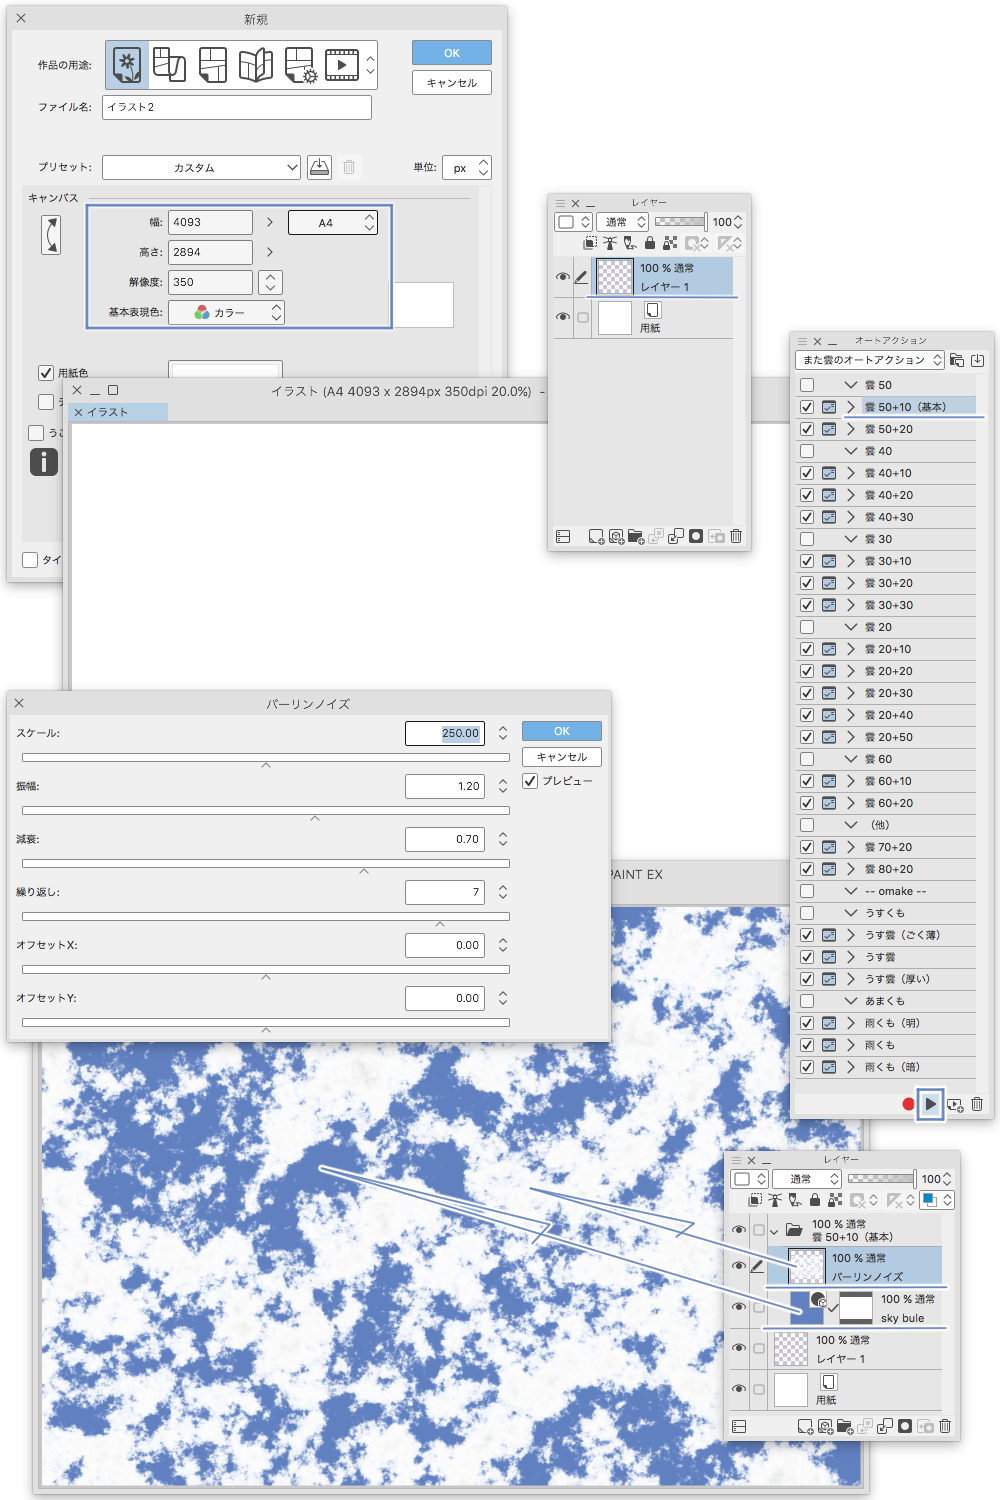
Empty "fill layer" and "cloud layer" are created on the canvas
The canvas of A4 (350DPI) is prepared.
(Please set the canvas size freely.)
Anyway, select "Basic" command and then "play"
Sky and clouds fill the canvas

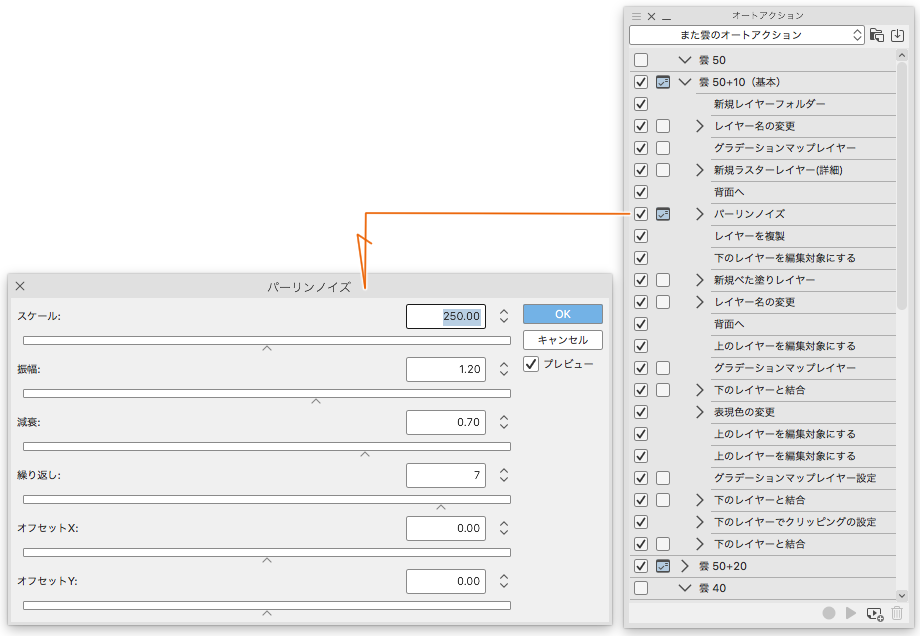
When "Play" is generated, "switch of setting" is included in generating "perlin noise".
You'll see the perlin noise settings, so you can change the scale of the cloud.
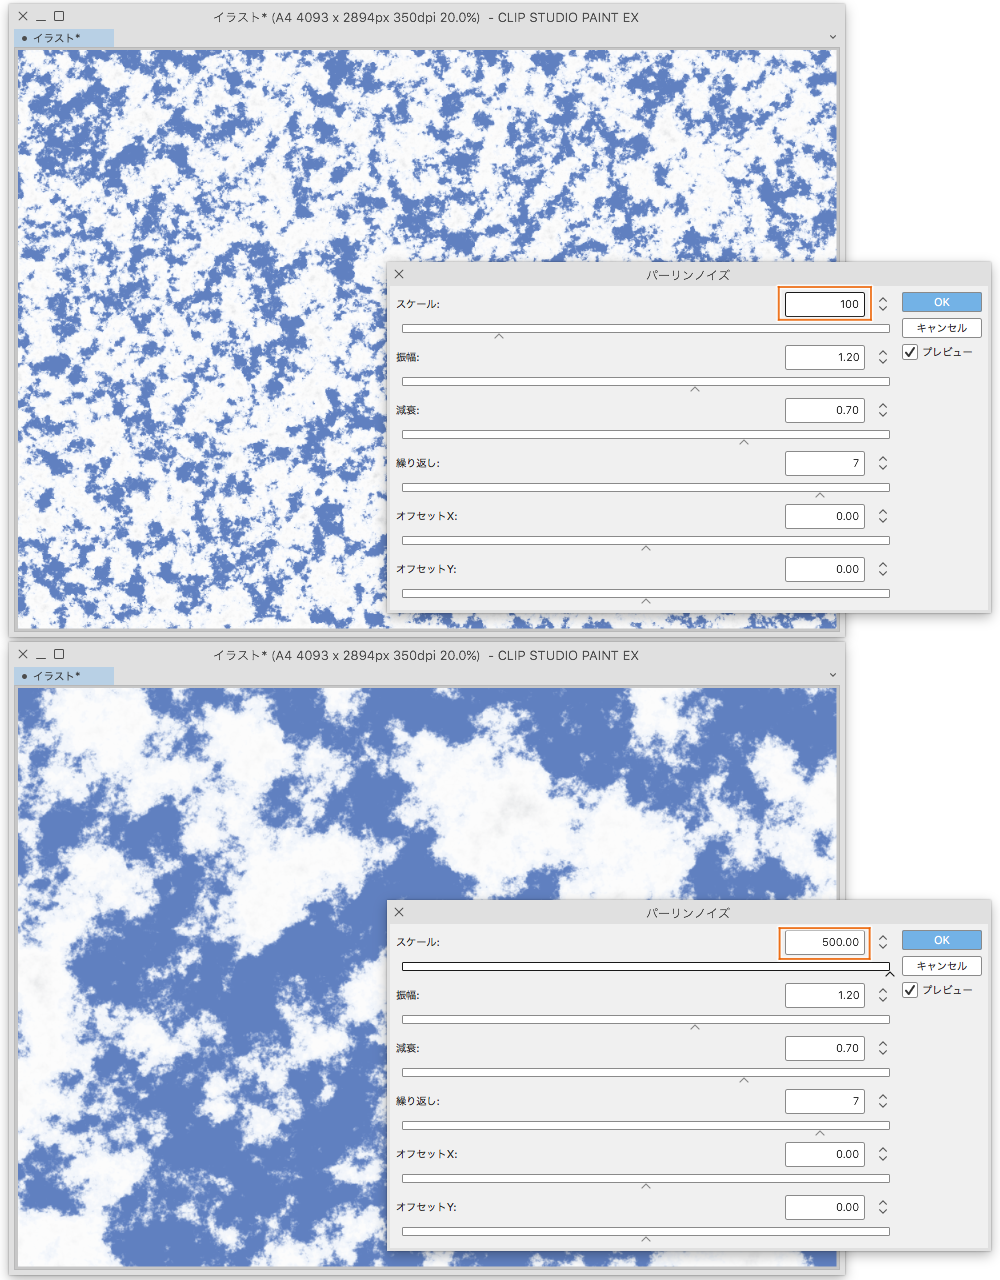
Try changing the scale number if it is too big or too small

Scale sample

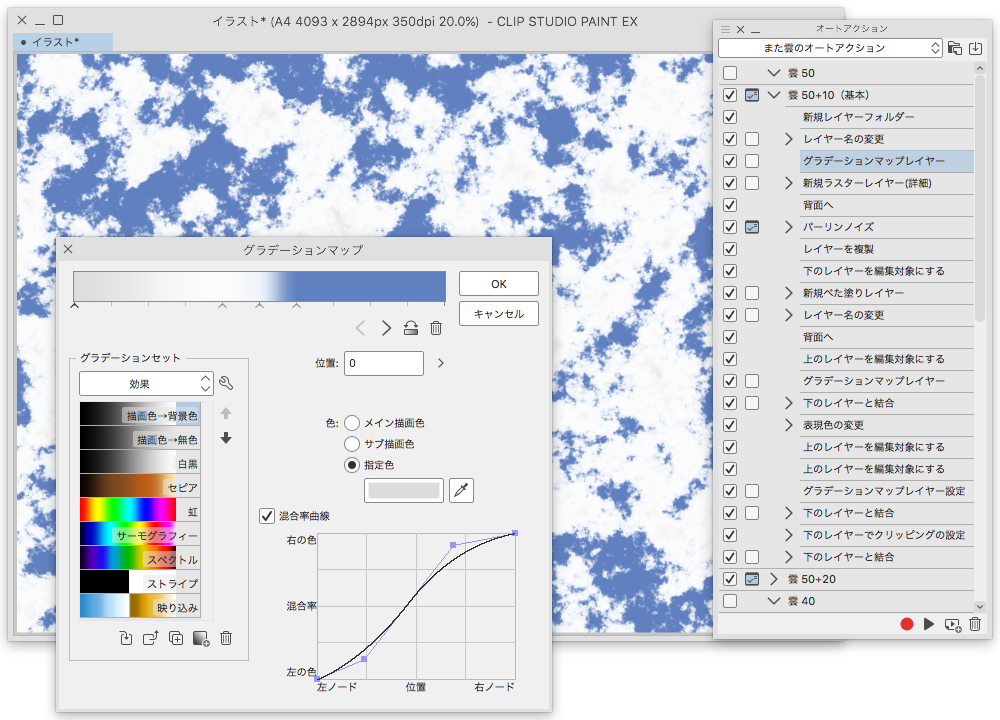
gradient map comes out several times in the command
I use it to create and mask the color of clouds.

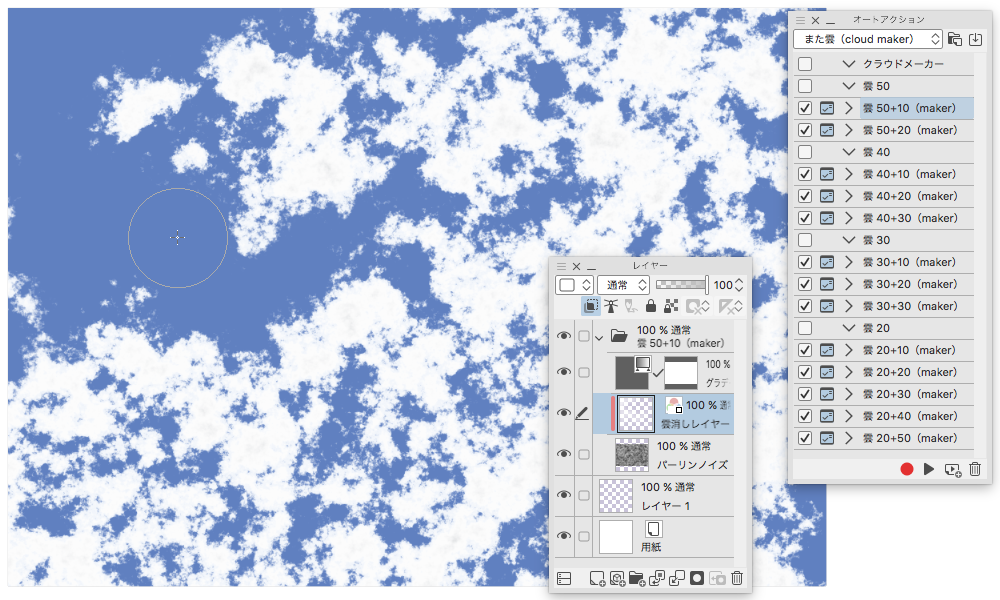
Cloud Maker
Select the command to play.
You can change the settings of the perlin noise like the auto action of the cloud.
OK.
On the Layer palette
Perlin noise layer (cloud identity)
The "Cloud Erase layer" and "gradient map" layers will be created

Is how to use
Select "Cloud Erase Layer" in the Layer palette
Draw the soft "airbrush" sub tool on the canvas.
I wonder if brush size is as easy to handle as perlin noise ' scale '.
Now we can draw it on the canvas.
When I say draw, the clouds disappear.
When I draw it with transparent color, it disappears and the cloud is revived.
It's just that.
Maker is the only thing to erase.
Please join the folder if you like cloud.
"(Omake) clouds in the sky" gradient Set
This is the gradient set I used when I was creating this auto action.
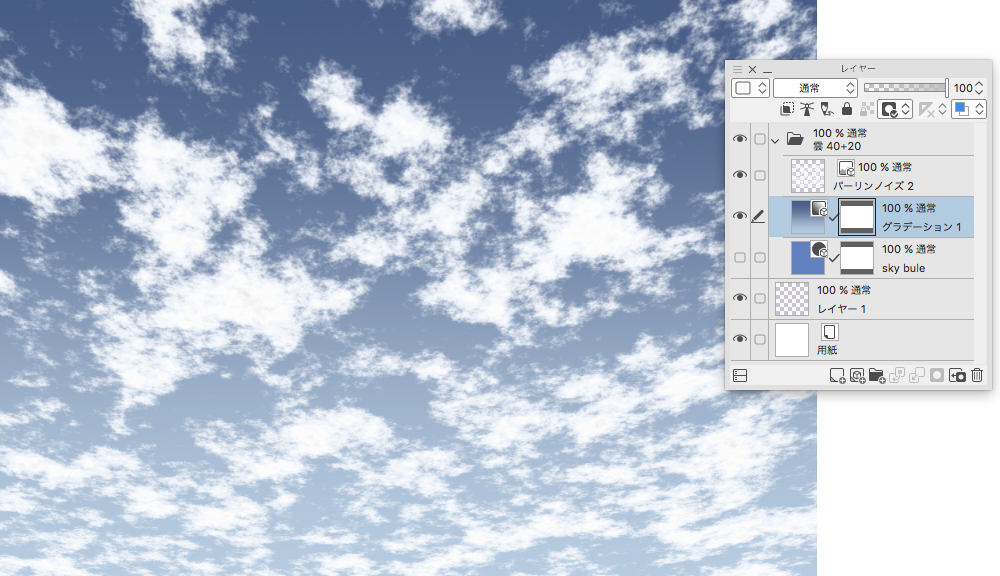
Sample
Two clouds piled up and the low cloud was darkened.

-The sky was a gradation, and the clouds were deformed (perspective distorted).

・ The clouds were erased in a circle, and the "deformation" of "Filter" menu was "swirl".

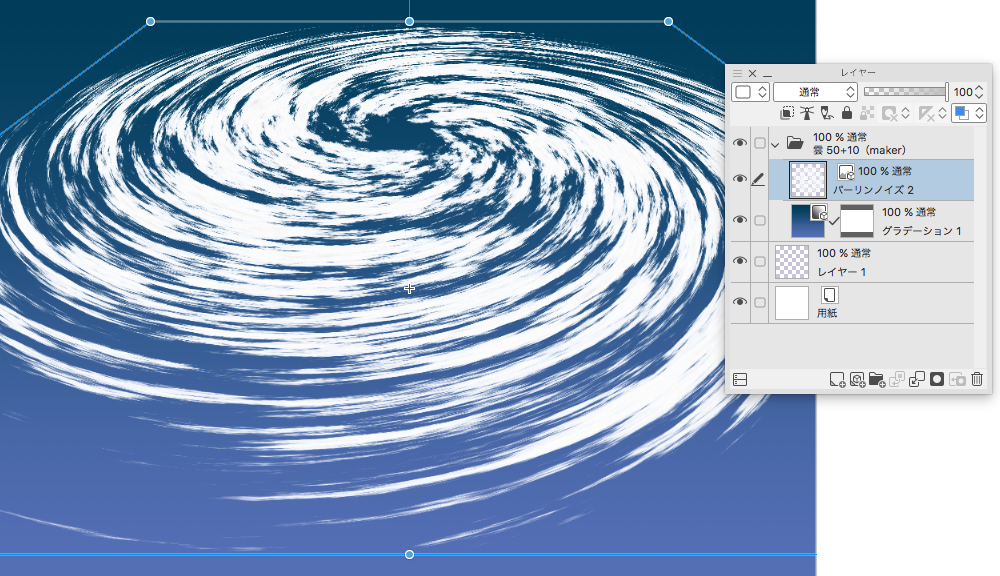
"The eye of the typhoon in the Clouds" (auto action)
Added auto action
I tried to auto action the "spiral" of "deformation" in the filter menu.
The new canvas (5000 x 5000px) is a large canvas
It will be created automatically.
It might be a little messy.
If you are having trouble creating your own canvas, uncheck "New" in the first command "auto action".
"Play" to set the rounded-type perlin noise and
The setting that "swirls" it is displayed in the order of the person.
You can play around with a little.
The resulting typhoon cloud is a deformed image material layer.
If you reset the deformation, you'll see the picture from above.
End
If you like the sky and clouds, please make image material layer.
You can also replace the sky blue layer created by cloud auto action with a blue gradient layer, or replace it with a dark sky.
Add auto action command
I think the sky of cloud maker can also be divided by clouds and layers.
Playing, please.
空に雲を浮かべるオートアクションです
「また雲のオートアクション」
オートアクションのテキトーにコマンドを選んで再生します
キャンバスに空の「べた塗りレイヤー」と「雲レイヤー」が作成されます
A4(350dpi)のキャンバスを用意します
(キャンバスサイズはこれに限らず自由に設定してください)
とりあえず「基本」のコマンドを選んで「再生」します
キャンバスいっぱいに空と雲が広がります
「再生」すると「パーリンノイズ」を生成するところに「設定の切り替えチェック」が入っています
パーリンノイズの設定が表示されるので、雲のスケールなどを変更できます
大きすぎたり小さすぎたりする場合はスケールの数値を変更してみてください
スケールのサンプルです
コマンドの中にグラデーションマップが何度か出てきます
雲の色を作成したりマスクに利用したりしてます
「また雲(cloud maker)」
テキトーにコマンドを選んで「再生」します
「また雲のオートアクション」と同じようにパーリンノイズの設定を変更できます
「OK」します
レイヤーパレットに
「パーリンノイズ」レイヤー(雲の正体)と
「雲消しレイヤー」と「グラデーションマップ」レイヤーが作成されます
使い方です
レイヤーパレットで「雲消しレイヤー」を選んでおいて
キャンバスにサブツールの「エアブラシ」の「柔らか」で描画します
ブラシサイズはパーリンノイズの「スケール」と同じくらいが扱いやすいかなと思います
これでキャンバスに描画します
描くと言って描くと雲が消えます
透明色で描くと消した雲が復活します
ただそれだけです
(maker)とは名ばかりで消し込むだけのものです
気に入った雲ができましたらフォルダーを結合してください
「(omake)空に雲」グラデーションセット
このオートアクションを作成しているときに使ったグラデーションセットです
「作例」
・二つの雲を重ねて低い雲を暗くしました
・空をグラデーションにして、雲を変形(遠近ゆがみ)しました
・雲を丸く消して、「フィルタ」メニューの「変形」の「渦巻き」をしました
「また雲で台風の目」(オートアクション)
(オートアクション)を追加しました
「フィルタ」メニューの「変形」の「渦巻き」をオートアクションで試してみました
「新規キャンバス」(5000 × 5000px)という大きめのキャンバスを
自動で作成してしまいます
少々面倒かもしれません
勝手にキャンバスを作成されるのが困るようでしたら「オートアクション」の最初のコマンドの「新規」のチェックを外してください
「再生」すると丸く型どられたパーリンノイズの設定と
それを「渦巻き」させる設定が人の順に表示されます
多少いじって遊ぶことができます
出来上がった台風雲は変形している画像素材レイヤーです
変形をリセットすれば真上から見た図になります
おしまい
気に入った空や雲ができましたら、画像素材レイヤーなどにしてください
「また雲のオートアクション」で作成した「sky blue」レイヤーを青いグラデーションのレイヤーなどと取り替えてみたり暗い空と取り替えたりすることもできます
オートアクションのコマンドを足せば
(cloud maker)の空も雲とレイヤーで分けることができると思います
あそんでください
auto action オートアクション


gradient set Omake グラデーションセット omake


Other materials by けも


Popular “Material catalog” materials


New materials


Badges
-
 MVP ◆This user has contributed greatly to the management of the community, by posting many great responses to the questions asked. Once every three months, MVPs are determined based on the points earned during that period and will be recognized accordingly.
 -
 New Valuable Player (NVP) ◆These are the next-best contributors to the community after MVPs. This is awarded to users who have not yet won an MVP award, based on the number of points they have earned.
 -
 Official Expert ◆Chosen out of all MVP awardees, who are already proof of excellence, this is a testimony of outstanding correspondence in the community. After careful screening, they are appointed by CELSYS and assume their position.Note: Formally called “Evangelists”
 -
 Official Moderator of CELSYS ◆Moderators are official CELSYS staff members who are fluent in Japanese as well as various other languages. Moderators are not experts on the software or illustration, so they are not able to directly answer your questions. However, moderators provide communication and language support to ensure that everyone can smoothly communicate with each other.
 -
 CELSYS official accountThe Official Administrator Account