
Crm_ Rough tint Pahaa (saturated line tool) (Crm_ラフめの濃淡パァァァ(集中線ツール)) Crm_ラフめの濃淡パァァァ(集中線ツール)
Content ID:1766964
-
5,744
by
 ◆
◆
◆
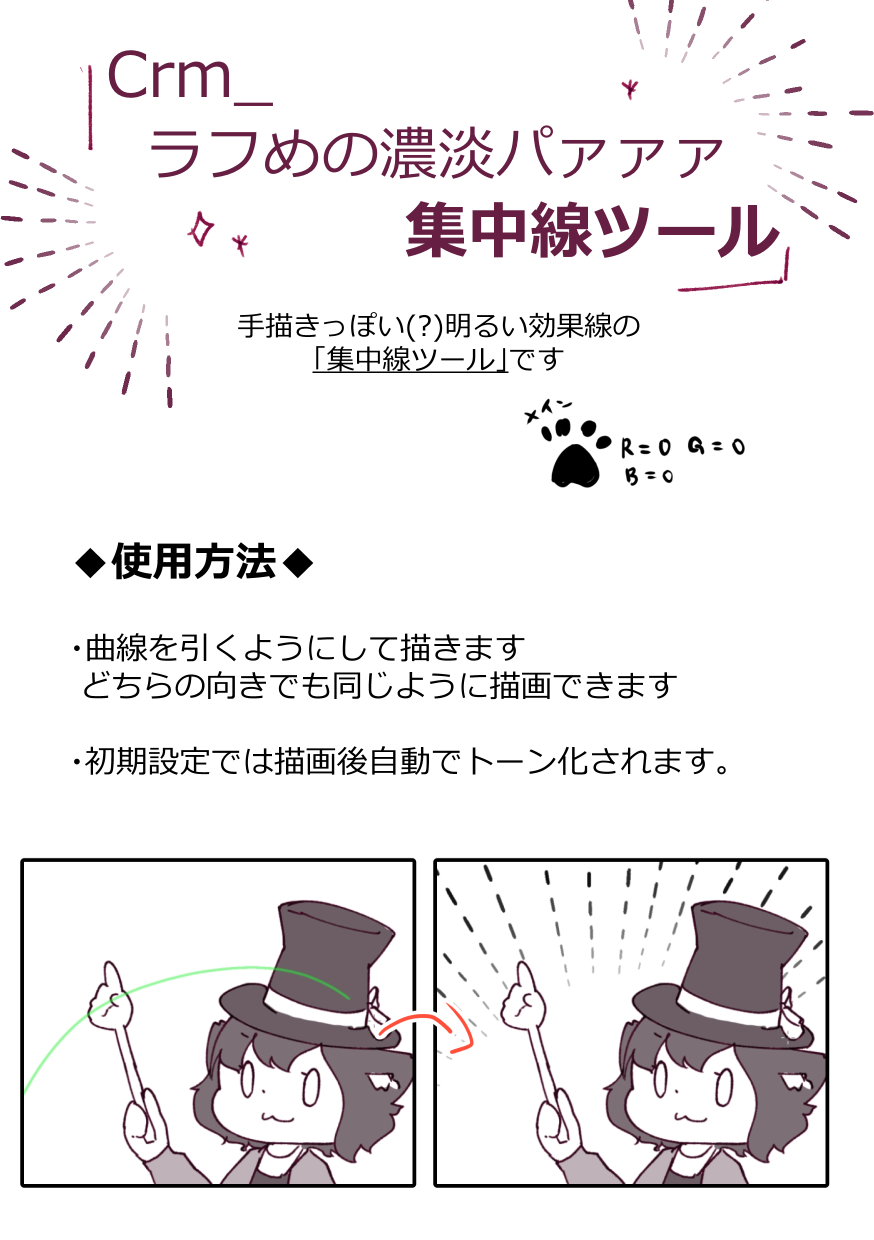
A saturated line tool made with the same idea as the brush material "rough tint Pahaa" brushes. 自作ブラシ素材「ラフめの濃淡パァァァ」ブラシと同様の発想で作った集中線ツールです。
Handwritten style (?) It is a saturated line tool made based on the setting of "Rough tint Pahaa" (https://assets.clip-studio.com/ja-jp/detail?id=1798268) with shading. It is now possible to adjust finer settings and later lines.

2020/07/24: GIF was added.
2020/11/10: With the update of the brush tool version, I edited the explanation and the use example.

I forgot to add it to the image, but I think that I can make it neatly when I create a ruler with the able to snap of this tool and snap to ruler of the display menu turned on and draw it along.
The saturated line layer is created, so if it doesn't work, you can adjust it later in the object sub tool. (Note that if you draw the mode as an Edit object layer, you cannot do so.)
It is like this. ↓

[Customize Method (example)]
Saturated line Length: Adjusts the number of "drawing position" to "length".
The larger the number, the longer saturated line. Turn on extend outside frame to extend out of the frame or to the outside of the canvas.
Particle size: Adjusts the brush size.
Thickness of the grain: Adjusts the number of "brush tip" to "thickness".
• Spacing between particles (brush tip): Adjusts the number of strokes to interval.
Saturated line spacing: Adjusts the number of drawing interval to gap of line.
-Difference in saturated line tint: When you increase the minimum value of "starting and ending" → "brush density", it becomes thin when it is darker and lowered.
Please also here. ↓
[Rough tint Pahaa (brush tool 2 seeds)]
https://assets.clip-studio.com/ja-jp/detail?id=1798268
[Random Shading Pahaa (brush & saturated line)]
https://assets.clip-studio.com/ja-jp/detail?id=1750713
[Black-ish] Pahaa Line (saturated line tool)
https://assets.clip-studio.com/ja-jp/detail?id=1756667
手書き風(?)で濃淡がつく「ラフめの濃淡パァァァ」(https://assets.clip-studio.com/ja-jp/detail?id=1798268)の設定をもとに作った集中線ツールです。より細かい設定や後からの線の調整が可能になりました。
2020/07/24:GIFを追加しました。
2020/11/10:ブラシツール版のアップデートに伴い、解説・使用例を編集しました。
画像に書き足すのを忘れていましたが、このツールの「スナップ可能」、表示メニューの「定規にスナップ」をオンにした状態で定規を作成し、それに沿って描くと綺麗にできると思います。
集中線レイヤーが作成されるので、うまくいかなかった場合は「オブジェクト」サブツールで後から調整できます。(モードを「編集対象のレイヤーに描画」にして描画した場合はできないので注意)
こんな感じです。↓
【カスタマイズ方法(例)】
・集中線の長さ:「描画位置」→「長さ」の数値を調節します。
数値が大きいほど集中線が長くなります。「コマ外まで延長」をオンにするとコマ外、またはキャンバス外まで伸びます。
・粒子の大きさ:「ブラシサイズ」を調節します。
・粒子の太さ:「ブラシ先端」→「厚さ」の数値を調節します。
・粒子(ブラシ先端)同士の間隔:「ストローク」→「間隔」の数値を調節します。
・集中線の間隔:「描画間隔」→「線の間隔」の数値を調節します。
・集中線の濃淡の差:「入り抜き」→「ブラシ濃度」の最小値を上げると濃く、下げると薄くなります。
こちらもどうぞ〜。↓
【ラフめの濃淡パァァァ(ブラシツール2種)】
https://assets.clip-studio.com/ja-jp/detail?id=1798268
【ランダム濃淡パァァァ(ブラシ&集中線)】
https://assets.clip-studio.com/ja-jp/detail?id=1750713
【墨っぽい(?)パァァァ線(集中線ツール)】
https://assets.clip-studio.com/ja-jp/detail?id=1756667


Other materials by 軽目くお(atApostle)


Popular “Tool settings (other)” materials


New materials


Badges
-
 MVP ◆This user has contributed greatly to the management of the community, by posting many great responses to the questions asked. Once every three months, MVPs are determined based on the points earned during that period and will be recognized accordingly.
 -
 New Valuable Player (NVP) ◆These are the next-best contributors to the community after MVPs. This is awarded to users who have not yet won an MVP award, based on the number of points they have earned.
 -
 Official Expert ◆Chosen out of all MVP awardees, who are already proof of excellence, this is a testimony of outstanding correspondence in the community. After careful screening, they are appointed by CELSYS and assume their position.Note: Formally called “Evangelists”
 -
 Official Moderator of CELSYS ◆Moderators are official CELSYS staff members who are fluent in Japanese as well as various other languages. Moderators are not experts on the software or illustration, so they are not able to directly answer your questions. However, moderators provide communication and language support to ensure that everyone can smoothly communicate with each other.
 -
 CELSYS official accountThe Official Administrator Account