
by
 ◆
◆
◆
It's been a while since I posted the material. (素材投稿は)お久しぶりです
I always think about it when I try to draw eyes.


"Troublesome drawn-in sober."
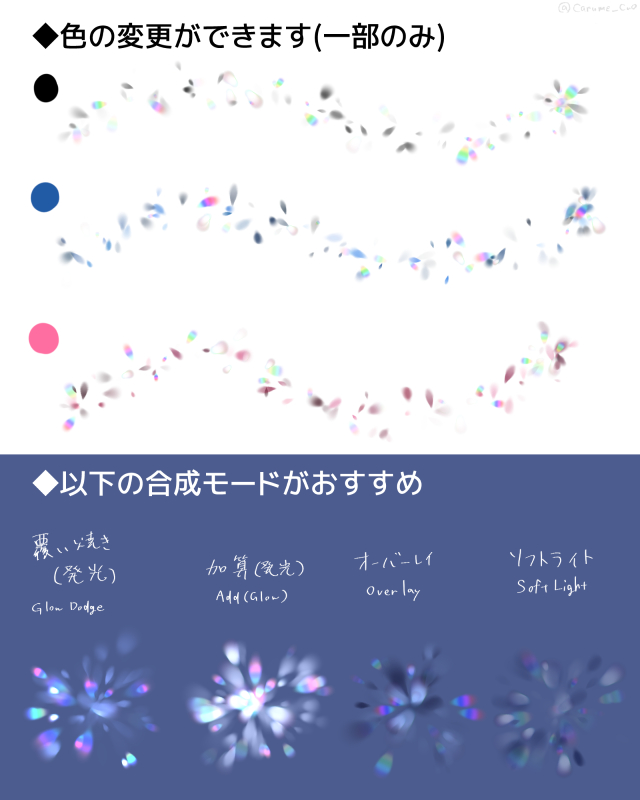
So, after finishing shading, highlighting, and reflection, I made abrush that would make my eyes finish a little richer in ten seconds .

* If you want to change the particle size, please change the "particle size" instead of brush size.
◎ How to use ◎
Create and clip a new layer on top of the ① eye fill layer (combine mode dodge (Light emitting), add (light), overlay, etc.)
② the center of the cursor over the pupil part and push it lightly.
Fine-grained adjustments such as ③ opacity changes and Blur
It is a good feeling that the nuance joins quickly! (In the image below, I put a slightly stronger effect for clarity.)

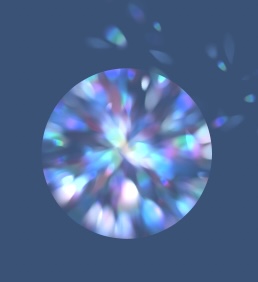
In addition to the pupil, it can be used as a brush for the normal effect (Dodge (Light emitting) is drawn in the processing such as Gaussian Blur ↓)

Depending on the way you look like a little gem...?

◎ Q & A ◎
Q1. I want to do something to dull the color of the paint color.
A1. Please try to close the value of brush tip color change to "brightness" to 0. Then you might be able to use multiplication, burn linear, etc.
Q2. I don't need the rainbow-colored particles coming in sometimes.
A2. Remove the rainbow particles from the sub tool detail "brush tip"
Q3. Want to change the aspect ratio of particles?
A3. Can be changed loosely from the thickness section. The number is greater than 100 and is elongated
I want to keep the particles from going out even if I hold them longer.
A4. Turn off the continuous spraying. But basically it's on the recommendation.
Q5: Want to increase or decrease particle quantity
A5. It is easy to fiddle with "interval". The higher the number, the less the density.
瞳を描こうとする時にいつも思うんですよ。
「描き込みが地味に面倒臭い」
という訳で、陰影・ハイライト・映り込みを描き終えた後、10秒で瞳の塗りがちょっとリッチな仕上がりになるブラシを作りました
※パーティクルのサイズを変更する場合はブラシサイズではなく「粒子サイズ」を変更して下さい
◎使用方法◎
①瞳の塗りのレイヤーの上に、新規レイヤーを作成してクリッピングします(合成モードは覆い焼き(発光)、加算(発光)、オーバーレイなどがおすすめ)
②カーソルの中心を瞳孔の部分に重ねて、軽く押し付けます
③不透明度の変更やぼかしなど、細かい調整をします
あっという間にニュアンスが加わっていい感じに!(下の画像では分かりやすいようにやや強めに効果をかけています)
瞳以外にも、普通のエフェクト用のブラシとしてもご利用いただけます(覆い焼き(発光)で描画しガウスぼかしなどの加工を施した例↓)
やり方次第でちょっと宝石っぽく見えるかも…?
◎Q&A◎
Q1.描画色の色がくすんでしまうのをなんとかしたい
A1.「ブラシ先端色の変化」→「明度」の値を0に近づけてみて下さい。そうすれば乗算や焼き込みリニアなどでも使えるようになるかも
Q2.時々入ってくる虹色のパーティクル、要らないんだけど…
A2.「サブツール詳細」の「ブラシ先端」から虹色のパーティクルを削除して下さい
Q3.パーティクルの縦横比を変更したい
A3.「厚さ」から大まかに変更できます。数値が100より大きいと細長くなります
Q4.長く押し続けてもパーティクルが出続けないようにしたい
A4.「連続吹き付け」をオフにして下さい。ですが基本的にオン推奨です
Q5.パーティクルの量を増やしたい/減らしたい
A5.「間隔」をいじるのが楽です。数値が高いほど密度が減ります


Other materials by 軽目くお(atApostle)


Popular “Brush” materials


New materials


Badges
-
 MVP ◆This user has contributed greatly to the management of the community, by posting many great responses to the questions asked. Once every three months, MVPs are determined based on the points earned during that period and will be recognized accordingly.
 -
 New Valuable Player (NVP) ◆These are the next-best contributors to the community after MVPs. This is awarded to users who have not yet won an MVP award, based on the number of points they have earned.
 -
 Official Expert ◆Chosen out of all MVP awardees, who are already proof of excellence, this is a testimony of outstanding correspondence in the community. After careful screening, they are appointed by CELSYS and assume their position.Note: Formally called “Evangelists”
 -
 Official Moderator of CELSYS ◆Moderators are official CELSYS staff members who are fluent in Japanese as well as various other languages. Moderators are not experts on the software or illustration, so they are not able to directly answer your questions. However, moderators provide communication and language support to ensure that everyone can smoothly communicate with each other.
 -
 CELSYS official accountThe Official Administrator Account