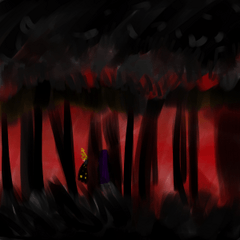

It is auto action to put the filter of toy camera to the picture that I drew.
◆ 0.0 Sphere
Open the data you finished drawing.
* Be sure to save.
Auto action load the PC with the environment (for example, when dealing with large-sized pictures)
It's a good idea to back up your data so that it's okay to kill CLIP STUDIO.
At this time, if there is only one layer, such as integrated, copy the layer and position it in two pieces.
You do not need to do this if you have more than two pieces.
You do not need to do this if you have more than two pieces.

◆ 1. Define Blur Range
Select any location with the selection tool.
It is the specification that the outside of the selected range is blurred so that the focus is shifted.

◆ 2. auto action execution

◆ 3. For your preference
Three layers have been increased after auto action run.
Because you can fine-tune it by fiddling with the setting of the noise layer and the tone curve layer, please in preference.

描いた絵にトイカメラ風のフィルターをかけるオートアクションです。
◆0.下準備
描き終わったデータを開きます。
※必ずセーブしてください。
オートアクションは環境によってPCに負荷がかかります(大きなサイズの絵を扱う場合など)
万一クリスタが強制終了しても大丈夫なように、データのバックアップを取ることをおすすめします。
この時、統合済などでレイヤーが1枚しかない状態の時は、レイヤーをコピーして2枚並んだ状態にしてください。
2枚以上ある場合はこの作業は不要です。
2枚以上ある場合はこの作業は不要です。

◆1.ぼかし範囲を指定
[選択範囲]ツールで任意の場所を選択してください。
選択した範囲の外側が、ピントがずれたようにボケる仕様です。

◆2.オートアクション実行

◆3.お好みで
オートアクション実行後は3枚のレイヤーが増えた状態です。
トーンカーブレイヤーやノイズレイヤーの設定をいじることで微調整ができますのでお好みでどうぞ。


