

아름다운 페인팅 효과를 낼 수 있도록 도와주는 텍스처 / 재료 Textures / Materials that help you get beautiful painting effect
안녕하세요!
저는 개인적으로 이렇게 사용하지만, 자유롭게 실험해 보세요!
레이어 "1"(예: a1, b1, c1)은 블렌딩 모드와 함께 사용하는 "Linear bum"
레이어 "2"(예: a2, b2, c2)에 "하드 라이트"
두 텍스처를 같은 크기로 리사이즈하는 것을 잊지 마세요(예: 100%, 55% 또는 원하는 대로 하세요. 반드시 동일해야 합니다).
저는 또한 맨 아래에 있는 오리지널 아트도 추천합니다.
밝기만 조금 더 밝게 설정하세요(레이어 > 보정 레이어 > 밝기/명암비를 적용해서) 약 30% 정도
그리고 맨 위(모든 텍스처 위)에 원본 아트워크를 붙여넣고, 블렌딩 모드 '추가'를 40%로 설정하면 완성됩니다!
여기 ^ 맨 끝에 "Add"를 사용하지 않았어요 (솔직히 잊어버려서요)
여기 있습니다 vs 저는 했습니다
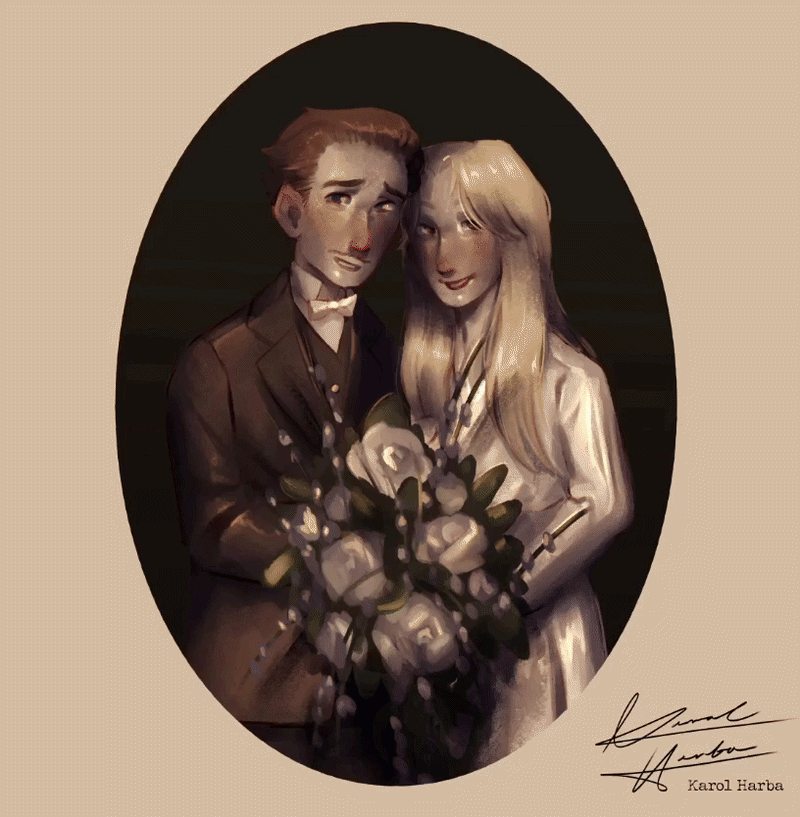
그 전

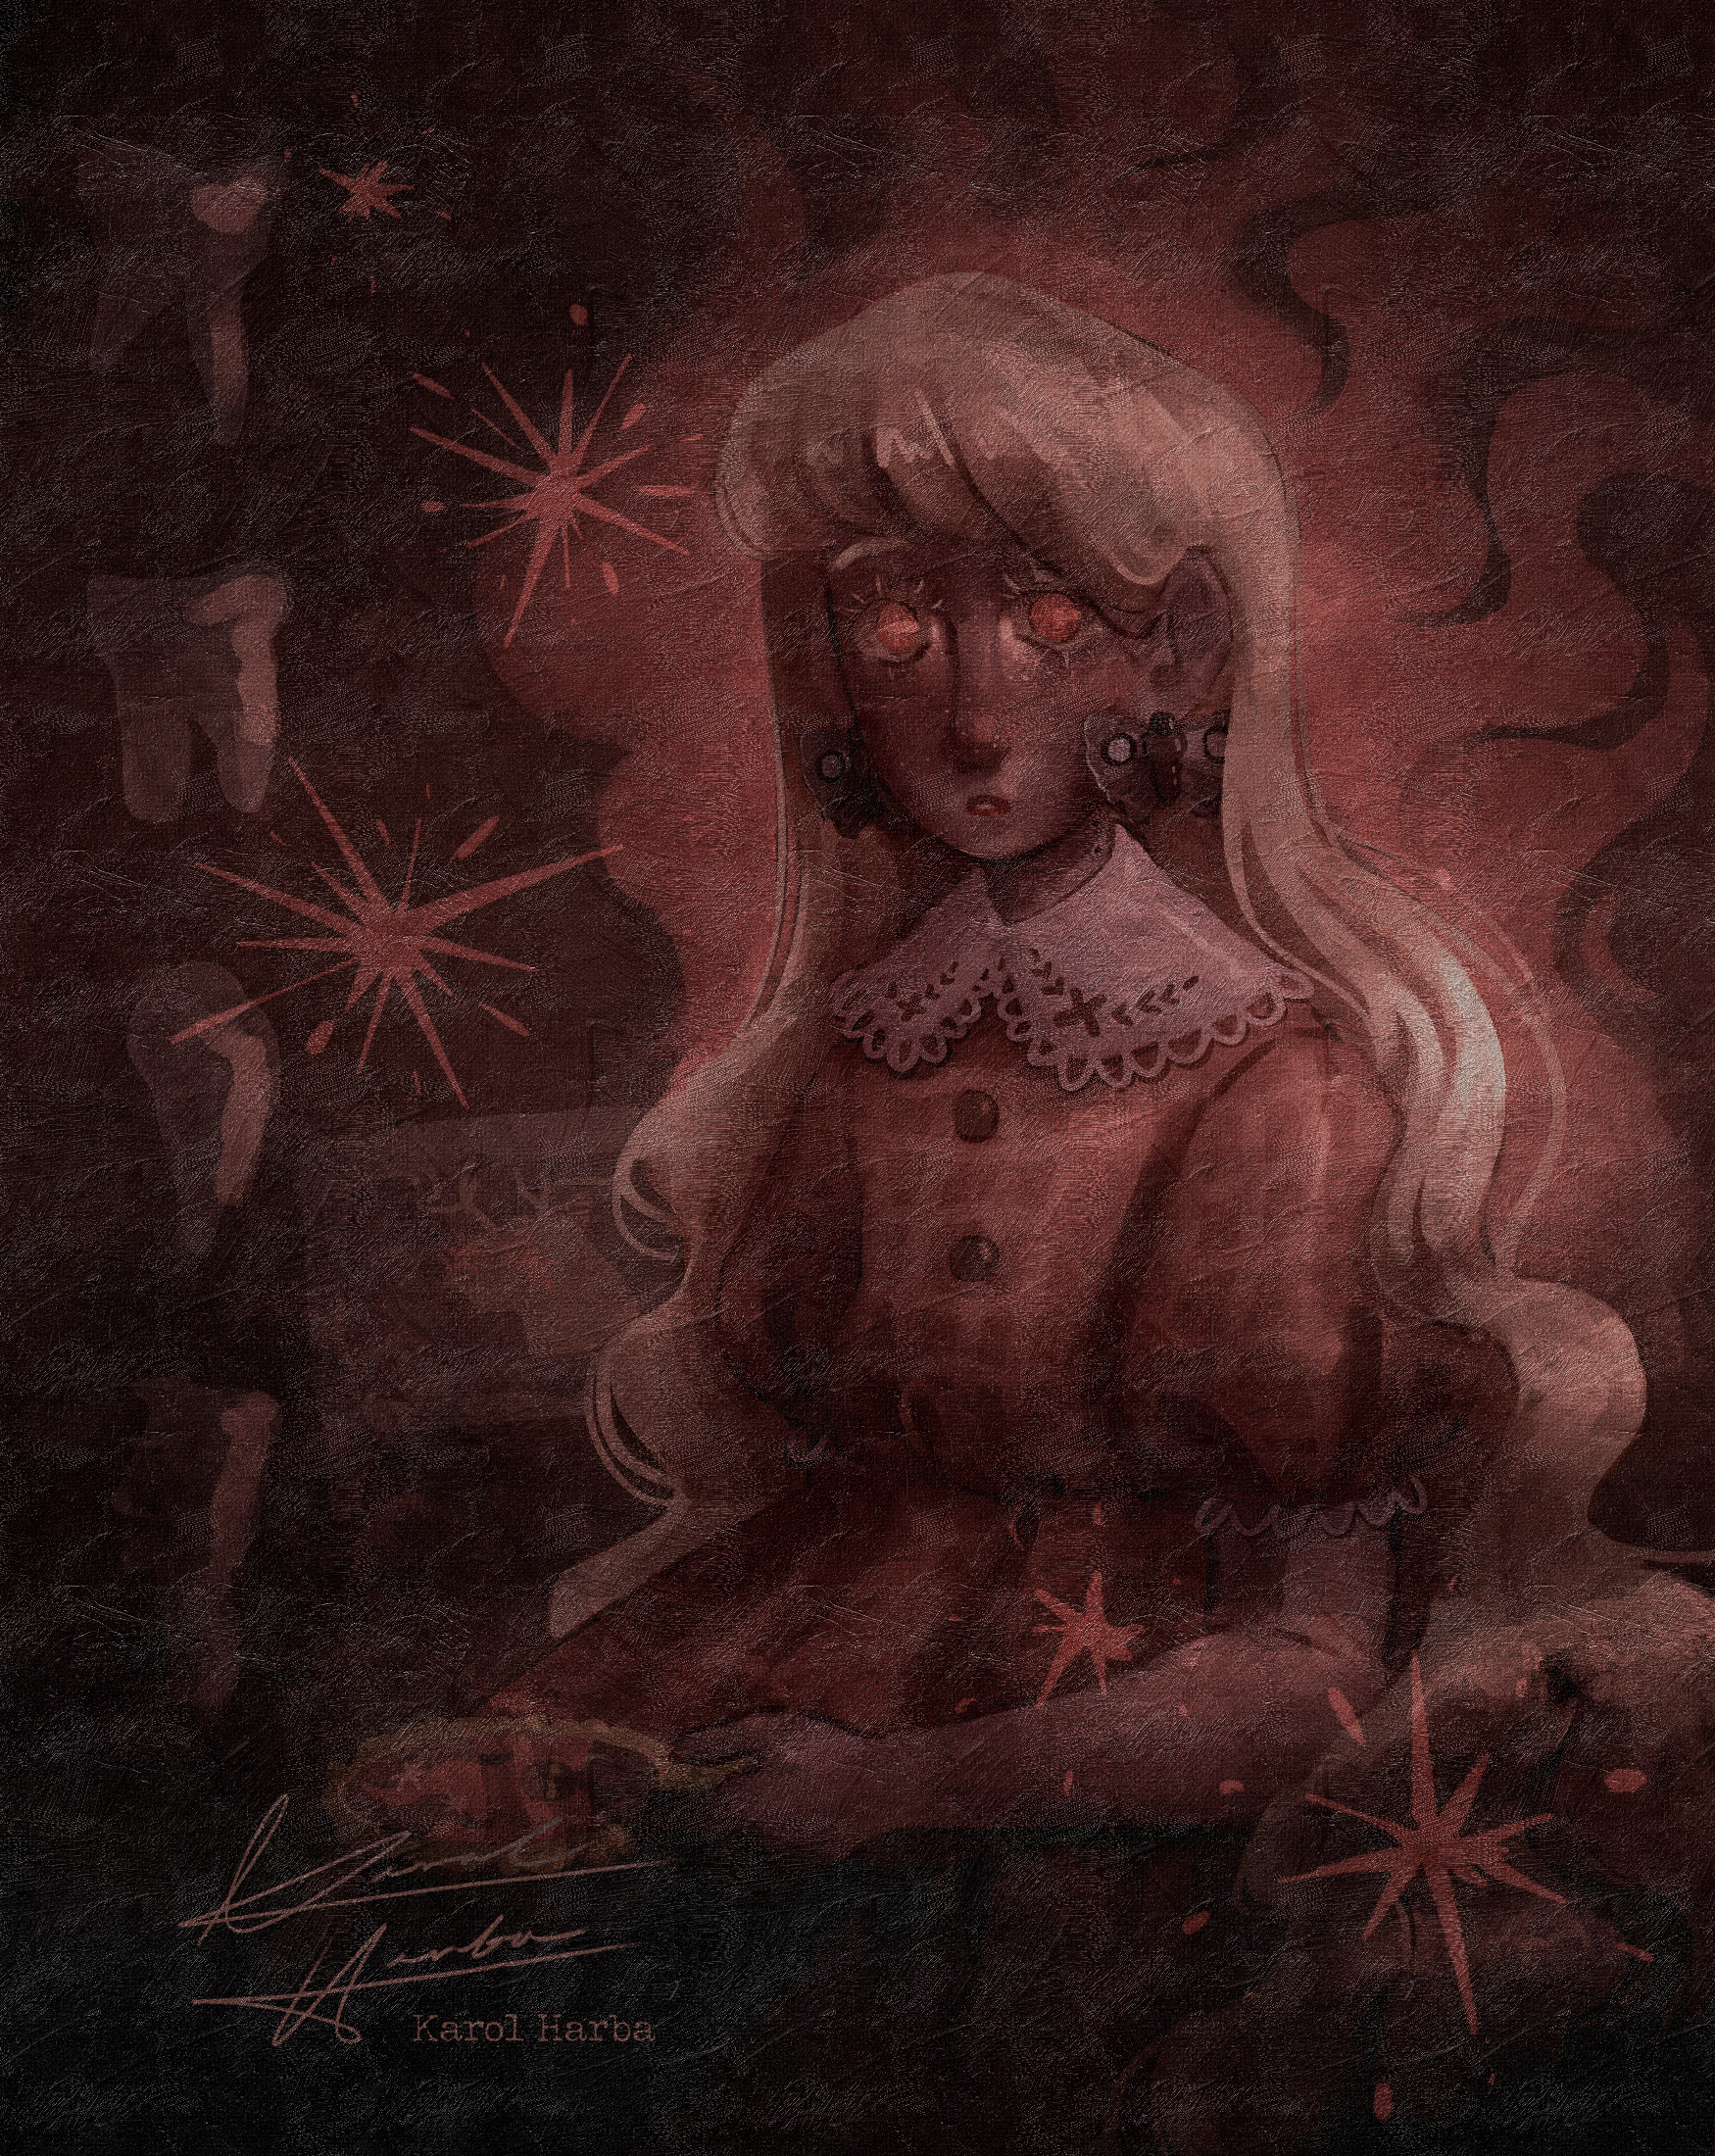
이후
저는 개인적으로 이렇게 사용하지만, 자유롭게 실험해 보세요!
레이어 "1"(예: a1, b1, c1)은 블렌딩 모드와 함께 사용하는 "Linear bum"
레이어 "2"(예: a2, b2, c2)에 "하드 라이트"
두 텍스처를 같은 크기로 리사이즈하는 것을 잊지 마세요(예: 100%, 55% 또는 원하는 대로 하세요. 반드시 동일해야 합니다).
저는 또한 맨 아래에 있는 오리지널 아트도 추천합니다.
밝기만 조금 더 밝게 설정하세요(레이어 > 보정 레이어 > 밝기/명암비를 적용해서) 약 30% 정도
그리고 맨 위(모든 텍스처 위)에 원본 아트워크를 붙여넣고, 블렌딩 모드 '추가'를 40%로 설정하면 완성됩니다!

여기 ^ 맨 끝에 "Add"를 사용하지 않았어요 (솔직히 잊어버려서요)
여기 있습니다 vs 저는 했습니다
그 전

이후

Hello!
I PERSONALLY use it this way, but feel free to experiment!
Layer "1" (for example a1, b1, c1) I use with blending mode "Linear bum"
Layer "2" (for example a2, b2, c2) with "Hard light"
Remember to resize both textures to same size (for example 100%, or 55%, or whatever you like, they need to be THE SAME.)
I also recommand coping original art which would be on the very bottom,
make it ONLY brighter (with Layer > Correction Layer > Brightness/Contrast) just a little bit (around 30%)
and then on the very top (above all the textures) paste the original artwork, use blending mode "Add" on 40% and it's all done!
Here ^ I didn't use "Add" at the very end (tbh bc I forgot)
Here v I did
Before
After
카테고리 1 Category 1


'KarolH'님의 다른 소재


'소재집'의 인기 소재


신규 소재


배지
-
 MVP ◆질문에 적절한 답변을 많이 게시하고 커뮤니티 운영에 크게 공헌한 사용자입니다. MVP는 3개월에 한 번, 그 사이에 획득한 포인트를 바탕으로 결정하고 표창을 실시하고 있습니다.
 -
 NVP(New Valuable Player) ◆MVP 다음으로 커뮤니티 운영에 공헌한 사용자입니다. 이제까지 MVP 수상 경험이 없는 분 중에서 획득한 포인트를 바탕으로 결정하여 표창을 실시하고 있습니다.
 -
 공식 엑스퍼트 ◆뛰어난 응답자의 증표인 MVP수상자 중에서 선택된 커뮤니티에서 가장 뛰어난 응답자의 증표입니다. 심사를 거쳐서 저희 회사에서 의뢰할 경우 취임되십니다.※ 옛 명칭 '에반젤리스트'
 -
 셀시스 공인 모더레이터 ◆모더레이터는 일본어와 기타 언어로 말할 수 있는 셀시스 공인 스태프입니다. 소프트웨어나 창작 전문가가 아니므로 직접 의문을 해결할 수는 없지만 여러분이 순조롭게 소통할 수 있도록 언어나 커뮤니케이션 측면에서 지원합니다.
 -
 셀시스 공식운영에 관련된 공식 계정입니다.