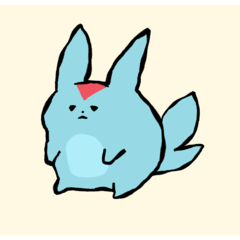

스토리보드 회색:
2번의 클릭으로 그림 뒤에 색상 추가
Storyboard gray:
Add a color behind your drawing in 2 clicks
다음은 스토리보드 스타일로 두 번의 클릭으로 그림 뒤에 회색을 추가하는 빠른 방법입니다. 만큼 회색에는 R197, G197 및 B197 값이 있습니다. 당신도 다시 편집할 수 있으므로 캔버스에서 색상을 선택하고 원하는 다른 색상으로 영역을 채웁니다.
1단계: 그림 만들기. 거기 확인하십시오 열린 틈이 없습니다.
2단계: 자동 선택 "마법 지팡이"를 클릭하고 그리기 영역 외부를 클릭합니다(첫 번째 클릭).
3단계: 자동 액션을 실행합니다(두 번째 클릭).
나의 경우, 이 자동 액션에 바로가기를 추가했는데, 이는 내 숫자의 + 입니다. 키보드. 자신만의 바로가기를 만들 수도 있습니다.
내 발걸음 1: 내 그림을 그립니다.
내 발걸음 2: 자동 선택 "마술 지팡이"를 사용하고 영역 외부를 클릭합니다. 내 그림의 (첫 번째 클릭).
내 발걸음 3: 내 숫자 키보드의 + 키 (두 번째 클릭)
확실히 하세요 "다중 참조 - 선택됨"에서 자동 선택 지팡이를 사용하고 있습니다. 레이어"만 사용할 수 있으며, 그렇지 않으면 결과가 약간 다를 수 있습니다.

Here is a fast way to add a gray behind your drawing in two clicks, storyboard-style. As you will notice, the gray has an R197, G197, and B197 value. Though you can re-edit it, I would advise you to just select the color on the canvas and fill the area with another color of your choice.
Step 1: Make your drawing. Make sure there are no opened gaps.
Step 2: Use your auto-select "magic wand" and click outside the area of your drawing (first click).
Step 3: Run the Auto Action (second click).
In my case, I added a shortcut to this Auto Action, which is the + on my numerical keyboard. You may want to create your own shortcut as well.
My Step 1: Make my drawing.
My Step 2: I use my auto-select "magic wand" and click outside the area of my drawing (first click).
My Step 3: + key on my numerical keyboard (second click)
Make sure you are using your auto-selection wand at "Refer Multiple - Selected Layer" only, otherwise the result may differ a bit.


