

It is a set of 6 types of ledger desks.
I think it can be used widely from the Edo period ~ the early Showa period.
There are three basic designs.
Based on 1, 2 has a different pillar design.
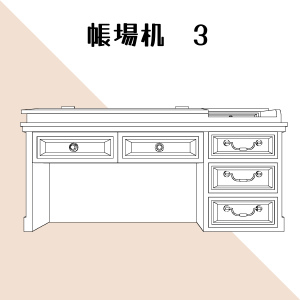
3 has a simple design with no decorations and shelves in the foreground.
1~3 There are narrow and wide desks for each of them, and there are 6 types in total.
The width switch is registered in the layout, but you can also change it from the object list.
As a bonus, a drawing doll with a sitting pose is attached.
As a sample set, a layer is added that combines a ledger desk, a ledger lattice, and a drawing doll.
You can use it as it is, but please use it as a size reference with a person.
The ledger grid is distributed free of charge as a separate material.
Download it if necessary.
We hope you will take advantage of it.
帳場机6種類のセットです。
江戸時代~昭和初期くらいまで、幅広くお使いいただけると思います。
基本デザインは3種類。
1を基本に、2は柱のデザインが違っています。
3は手前の飾りと棚がない、シンプルなデザインです。
1~3それぞれに机の横幅が狭いものと広いものがあり、全6種類となります。
横幅の切り替えはレイアウトに登録してありますが、オブジェクトリストからも変更できます。
おまけとして正座ポーズのデッサン人形を付けています。
セット見本として、帳場机、帳場格子、デッサン人形を組み合わせたレイヤーを付けています。
そのままでもご利用いただけますが、人物とのサイズ参考にもご活用ください。
帳場格子を別素材として無料配布しています。
必要に応じてダウンロードしてください。
ご活用いただけましたら幸いです。


Account machine 帳場机


bonus おまけ

Sample of use 使用見本

Update history
* There was a mistake in the register desk 2-1, and a corrected version was added.
Old versions with mistakes cannot be deleted due to the specifications of ASSETS, so they remain as they are.
"Desk 2 [Modified Version]" is the more correct material.
Please delete the old version after downloading.
※帳場机2-1にミスがあり、修正版を追加しました。
ミスがある旧バージョンもASSETSの仕様上削除できないため、そのまま残っています。
「帳場机 2 【修正版】」の方が正しい素材です。
旧バージョンはダウンロード後に削除お願いいたします。


Other materials by karasuka


Popular “Material catalog” materials


New materials


-
 MVP ◆This user has contributed greatly to the management of the community, by posting many great responses to the questions asked. Once every three months, MVPs are determined based on the points earned during that period and will be recognized accordingly.
 -
 New Valuable Player (NVP) ◆These are the next-best contributors to the community after MVPs. This is awarded to users who have not yet won an MVP award, based on the number of points they have earned.
 -
 Official Expert ◆Chosen out of all MVP awardees, who are already proof of excellence, this is a testimony of outstanding correspondence in the community. After careful screening, they are appointed by CELSYS and assume their position.Note: Formally called “Evangelists”
 -
 Official Moderator of CELSYS ◆Moderators are official CELSYS staff members who are fluent in Japanese as well as various other languages. Moderators are not experts on the software or illustration, so they are not able to directly answer your questions. However, moderators provide communication and language support to ensure that everyone can smoothly communicate with each other.
 -
 CELSYS official accountThe Official Administrator Account