↑ This is an image with LT conversion in the display state when "Lighting", which can be selected from the layout presets, is selected.
・ Linear shadows can be operated because they are attached as a standard function of the CLIP STUDIO.
↑ This is an image with LT conversion in the initial display state.
[About LT conversion setting value in the initial display state]
The LT conversion setting values for reference images other than "Lighting" of this material are as follows.
* If you want to change your own LT conversion setting value, we recommend that you save the image in advance so that it can be restored.
[About LT conversion method and LT conversion setting value when lighting is selected] * Reference images are from "Japanese modern inn" that is released separately.
When "Lighting" is selected from the layout presets, perform LT conversion according to the steps in the image (1) ~ (3) below to output the background beautifully.
(1) Select "Lighting" from the layout presets.
(2) Uncheck "apply light source" in the tool property of the 3D material.
(3) On the setting screen that appears when performing LT conversion, uncheck "Gradation" in the tone work and execute LT conversion.
【About the intensity of the touch】
If you use the standard CLIP STUDIO function "correct line width" with the layer related to touch in the folder output by LT conversion selected, you can freely adjust the depth of the touch.
The image below shows the change in touch when the tool property setting of the correct line width is set to "thin width" and the value is set to 0.01.
【About shadow manipulation of the floor surface】
With this material, both the initial display state and the display state with lighting support shadow operation on the floor. The following explanations are listed for the following images (1) ~ (6) with different impressions from the same angle.
(1) LT conversion with "show shadow on floor" unchecked from the tool property of the 3D Object in the initial display state.
(2) LT conversion from the 3D Object tool property in the initial display state with "show shadow on the floor" checked.
(3) In the initial display state, check "show shadow on floor" from the tool property of the 3D Object, and apply the correct line width described above to the touch layer once to convert LT.
* All of the following (4) ~ (6) are unchecked from the 3D Object tool property "apply light source".
(4) LT conversion with "show shadow on floor" unchecked from the tool property of the 3D Object in the display state of "Lighting", which can be selected from the layout presets.
(5) ・ (6) In the display state of "Lighting", which can be selected from the layout presets, the position of the shadow is changed by operating the sphere of the "light source" in the same tool property with "show shadow on the floor" checked from the tool property of the 3D Object and LT conversion.
[Display status list]
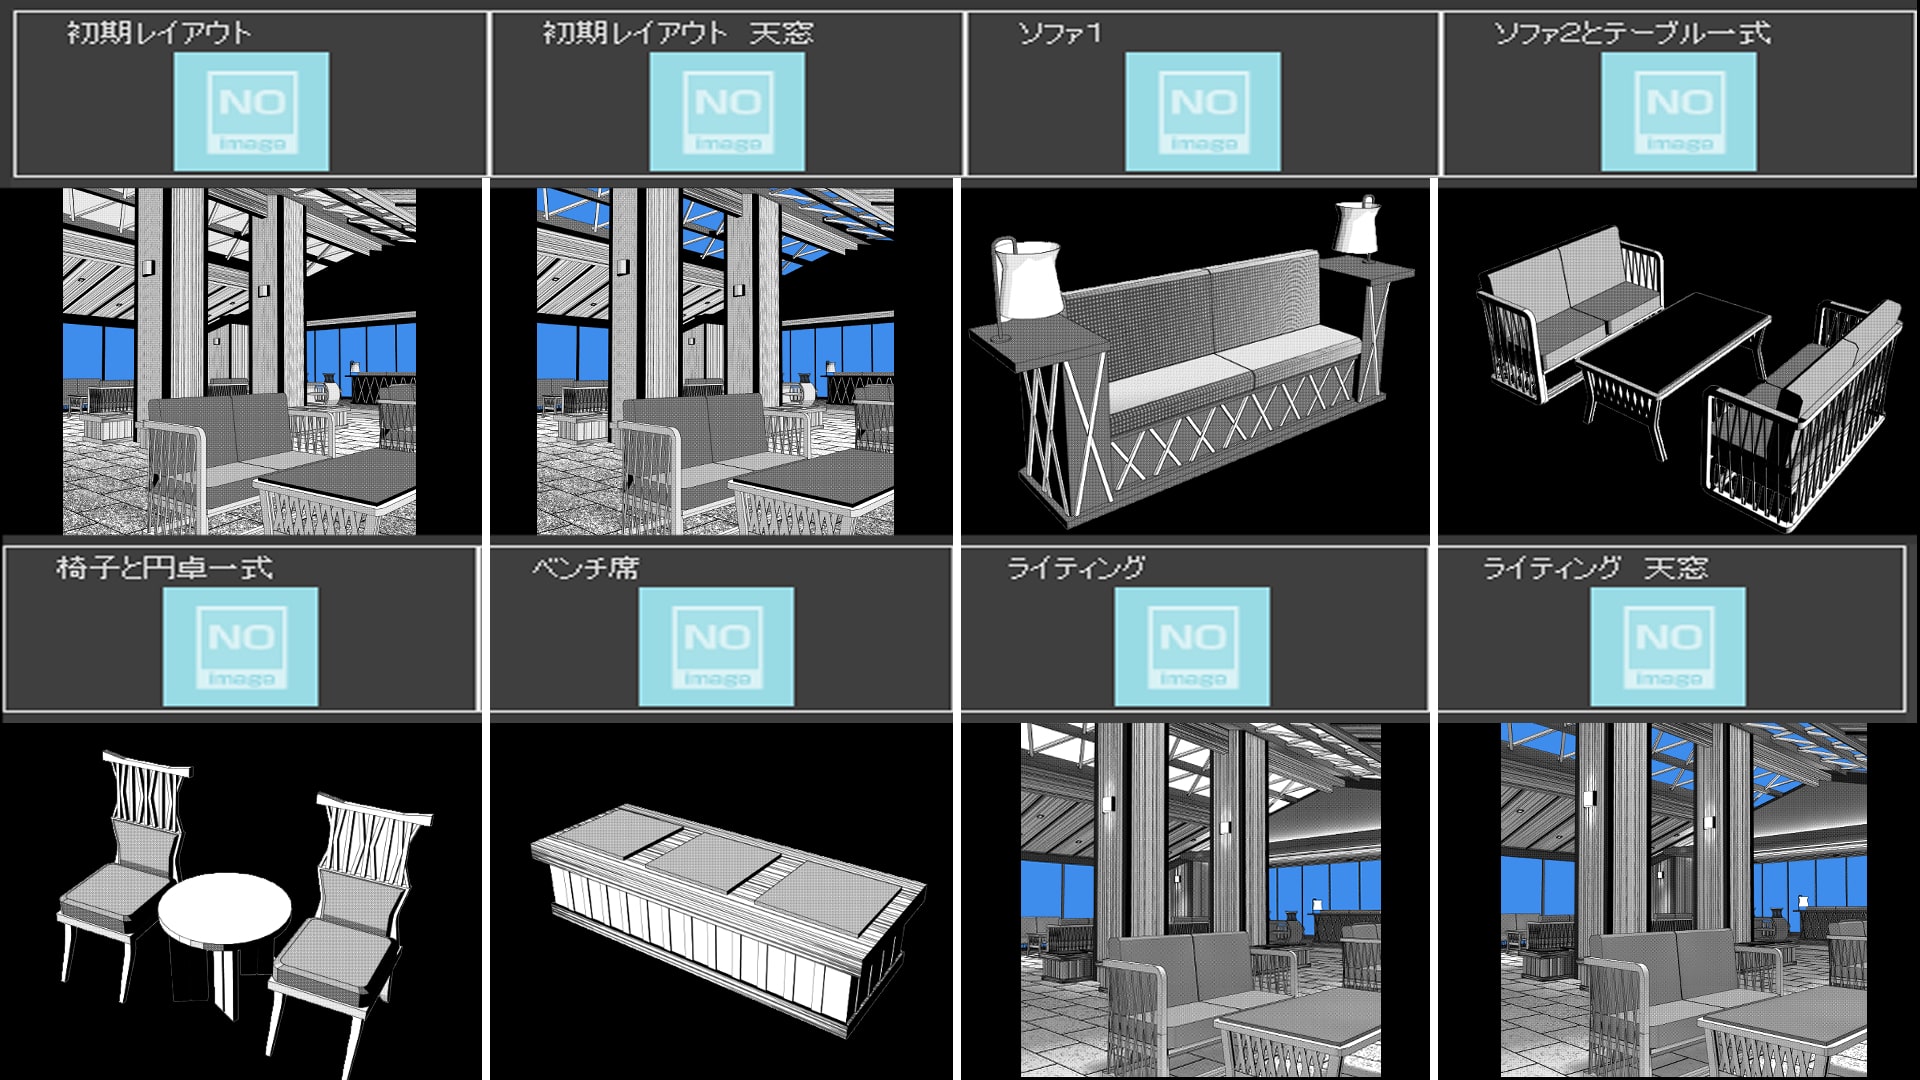
You can select the following display states from the layout presets:

From the material presets, you can choose whether to touch the floor. * Initial display state only
【About hiding the wall】
This material makes it easier to place the camera (viewpoint) in any position by hiding walls 1~4, ceilings, floors and other structures in the object list.
[About other recommended materials] * Not included with this material.
In addition to this material, our sister products "Japanese Modern Inn" series and "Hotel" series are now available, so please check my material list.
・The following is a reference image. No additions have been made after LT conversion.
"Modern Japanese inn"
"Japanese modern guest room corridor"
"Large Hotel Lounge"
[About the font of the text used in this material]
Furniture logos and other characters are handwritten or used only in Iwata Antic B font.
↑こちらはレイアウトのプリセットから選択できる「ライティング」を選択した際の表示状態でLT変換を施した画像になります。
・直線的な影はクリスタの標準機能で付けているので操作が可能です。
↑こちらは初期表示状態でLT変換を施した画像になります。
【初期表示状態でのLT変換設定値について】
本素材の「ライティング」以外の参考画像のLT変換設定値は以下の通りとなります。
※ご自身のLT変換設定値を変更される場合は事前に画像を保存する等して復元可能な状態にしておく事を推奨します。
【ライティング選択時のLT変換方法とLT変換設定値について】※参考画像は別途公開中の「和モダンな宿」のものを使っています。
レイアウトのプリセットから「ライティング」を選択した際は下記画像①~③の手順に沿ってLT変換を行うとキレイに背景が出力されます。
①レイアウトのプリセットから「ライティング」を選択。
②3D素材のツールプロパティ内の「光源の影響を受ける」のチェックを外す。
③LT変換をする際に出る設定画面でトーンワークの「階調化」のチェックを外してLT変換を実行。
【タッチの濃さについて】
LT変換で出力されたフォルダ内のタッチに関するレイヤーを選択した状態でクリスタの標準機能である「線幅修正」をお使いになればタッチの濃さを自由に調整できます。
以下の画像は線幅修正のツールプロパティ設定を「指定幅で細らせる」にチェックを入れて値を0.01に設定した際のタッチの変化です。
【床面の影操作について】
本素材では初期表示状態、ライティング込の表示状態のどちらも床面の影操作に対応しています。同アングルで印象の異なる以下の画像①~⑥について解説を列挙します。
① 初期表示状態で3Dオブジェクトのツールプロパティから「床面に影を表示する」のチェックを外した状態でLT変換。
② 初期表示状態での3Dオブジェクトのツールプロパティから「床面に影を表示する」にチェックを入れた状態でLT変換。
③ 初期表示状態で3Dオブジェクトのツールプロパティから「床面に影を表示する」にチェックを入れ、タッチに関するレイヤーに上記で解説した線幅修正を1回適用してLT変換。
※以下④~⑥は全て3Dオブジェクトのツールプロパティから「光源の影響を受ける」のチェックを外しています。
④ レイアウトのプリセットから選択できる「ライティング」の表示状態で3Dオブジェクトのツールプロパティから「床面に影を表示する」のチェックを外した状態でLT変換。
⑤・⑥ レイアウトのプリセットから選択できる「ライティング」の表示状態で3Dオブジェクトのツールプロパティから「床面に影を表示する」にチェックを入れた状態で同じツールプロパティ内の「光源」の球体を操作する事で影の位置を変更しLT変換。
【表示状態一覧】
レイアウトのプリセットから以下の表示状態を選択できます。

マテリアルのプリセットからは床のタッチの有無を選択できます。※初期表示状態のみ
【壁の非表示について】
本素材はオブジェクトリスト内の壁1~4と天井、床やその他の構造物を非表示にする事でカメラ(視点)を任意の位置に置きやすくなります。
【その他のおすすめ素材について】※本素材には付属していません。
本素材以外にも姉妹品である「和モダンな宿」シリーズや、「ホテル」シリーズを公開中ですので是非私の素材一覧からご確認ください。
・以下は参考画像になります。LT変換後の加筆は行ってません。
「和モダンな宿」
「和モダンな宿客室廊下」
「大規模ホテルラウンジ」
【本素材に使われてるテキストのフォントについて】
家具のロゴ等の文字は手書きかイワタアンチック体Bフォントのみを使用しています。


