

It is a set of 2 glitch (error) auto-action that can be adjusted freely with layers remaining.
2 species, but almost identical.
Please see below for a detailed explanation.
레이어가 남아 자유롭게 조절할 수 있는 글리치(오류) 오토액션 2종 세트입니다.
2종이지만 거의 동일합니다.
자세한 설명은 아래를 참고해주세요.
Warnings
Please be sure to read it before use. It does not respond to errors caused by not reading.
1. When using, make sure there are no layers with numbers up to 1,2,3,4,5,6.
2. Before use, combine all the original pictures to give the effect, copy the merged original with Ctrl+C, and then use it.
3. All examples were used for canvas size 2000*2000 resolution 300dpi. Please use it at a similar size and resolution.
Instructions
1. Prepare the original to give the glitch effect by opening a new window. Select the desired auto action and press Play. (Please note the precautions.)

2. That's it. In the case of Layer ON auto action 1 and 2, a layer folder with effects is created separately and can be adjusted freely.

For Layer ON auto action 1, you can determine the size of chromatic aberration by adjusting layers 1,2,3.
For 4,5,6, this is a layer to create a noise effect, and you can adjust the transparency and mode .
3. Layer X auto action 1.
There are no layers left to adjust.

4. In the case of Layer ON/X auto action 2, the noise effect also contains chromatic aberration, which gives a softer feeling than 1.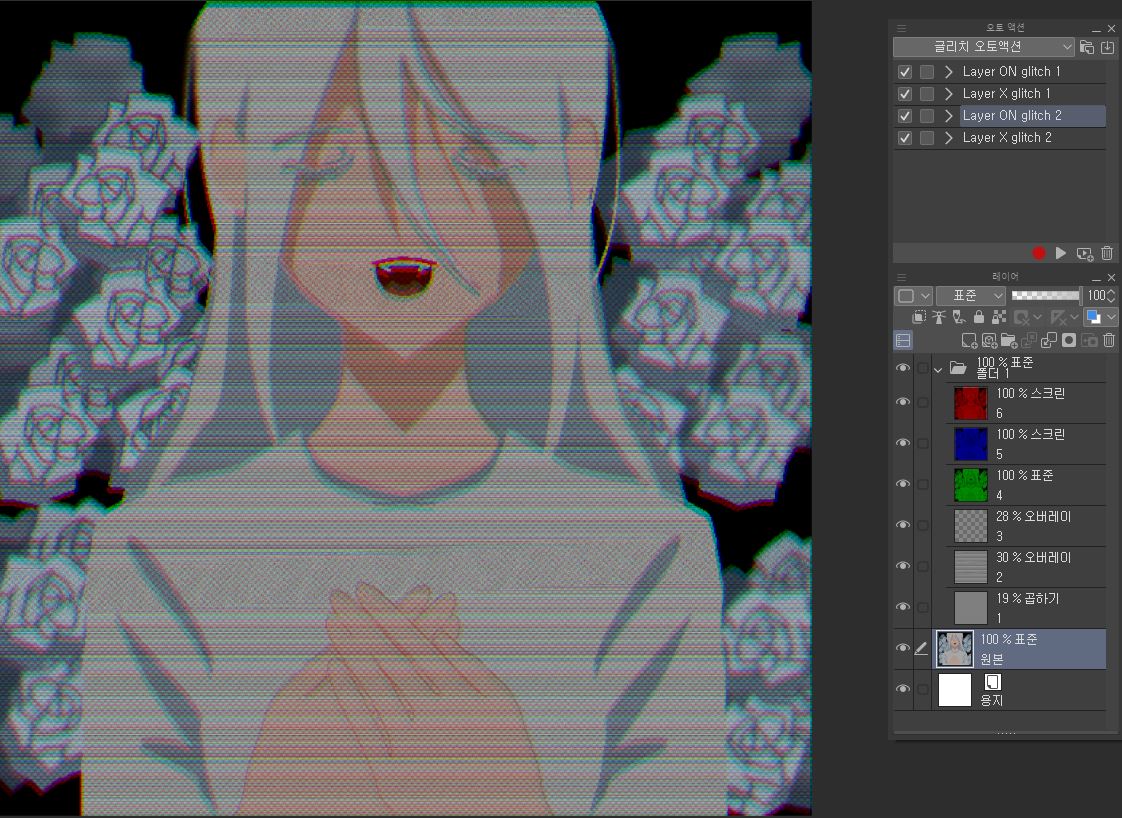

For Layer ON auto action 2, you can adjust the 4,5,6 layers to determine the size of chromatic aberration.
+Edit) Layers of 1,2,3 cannot be adjusted.
5. Layer X auto action 2.
There are no layers left to adjust.

If you have any questions or don't understand, please send us a direct message!
+Thank you for the gift!
주의사항
사용 전 반드시 읽어주세요. 읽지 않아 생기는 오류에는 답변하지 않습니다.
1. 사용할 때 1,2,3,4,5,6까지의 숫자로 된 레이어가 없도록 해주세요.
2. 사용하기 전 효과를 줄 원본 그림을 모두 합치고, 합쳐진 원본을 ctrl+c로 복사입력 해둔 후 사용하세요.
3. 모든 예시는 캔버스 크기 2000*2000 해상도 300dpi에 활용되었습니다. 이와 비슷한 크기와 해상도로 맞춰 사용해주세요.
사용방법
1. 글리치 효과를 줄 원본을 새 창을 열어 준비한다. 원하는 오토액션을 선택한 후 재생을 누른다. (주의사항 참고 해주세요.)
2. 끝입니다. Layer ON auto action 1,2의 경우, 효과를 준 레이어 폴더가 따로 생성되어 자유롭게 조절할 수 있습니다.
Layer ON auto action 1의 경우 1,2,3 레이어를 조절하여 색수차의 크기를 결정할 수 있습니다.
4,5,6의 경우 노이즈 효과를 내기 위한 레이어로, 투명도와 모드를 조절하시면 됩니다.
3. Layer X auto action 1을 적용한 모습.
따로 조절할 수 있는 레이어가 남지 않습니다.
4. Layer ON/X auto action 2의 경우 노이즈 효과에도 색수차가 들어가 1에 비해 부드러운 느낌을 줍니다.
Layer ON auto action 2의 경우 4,5,6 레이어를 조절하여 색수차의 크기를 결정할 수 있습니다.
+수정) 1,2,3의 레이어는 조절할 수 없습니다.
5. Layer X auto action 2을 적용한 모습.
따로 조절할 수 있는 레이어가 남지 않습니다.
궁금하거나 이해가 안 되는 부분은 다이렉트 메세지 주세요!
+선물 감사합니다!


Other materials by 진짜햄


Popular “Auto Action” materials


New materials


Badges
-
 MVP ◆This user has contributed greatly to the management of the community, by posting many great responses to the questions asked. Once every three months, MVPs are determined based on the points earned during that period and will be recognized accordingly.
 -
 New Valuable Player (NVP) ◆These are the next-best contributors to the community after MVPs. This is awarded to users who have not yet won an MVP award, based on the number of points they have earned.
 -
 Official Expert ◆Chosen out of all MVP awardees, who are already proof of excellence, this is a testimony of outstanding correspondence in the community. After careful screening, they are appointed by CELSYS and assume their position.Note: Formally called “Evangelists”
 -
 Official Moderator of CELSYS ◆Moderators are official CELSYS staff members who are fluent in Japanese as well as various other languages. Moderators are not experts on the software or illustration, so they are not able to directly answer your questions. However, moderators provide communication and language support to ensure that everyone can smoothly communicate with each other.
 -
 CELSYS official accountThe Official Administrator Account