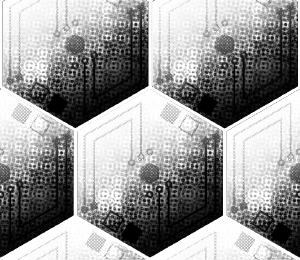

This material is auto action to make textures easier to paint. It also comes with a sci-fi armor texture that explains how to use it.
This auto action divides the light, dark, and non-transparent parts of the texture into three selection layer. It allows you to easily paint and separate the texture.
In addition to textures, it is also useful for coloring images painted with black and white brushes.
この素材は、テクスチャを塗りやすくするためのオートアクションです。使用方法を説明するためのSFアーマーテクスチャも付属しています。
このオートアクションを使うと、テクスチャの明るい部分、暗い部分、透明でない部分が、3つの選択範囲レイヤーに分けられます。それによって、簡単にテクスチャを塗り分けることができるようになります。
テクスチャ以外にも、白黒のブラシで描いた画像を塗り分けるのにも便利です。
Use
With the texture layer selected, run auto action selection Division. You can have three selection layer.
- Whole Silhouette: Parts Other than transparency
- Dark areas: The darkest part
- Highlights: Bright part
Double-clicking the selection layer thumbnail loads the selection. Turn off show selection border and paint with brushes.


Example of how to fill

Create selection and paste the supplied texture. The right arm is another layer.

Rasterize the texture and transform the mesh transformation or distortion tool to fit the person's body.

Combines a texture into a single layer in normal mode and performs a auto action.
Use three selection and a multiple layers to apply light and shade.
Deselect and put highlights.

Reads "Dark areas", fill the new layer in yellow, dodge (light emitting), and lowers the opacity.

Creates a blue gradient map layer. Here I used my material "nostalgia gradient set".
If you overlay this layer and reduce the opacity, the armor fill is complete.
"Nostalgia gradient set" ID: 1764168
* Search by the content ID or "see more" of my material list at the bottom of the page and look for it.


使い方
テクスチャのレイヤーを選択した状態で、オートアクション「selection division」を実行してください。3つの選択範囲レイヤーができます。
- Whole silhouette: 透明以外の部分
- dark areas: 暗い部分
- highlights: 明るい部分
選択範囲レイヤーのサムネイルをダブルクリックすると、選択範囲が読み込まれます。「選択範囲の境界線を表示」をオフにして、ブラシなどで塗ります。


塗り方例

選択範囲を作成し、付属のテクスチャを貼り付けます。右腕は別レイヤーです。

テクスチャをラスタライズし、メッシュ変形やゆがみツールを使い人物の身体に合うように変形させます。

テクスチャを通常モードで1つのレイヤーに結合し、オートアクションを実行します。
3つの選択範囲と複数のレイヤーを使い分け、明暗を塗ります。
選択を解除し、ハイライトを入れます。

「dark areas」を読み込み、新レイヤーを黄色で塗りつぶし、覆い焼き(発光)にし、不透明度を下げます。

青のグラデーションマップレイヤーを作成します。ここでは私の素材「nostalgia グラデーションセット」を使用しました。
このレイヤーをオーバーレイにして不透明度を下げると、アーマーの塗りは完成です。
「nostalgia グラデーションセット」ID:1764168
*コンテンツIDで検索するか、ページ下部の私の素材一覧の「もっと見る」から探して下さい。


Category 1 カテゴリ1
Update history
More detailed "example of how to fill" has been released to CLIP STUDI TIPS. Please see that too. (English page. To be in a different language, select the language at the top of the screen.)
https://tips.clip-studio.com/en-us/articles/5863
より詳しい「塗り方例」をCLIP STUDI TIPSに公開しました。そちらもご覧ください。(英語ページ。他の言語にするには、画面上部で言語選択してください)
https://tips.clip-studio.com/en-us/articles/5863


