

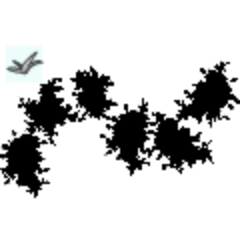
A set of auto action that creates a brush and a layer for using the brush, such as tree leaves, shrubbery, and other forms of contour.
You can easily draw plain trees and bushes that do not insist on the edge of the screen, a part of the background, or a distant view.
It becomes the same as the material published for the supporter in Pixiv FANBOX.
木の葉っぱや植え込みなどのフォルムを輪郭線だけで描けるブラシと、そのブラシを使用するためのレイヤーを作成するオートアクションのセットです。
画面の端や背景の一部、遠景などに、主張しすぎないあっさりした木や茂みを簡単に描くことができます。
pixiv FANBOXで支援者様を対象に公開している素材と同じものになります。


When using this brush, any color is fine.
During one stroke, the contour line will also be drawn when the image overlaps, but if you click on a stamp with a brush, the overlapping part of the existing contour will be filled with white.


You can also draw and add branches and trunks to the same layer and touch them.


Keep in mind that you can still merge with other layers, but you won't be able to resume working with this brush on that layer because the layer settings after the merge won't be used for the "compare (Dark)" brushes.
このブラシ使用時は、描画色は何色でも大丈夫です。
ワンストローク中は画像が重なった部分も輪郭線が描画されますが、スタンプ状にブラシでクリックしていくと、既存の輪郭線部分に重なった部分は白で塗りつぶされます。
同一レイヤーに手描きで枝や幹を描き加えたりタッチを入れることもできます。
この表示のまま「他のレイヤーと結合」もできますが、結合後のレイヤーの設定は「比較(暗)ブラシ」用にはなりませんので、そのレイヤー上でこのブラシでの作業再開はできませんのでご注意ください。
Edge drawing Brushes フチ描画ブラシ


Layer creation for comparison dark brushes 比較暗ブラシ用レイヤー作成


Other materials by 摩耶薫子


Popular “Material catalog” materials


New materials


-
 MVP ◆This user has contributed greatly to the management of the community, by posting many great responses to the questions asked. Once every three months, MVPs are determined based on the points earned during that period and will be recognized accordingly.
 -
 New Valuable Player (NVP) ◆These are the next-best contributors to the community after MVPs. This is awarded to users who have not yet won an MVP award, based on the number of points they have earned.
 -
 Official Expert ◆Chosen out of all MVP awardees, who are already proof of excellence, this is a testimony of outstanding correspondence in the community. After careful screening, they are appointed by CELSYS and assume their position.Note: Formally called “Evangelists”
 -
 Official Moderator of CELSYS ◆Moderators are official CELSYS staff members who are fluent in Japanese as well as various other languages. Moderators are not experts on the software or illustration, so they are not able to directly answer your questions. However, moderators provide communication and language support to ensure that everyone can smoothly communicate with each other.
 -
 CELSYS official accountThe Official Administrator Account