

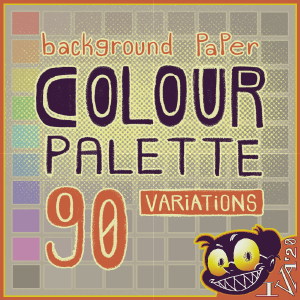
"只為了你的眼睛"不要長時間地看你的白眼,用這張背景紙讓你的眼睛有些寬慰。 "For your eyes only". Don't strain your eyes looking at your white sceen for long periods, use this background paper to give your eyes some relief.
基本
這是一個自動動作集加上調色板(又名。"顏色集"),在所有圖層的底部創建一個"背景紙"資料夾,同時進行播放和渲染。在長時間繪圖時,讓眼睛輕鬆。
細節
類別: [🌞日模式] 和 [🌜夜間模式] 不依賴于/引用您的剪輯工作室繪畫主題, 它們是我用來按飽和度和亮度分隔顏色的術語。 無論剪輯圖迪奧繪畫主題如何,您都可以從任一模式進行選擇。


如何使用
1. 導入自動操作 + 背景紙 + 集2. 從任何模式和色調中選擇您喜歡的色調3. 根據需要,調整資料夾的不透明度或關閉資料夾的可見度。
(有關視覺物件,請參閱下面的 gif)

1. 在"背景紙"資料夾中 ,選擇 填充圖層 並解鎖 它2. 將工具更改為操作工具3. 確保您 的主色已選定4. 操縱色輪點或顏色滑塊以更改色調/飽和度/亮度
(有關視覺物件,請參閱下面的 gif)

- 我把填充圖層放在資料夾中,以便您可以調整填充圖層的不透明度,而不會意外選擇填充圖層。 我強烈建議在改變顏色後鎖定填充層。我沒有費心創建自動操作沒有資料夾,因為我已經瞭解到,鎖定和解鎖填充層只是為了改變亮度是麻煩。
- 因為我去飽和的色調,顏色越暗,它與其他色調的黑暗版本越難以區分。雖然在最暗的顏色中至少有 5% 的飽和度, 只是為了給人一種溫暖或涼爽的色調氛圍。 我不相信有高飽和度(即 >20%)背景紙是很好的渲染目的和/或眼睛。
- "背景紙"資料夾會自動轉到所有圖層的底部。如果出現錯誤視窗,只需按一下"確定"。
- 如果看不到背景紙,則上面有一個覆蓋畫布的圖層。
BASICS
This is an autoaction set plus colour palette (aka. "color set") that creates a "Background Paper" folder in the bottom of all your layers while dawing & rendering. To give your eyes an easy time while drawing for long periods.
SPECIFICS
The categories: [🌞Day Mode] and [🌜Night Mode] don't depend/refer to your clipstudio paint theme, they're terms I used to separate the colours by saturation and luminance. You can pick from either mode regardless of your clipstudio paint theme.
HOW TO USE
1. Import the autoaction [ Background Paper ] set2. Select the hue you like from any of the modes & hues3. Adjust the opacity of the folder or turn off the visibility of the folder if you need to.
(see gif below for visuals)
1. in the "background paper" folder, select the fill layer and unlock it2. change your tool to the Operation tool3. make sure your main colour is selected4. manipulate your colour wheel point or colour slider to change the hue/ saturation/ luminosity
(see gif below for visuals)
- I put the fill layer in a folder so that you can adjust the opacity of the fill layer, without accidentally selecting the fill layer. I highly advise to lock the fill layer after changing the colour. I didn't bother creating the autoaction without the folder, because I've learnt that locking & unlocking the fill layer just to change the brightness is bothersome.
- Because I desaturated the hues, the darker the colour gets the more indistinguishable it is from the other hues' versions of that darkness. Although there's at least 5% saturation level in the darkest of the colours just to give that warm or cool vibe of the hue. I don't believe having a high saturation (ie. >20%) for the background paper is good for rendering purposes and/or for the eyes.
- The "Background Paper" folder automatically goes to the bottom of all your layers. If an error window occurs, just click OK.
- If you can't see the background paper, then there's a layer somewhere above it that's covering the canvas.
自動操作集 autoaction set

調色板/顏色集 colour palette/ color set


「carmina」的其他素材


「素材集」的人氣素材


最新素材


-
 MVP ◆針對問題投稿了眾多適切的回答,對社群有顯著貢獻的用戶。每3個月一次,會依據期間內獲得的點數選出MVP用戶,並進行表揚。
 -
 NVP(New Valuable Player) ◆繼MVP後,對社群營運做出良好貢獻的用戶。將從不曾獲選為MVP的用戶中,依據獲得的點數進行評選、表揚。
 -
 官方推廣大使 ◆從被證明為優良回答用戶的MVP獲獎者中選出社群中最優異的回答者。並經審查後由本社委託就任。※舊名稱為「Evangelist」
 -
 CELSYS公認Moderator ◆Moderator為會使用日文及其他語言的CELSYS公認工作人員。由於並非軟體或創作的專業人士,Moderator無法直接為用戶解決疑問,但能在語言、交流方面提供支援,幫助用戶們順利地進行溝通。
 -
 CELSYS官方為與營運相關的官方帳號。