해칭 텍스처 브러시(+곡선 해치!) (Hatching Texture Brushes (+Curve Hatch!)) Hatching Texture Brushes (+Curve Hatch!)

콘텐츠 ID:2075389

  • 20,115
  • 무료
이 소재집에는 스튜디오 모드에서 이용하실 수 있는 소재가 포함되어 있습니다. (스튜디오 모드란?)

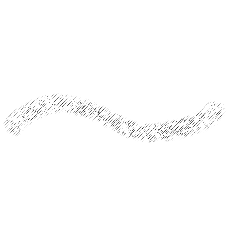
다음과 같은 세트로 빠르게 부화할 수 있습니다.
- 7 해치 텍스처 브러쉬
- 2 "톤 스크래핑"도구 (선폭 조정)
- 19 다이렉트 해치 브러쉬 / 스네이크 / 스프레이
- 5 수직 해칭 브러쉬
- 채우기 도구를 사용하여 편리하게 해칭하는 방법에 대한 유용한 팁입니다.
-새로운!!! 3 커브 해치 브러쉬
(업데이트: 07.04.24)
Hatching made fast with a set of:
- 7 Hatch Texture Brushes
- 2 "Tone Scraping“ Tools (adjust linewidth)
- 19 Direct Hatch Brushes / Snakes / Sprays
- 5 Vertical Hatching Brushes
- A hopefully useful tip about conveniently hatching with fill tools
- NEW!!! 3 Curve Hatch Brushes
(Updated: 07.04.24)

이 카탈로그에는 무엇이 있습니까?
새 브러시: 수직 해치 (06.04.24) 및 곡선 해치(07.04.24)
타다아 ⤵

_ _ _ _ _ _ _ _ _ _ _ _ _ _ _ _

 해칭 텍스처 브러시 1 이 동작하고 있습니다.


(오버플로 방지가 켜져 있지만 ^^ 마음에 들지 않으면 조정하거나 끌 수 있습니다.)

_ _ _ _ _ _ _ _ _ _ _ _ _ _ _ _

다음은 해치 텍스처 브러시를 사용하는 방법에 대한 설명입니다.

이 경우 곱하기와 빼기가 실제로 동일한 작업을 수행한다는 것을 알았으므로 gif XD에서했던 것처럼 지우기 / 음수 색상 모드 (배경에 사용)를 위해 곱하기 상태로 둘 수 있습니다.


_ _ _ _ _ _ _ _ _ _ _ _ _ _ _ _

다음은 채우기 도구를 사용하여 매우 빠르게 해치하는 방법에 대한 설명입니다.

채우기 도구(올가미, 양동이 등)를 모든 Hatch Texture BrushesVertical Hatch Brushes의 텍스처와 함께 사용할 수 있습니다!

  • 레이어에서 텍스처를 드래그하고 검게 칠해진 마스크를 추가하기만 하면 됩니다(텍스처의 이름은 "텍스처"의 고급 도구 속성에서 찾을 수 있습니다).
  • 그런 다음 마스크에 그려 텍스처를 다시 추가합니다^^


가장 멋진 점은 텍스처 레이어가 여전히 손상되지 않았기 때문에 이렇게 그린 후에도 해치의 크기와 각도를 조정할 수 있다는 것입니다!


_ _ _ _ _ _ _ _ _ _ _ _ _ _ _ _


다음은 "톤 스크래핑" 도구(선폭 조정)를 사용하는 방법에 대한 설명입니다.

해칭 텍스처 브러시(Hatch Texture Brushes )와 직접 해칭 브러시(Direct Hatch Brushes) 모두에서 사용할 수 있습니다. 해치를 두껍게 하거나 좁힙니다.
잉크 는 테두리가 보이지만 두꺼워지거나 고르게 좁아지고, 모래 는 더 부드럽지만 긁거나 추가할수록 모래 질감을 볼 수 있습니다.

아래 그림은 표준 CSP 조정 라인 도구의 일반적인 효과를 보여 주므로 그 기능을 명확하게 볼 수 있습니다. (색상 : 검은 색은 흰색 바탕에 칠해지고, 색상 : 음수는 검은 색 레이어에서 지워집니다.)


배경의 경우:

텍스처를 캔버스로 드래그하거나 브러시 중 하나로 페인팅합니다(영역이 클수록 시간이 더 오래 걸리므로 드래그하는 것이 더 빠를 수 있음).

드래그한 경우 레이어를 래스터 레이어로 변환합니다.

이제 원하는대로 텍스처의 선을 두껍게하고 좁힐 수 있습니다!
(과용하지 마세요. 선은 변경할수록 약간 불안정해질 수 있습니다...)

(색상을 변경하려면 레이어 색상을 설정하거나(1) 레이어 표현식 을 색상 으로 변경하고 투명도를 잠궈 그 위에 칠할 수 있습니다(2) ^^).

1)


2)

(예제의 텍스처: Wonky Hatch Texture 4, "Tone Scraping" Ink(선 너비 조정)로 변경됨).

_ _ _ _ _ _ _ _ _ _ _ _ _ _ _ _


Direct Hatch Brushes 는 너무 많기 때문에 자세히 설명하지 않겠습니다.
브러시 크기, 입자 크기, 입자 밀도, 스프레이 편차, 브러시 끝 각도, 입자 각도 및 기타 원하는 것을 실험해 보십시오^^
수많은 옵션이 있습니다!

_ _ _ _ _ _ _ _ _ _ _ _ _ _ _ _


  • 도구 속성 패널에서 해칭 텍스처의 크기와 각도/회전을 변경할 수 있습니다.
  • 오버플로 방지가 켜져 있으므로 원하는 작업을 엉망으로 만드는 경우 끌 수 있습니다.
  • 일부 브러시는 약간 투명한 부분이 있는데, 이것이 마음에 들지 않으면 레이어를 흑백으로 설정하십시오.

  • _ _ _ _ _ _ _ _ _ _ _ _ _ _ _ _


    업데이트!


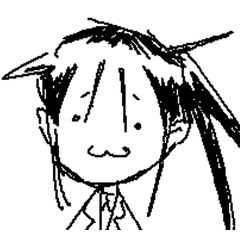
    나는 위의 스케치를 한 짧은 시간에 그것들을 매우 좋아하게되었습니다^^

    이상한 해치는 브러시 끝보다 작은 작은 원을 그릴 때 발생합니다. 좀 멋져 보일 수 있을 것 같아요. 당신은 이것을 물 잔물결에 사용할 수 있습니다! -> 먼저 원을 그린 다음 레이어를 원근 변형합니다.

    _ _ _ _ _ _ _ _ _ _ _ _ _ _ _ _


    좋아, 그게 전부^^ (알아, 많이...)
    즐거운 시간 보내세요!
    What’s in this catalog?
    New brushes: Vertical Hatch (06.04.24) and Curve Hatch (07.04.24)
    Tadaaa, these! ⤵

    _ _ _ _ _ _ _ _ _ _ _ _ _ _ _ _

    This is Hatching Texture Brush 1 in action:


    (Anti overflow is on, but you can adjust it or turn it off if you don’t like it ^^)

    _ _ _ _ _ _ _ _ _ _ _ _ _ _ _ _

    The following explanations are about how to use the Hatch Texture Brushes:

    I noticed that multiply and subtract actually did the same thing in this case, so you can leave it on multiply for erasing / negative color mode (used for background) not like i did in the gif XD…


    _ _ _ _ _ _ _ _ _ _ _ _ _ _ _ _

    The following explanations are about how to hatch super fast using fill tools:

    You can use fill tools (lasso, bucket or whatever) with the textures of all the Hatch Texture Brushes and Vertical Hatch Brushes!

    • Just drag the texture on a layer and add a blacked out mask (You can find the name of the textures in the advanced tool properties under „Texture“.)
    • Then draw on the mask to add the texture back ^^


    Coolest thing is that you can still adjust the size and angle of the hatches after drawing them like this, since the texture layer is still intact!


    _ _ _ _ _ _ _ _ _ _ _ _ _ _ _ _


    The following explanations are about how to use the „Tone Scraping“ Tools (adjust linewidth):

    You can use these on both the Hatch Texture Brushes and the Direct Hatch Brushes. They either thicken or narrow the hatches.
    The Ink one has a visible border but thickens or narrows evenly, the Sand one is smoother but you can see the sand texture the more you scrape or add.

    The pictures below show the general effect of the standard CSP adjust linewith tool, so you can see clearly what it does. (Color: black is painted on white, color: negative is erased from a black layer.)


    For Backgrounds:

    Drag a texture onto the canvas or paint it in with one of the brushes (the bigger the area the longer that takes so you might be faster to just drag it in).

    If you dragged it in, convert the layer into a raster layer.

    Now you can thicken and narrow the lines of the texture however you want!
    (Don’t overdo it, the lines can get a bit wonky the more you change them…)

    (To change colors you can either set a layer color (1) or change the layer expression to color and lock transparency so you can paint over it (2) ^^)

    1)


    2)

    (Texture in the example: Wonky Hatch Texture 4, changed with "Tone Scraping" Ink (adjust line width)).

    _ _ _ _ _ _ _ _ _ _ _ _ _ _ _ _


    I won’t explain the Direct Hatch Brushes in detail as there are so many…
    Just experiment with brush size, particle size, particle density, spray deviation, brushtip angle, particle angle and what ever else you find ^^
    There’s tons of options!

    _ _ _ _ _ _ _ _ _ _ _ _ _ _ _ _


  • You can change the size and angle / rotation of the hatching texture in the tool property panel.
  • Anti overflow is turned on, you can turn it off if it’s messing with what you want to do.
  • Some of the brushes have slightly transparent parts, if you don’t like this, set the layer to monochrome.

  • _ _ _ _ _ _ _ _ _ _ _ _ _ _ _ _


    UPDATE!


    I came to like those very much in the short time I did the sketch above ^^

    The weird hatches happen when you draw tiny circles smaller then the brushtip… I think it can look kinda cool. You could use this for water ripples! -> draw circles first, then perspective transform the layer...

    _ _ _ _ _ _ _ _ _ _ _ _ _ _ _ _


    Alright, that’s everything ^^ (I know, it’s a lot…)
    Have fun!

    해치 텍스처 브러쉬 Hatch Texture Brushes

    톤 스크래핑 도구(선 너비 조정) Tone Scraping Tools (adjust line width)

    직접 해치 브러쉬 / 스네이크 / 스프레이 Direct Hatch Brushes / Snakes / Sprays

    수직 해치 브러쉬 Vertical Hatch Brushes

    커브 해치 브러쉬 Curve Hatch Brushes

    구 버전

    콘텐츠 ID:2075389

    공개일 : 21 days ago

    갱신일 : 20 days ago