
Print-ify (자동 효과 + 레이어 템플릿) (Print-ify (Auto Effect + Layer Template)) Print-ify (Auto Effect + Layer Template)
콘텐츠 ID:2020152
-
5,736

자동 동작과 레이어 템플릿 조합은 평면 이미지에 인쇄된 하프톤 질감을 제공합니다. An auto-action and layer template combination that will give a flat image a printed halftone texture.
디지털 아트에 아날로그적인 질감을 부여하시겠습니까? 이 도구는 하나의 레이어를 3개의 겹치는 CMY 레이어로 분할하고 각각에 하프톤 도트 텍스처를 추가하여 인쇄된 모양을 제공합니다. 다음 지침에 따라 사용하십시오.
1단계: 평면(단일 레이어) 이미지에서 "cmyk" 자동 액션을 실행합니다.

2단계: "현재 [레이어 표시 상태]를 실행할 수 없습니다"라는 창이 나타나면 " 예" 를 클릭합니다. 왜 이런 일이 발생하는지 잘 모르겠지만 결과에 전혀 영향을 미치지 않습니다.

الخطوة 3 : 하단 레이어의 가시성을 끕니다. 이것은 원본 이미지의 반전된 버전입니다. (Edit > Tonal Correction > Reverse Gradient를 사용하여 원래 색상으로 되돌릴 수도 있습니다.)

الخطوة 4 : "하프톤 레이어 세트" 템플릿을 레이어 목록이나 캔버스로 드래그하여 레이어에 추가합니다.

5 단계 : 각 색상 레이어를 해당 폴더로 이동합니다 : "c"폴더의 레이어 "c", 폴더 "m"의 레이어 "m", 폴더 "y"의 레이어 "y". 텍스처가 포함된 레이어 아래에 있는지 확인하십시오.

수행! 이제 이미지가 오래된 하프톤 프린트처럼 보입니다!

텍스처 배율은 기본적으로 2로 설정되어 있지만 "저해상도" 모양에 대한 값을 변경할 수 있습니다.

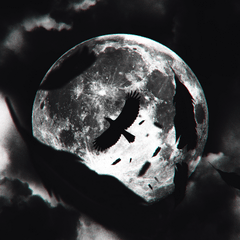
이 효과는 가짜 "VHS" 스크린샷에서 특히 멋지게 보입니다.
전에:

후:

Would you like your digital art to have some analog texture to it? These tools will split one layer into 3 overlapping CMY layers and add a halftone dots texture to each to give it a printed look. Follow these instructions to use:
Step 1: Run the "cmyk" Auto Action on a flat (single layer) image.
Step 2: When the window reading "Currently [Display status of layer] cannot be executed" pops up, click "Yes". I am not sure why this happens, but it doesn't affect the results at all.
Step 3: Turn the visibility of the bottom layer OFF. This is an inverted version of the original image. (You can also return it to its original colors by using Edit > Tonal Correction > Reverse Gradient)
Step 4: Add the "halftone layer set" template to your layers by dragging it into the layer list or onto the canvas.
Step 5: Move each color layer into the corresponding folder: Layer "c" in folder "c", layer "m" in folder "m", and layer "y" in folder "y". Make sure they are UNDER the layers containing the textures.
Done! Your image now looks like an old halftone print!
The texture scale is set to 2 by default, however you can change the value for a "lower resolution" look.
This effect looks especially cool on fake "VHS" screenshots.
Before:
After:
구분 1 Category 1


갱신 이력
#ASSETSChallenge 태그를 추가했습니다. Added #ASSETSChallenge tag.


'Tealfruit'님의 다른 소재


'소재집'의 인기 소재


신규 소재


배지
-
 MVP ◆질문에 적절한 답변을 많이 게시하고 커뮤니티 운영에 크게 공헌한 사용자입니다. MVP는 3개월에 한 번, 그 사이에 획득한 포인트를 바탕으로 결정하고 표창을 실시하고 있습니다.
 -
 NVP(New Valuable Player) ◆MVP 다음으로 커뮤니티 운영에 공헌한 사용자입니다. 이제까지 MVP 수상 경험이 없는 분 중에서 획득한 포인트를 바탕으로 결정하여 표창을 실시하고 있습니다.
 -
 공식 엑스퍼트 ◆뛰어난 응답자의 증표인 MVP수상자 중에서 선택된 커뮤니티에서 가장 뛰어난 응답자의 증표입니다. 심사를 거쳐서 저희 회사에서 의뢰할 경우 취임되십니다.※ 옛 명칭 '에반젤리스트'
 -
 셀시스 공인 모더레이터 ◆모더레이터는 일본어와 기타 언어로 말할 수 있는 셀시스 공인 스태프입니다. 소프트웨어나 창작 전문가가 아니므로 직접 의문을 해결할 수는 없지만 여러분이 순조롭게 소통할 수 있도록 언어나 커뮤니케이션 측면에서 지원합니다.
 -
 셀시스 공식운영에 관련된 공식 계정입니다.