

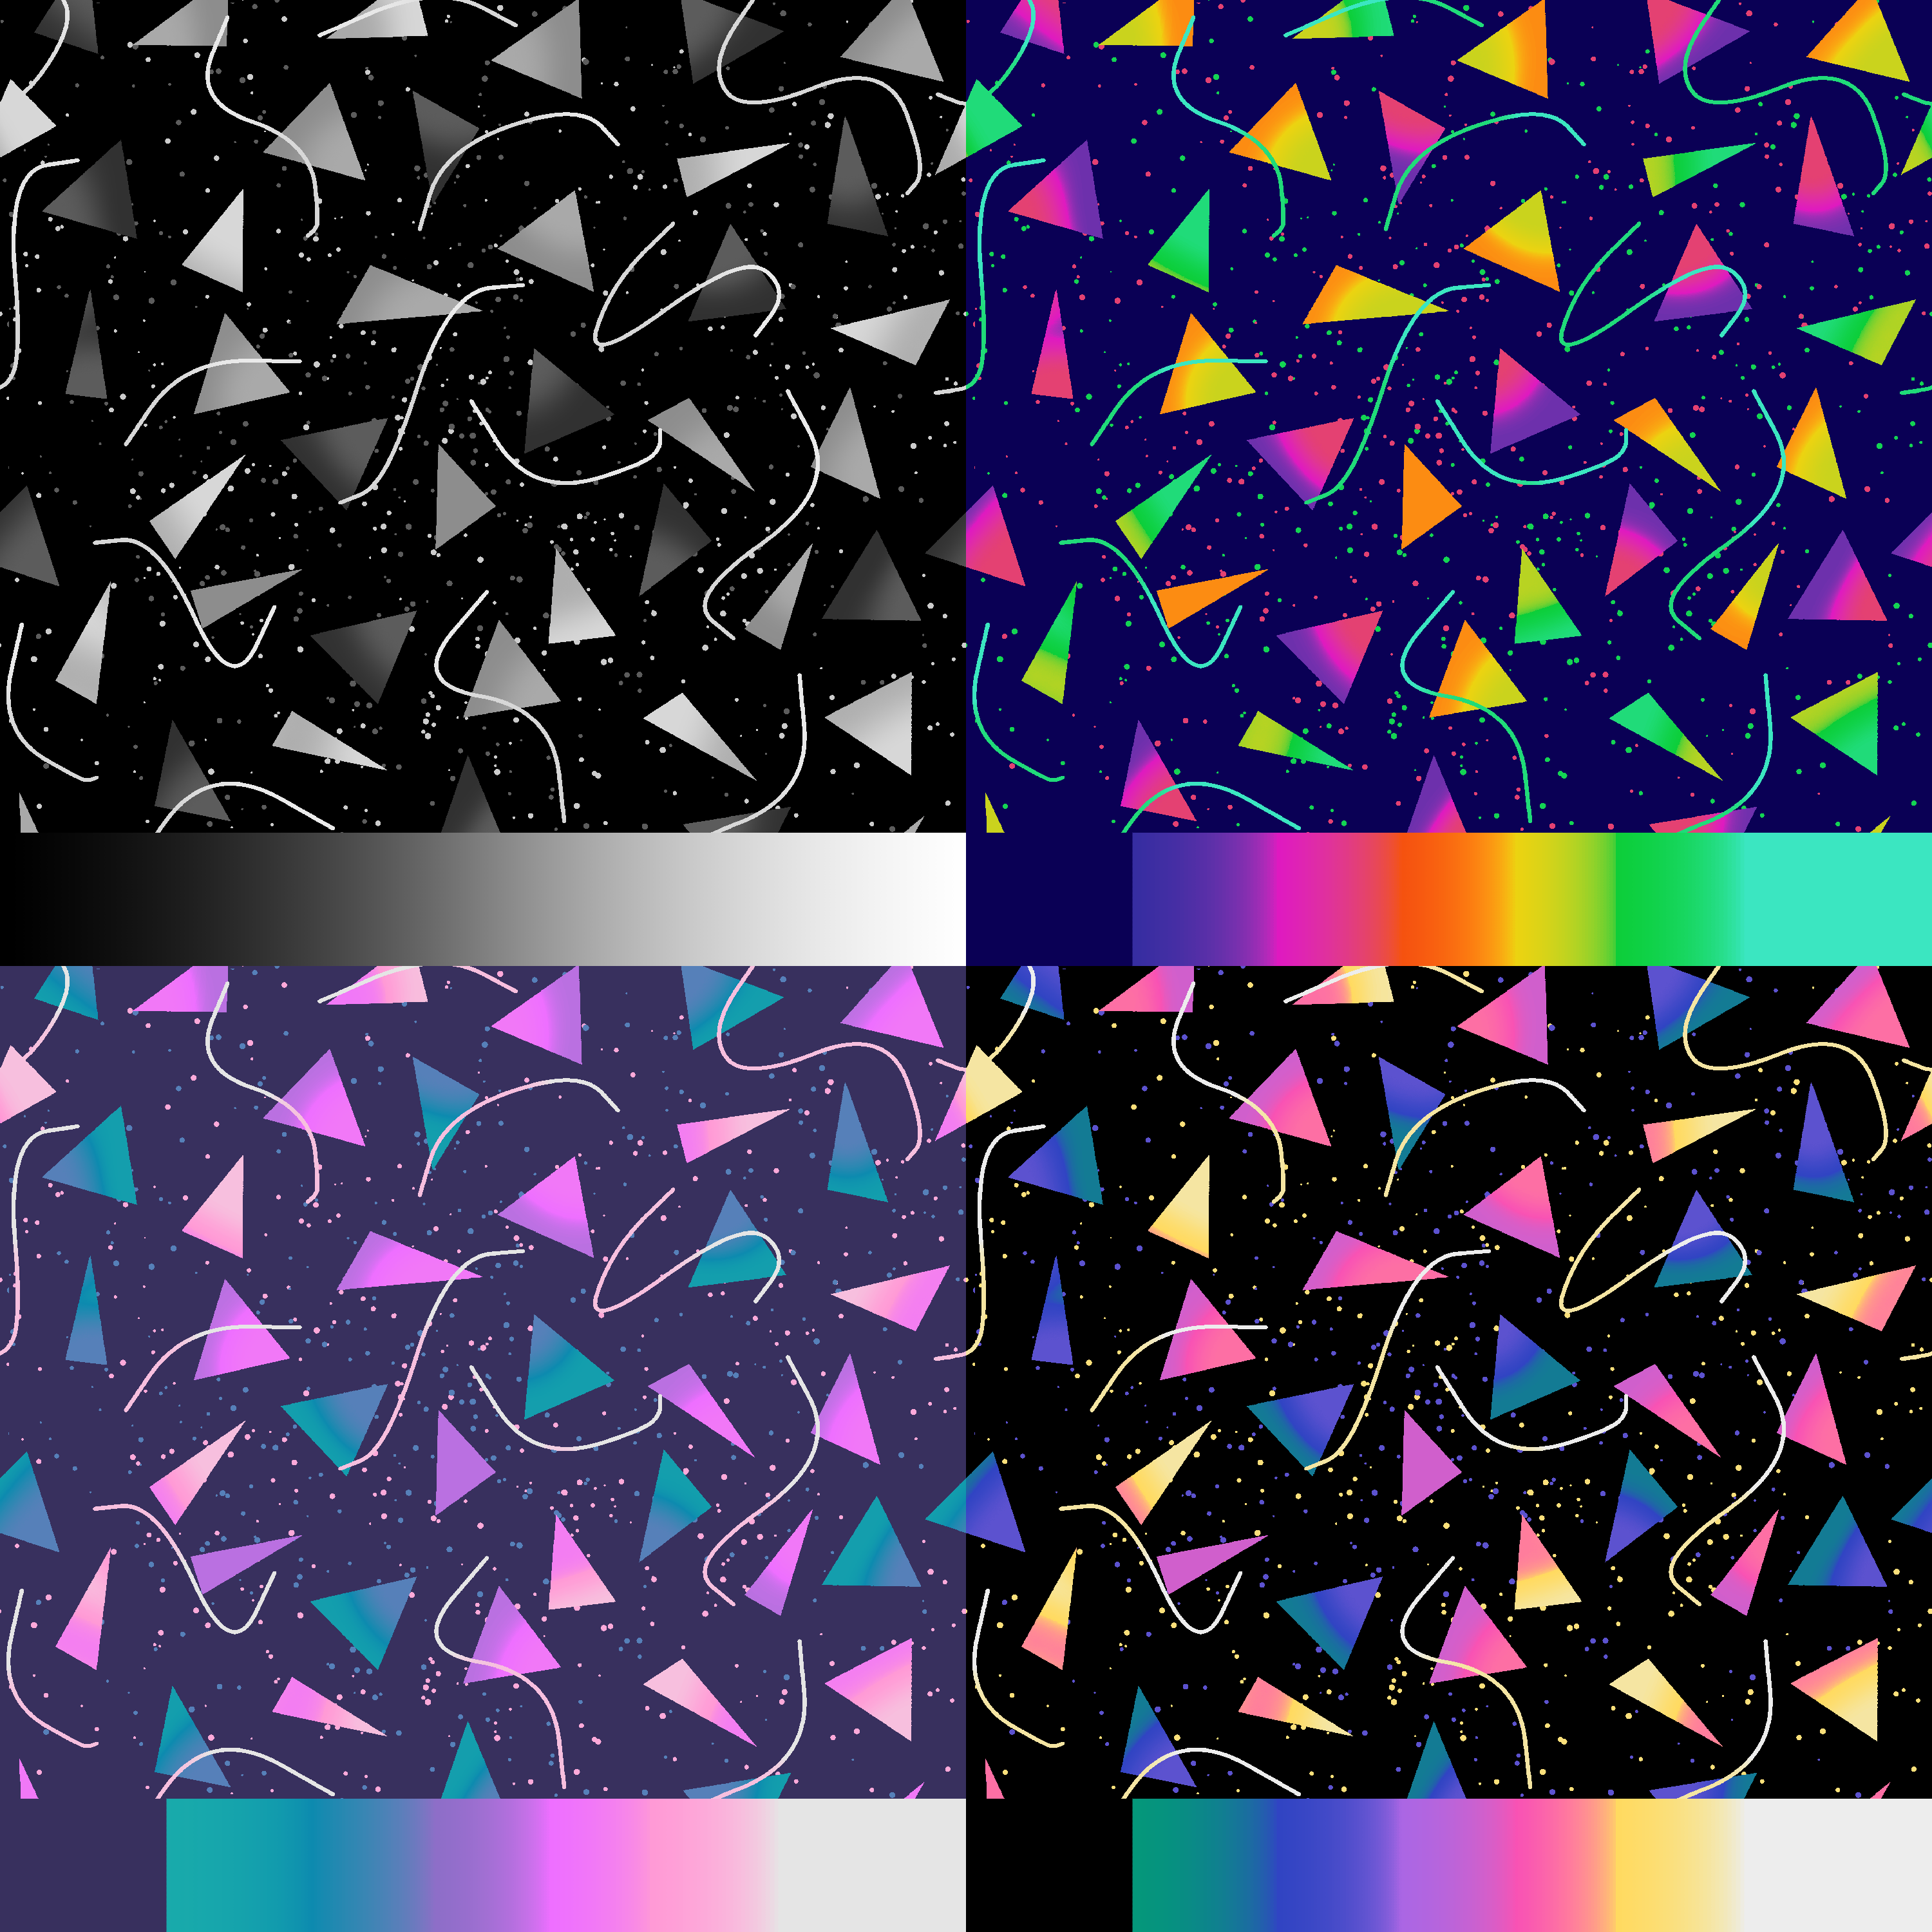
멤피스 스타일의 복고풍에서 영감을 받은 여러 패턴이 회색조로 반복되며, 원하는 대로 색칠하는 데 사용할 수 있는 그라디언트 세트가 있습니다. Several Memphis-style, retro inspired repeating patterns in grayscale, with gradient sets that can be used to color them however you'd like.
이것들은 포함된 그라디언트 세트(또는 자신의 것)와 그라디언트 맵 기능을 사용하여 사용자 정의할 수 있는 복고풍, 멤피스 스타일의 반복 패턴입니다.
사용하는 방법:
1. 패턴을 작업 공간이나 레이어 목록으로 드래그합니다.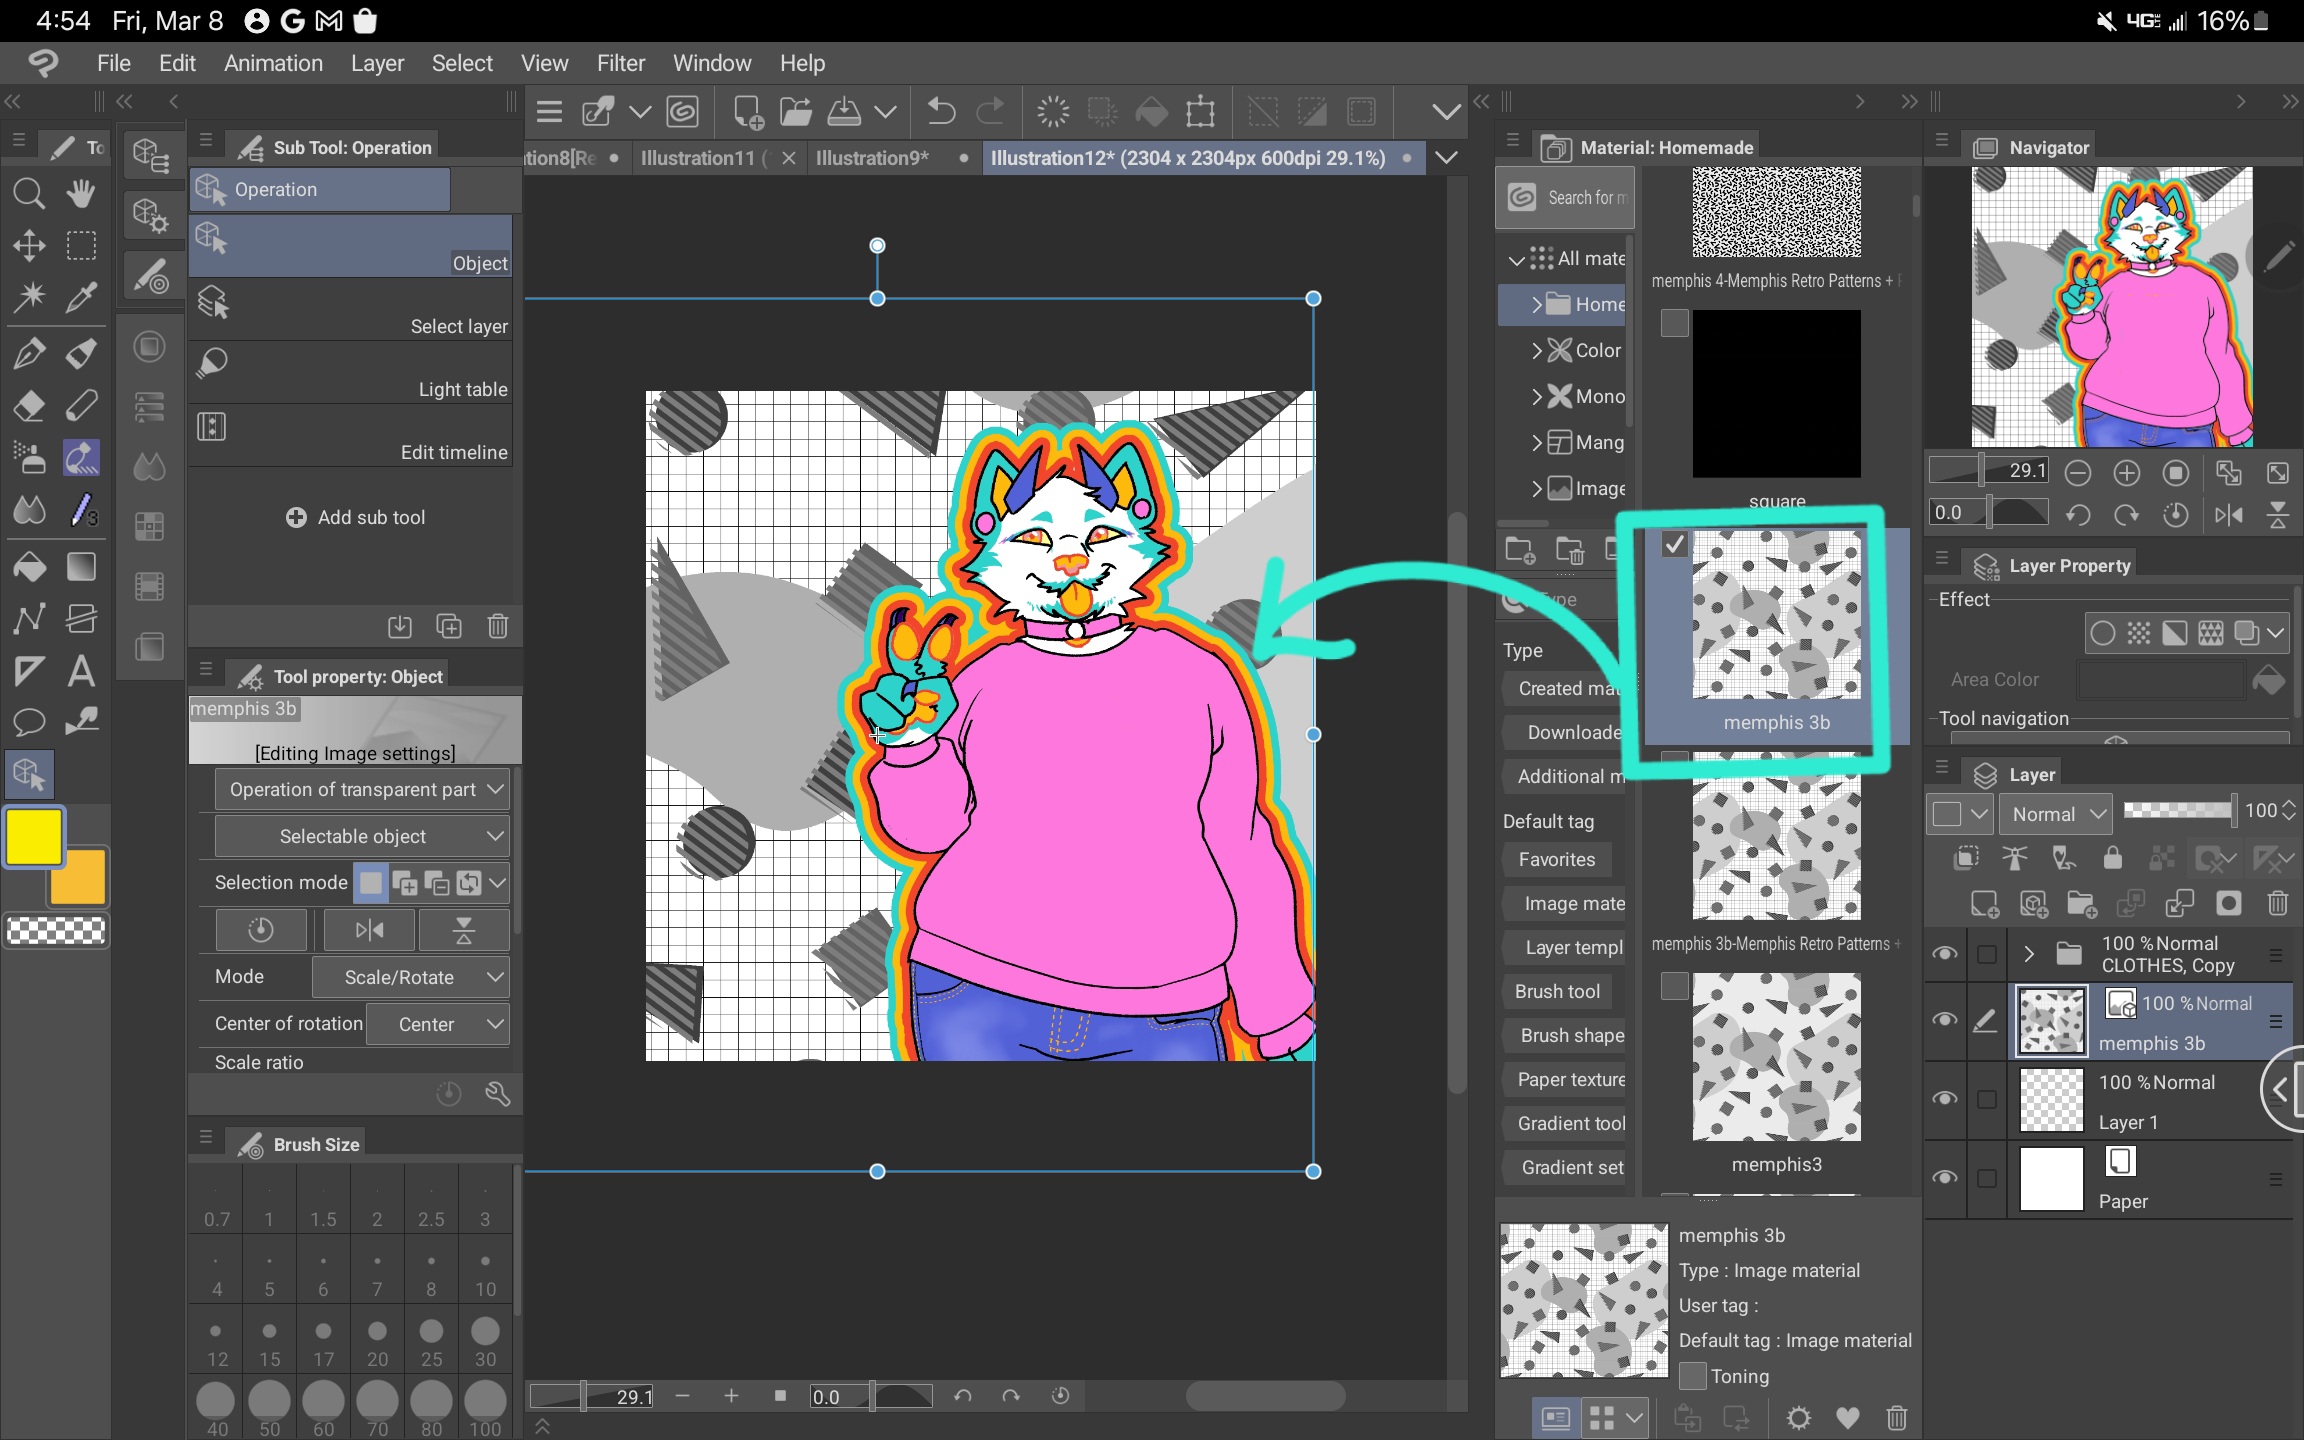
2. 원하는 대로 패턴을 확대/축소합니다. 참고: 앤티 앨리어싱은 회색 픽셀의 다른 음영을 만들어 색상이 렌더링되는 방식에 영향을 줄 수 있습니다. 이를 방지하려면 개체 설정으로 이동하여 "이미지 재료"에서 "하드 가장자리(가장 가까운 이웃)"를 선택합니다.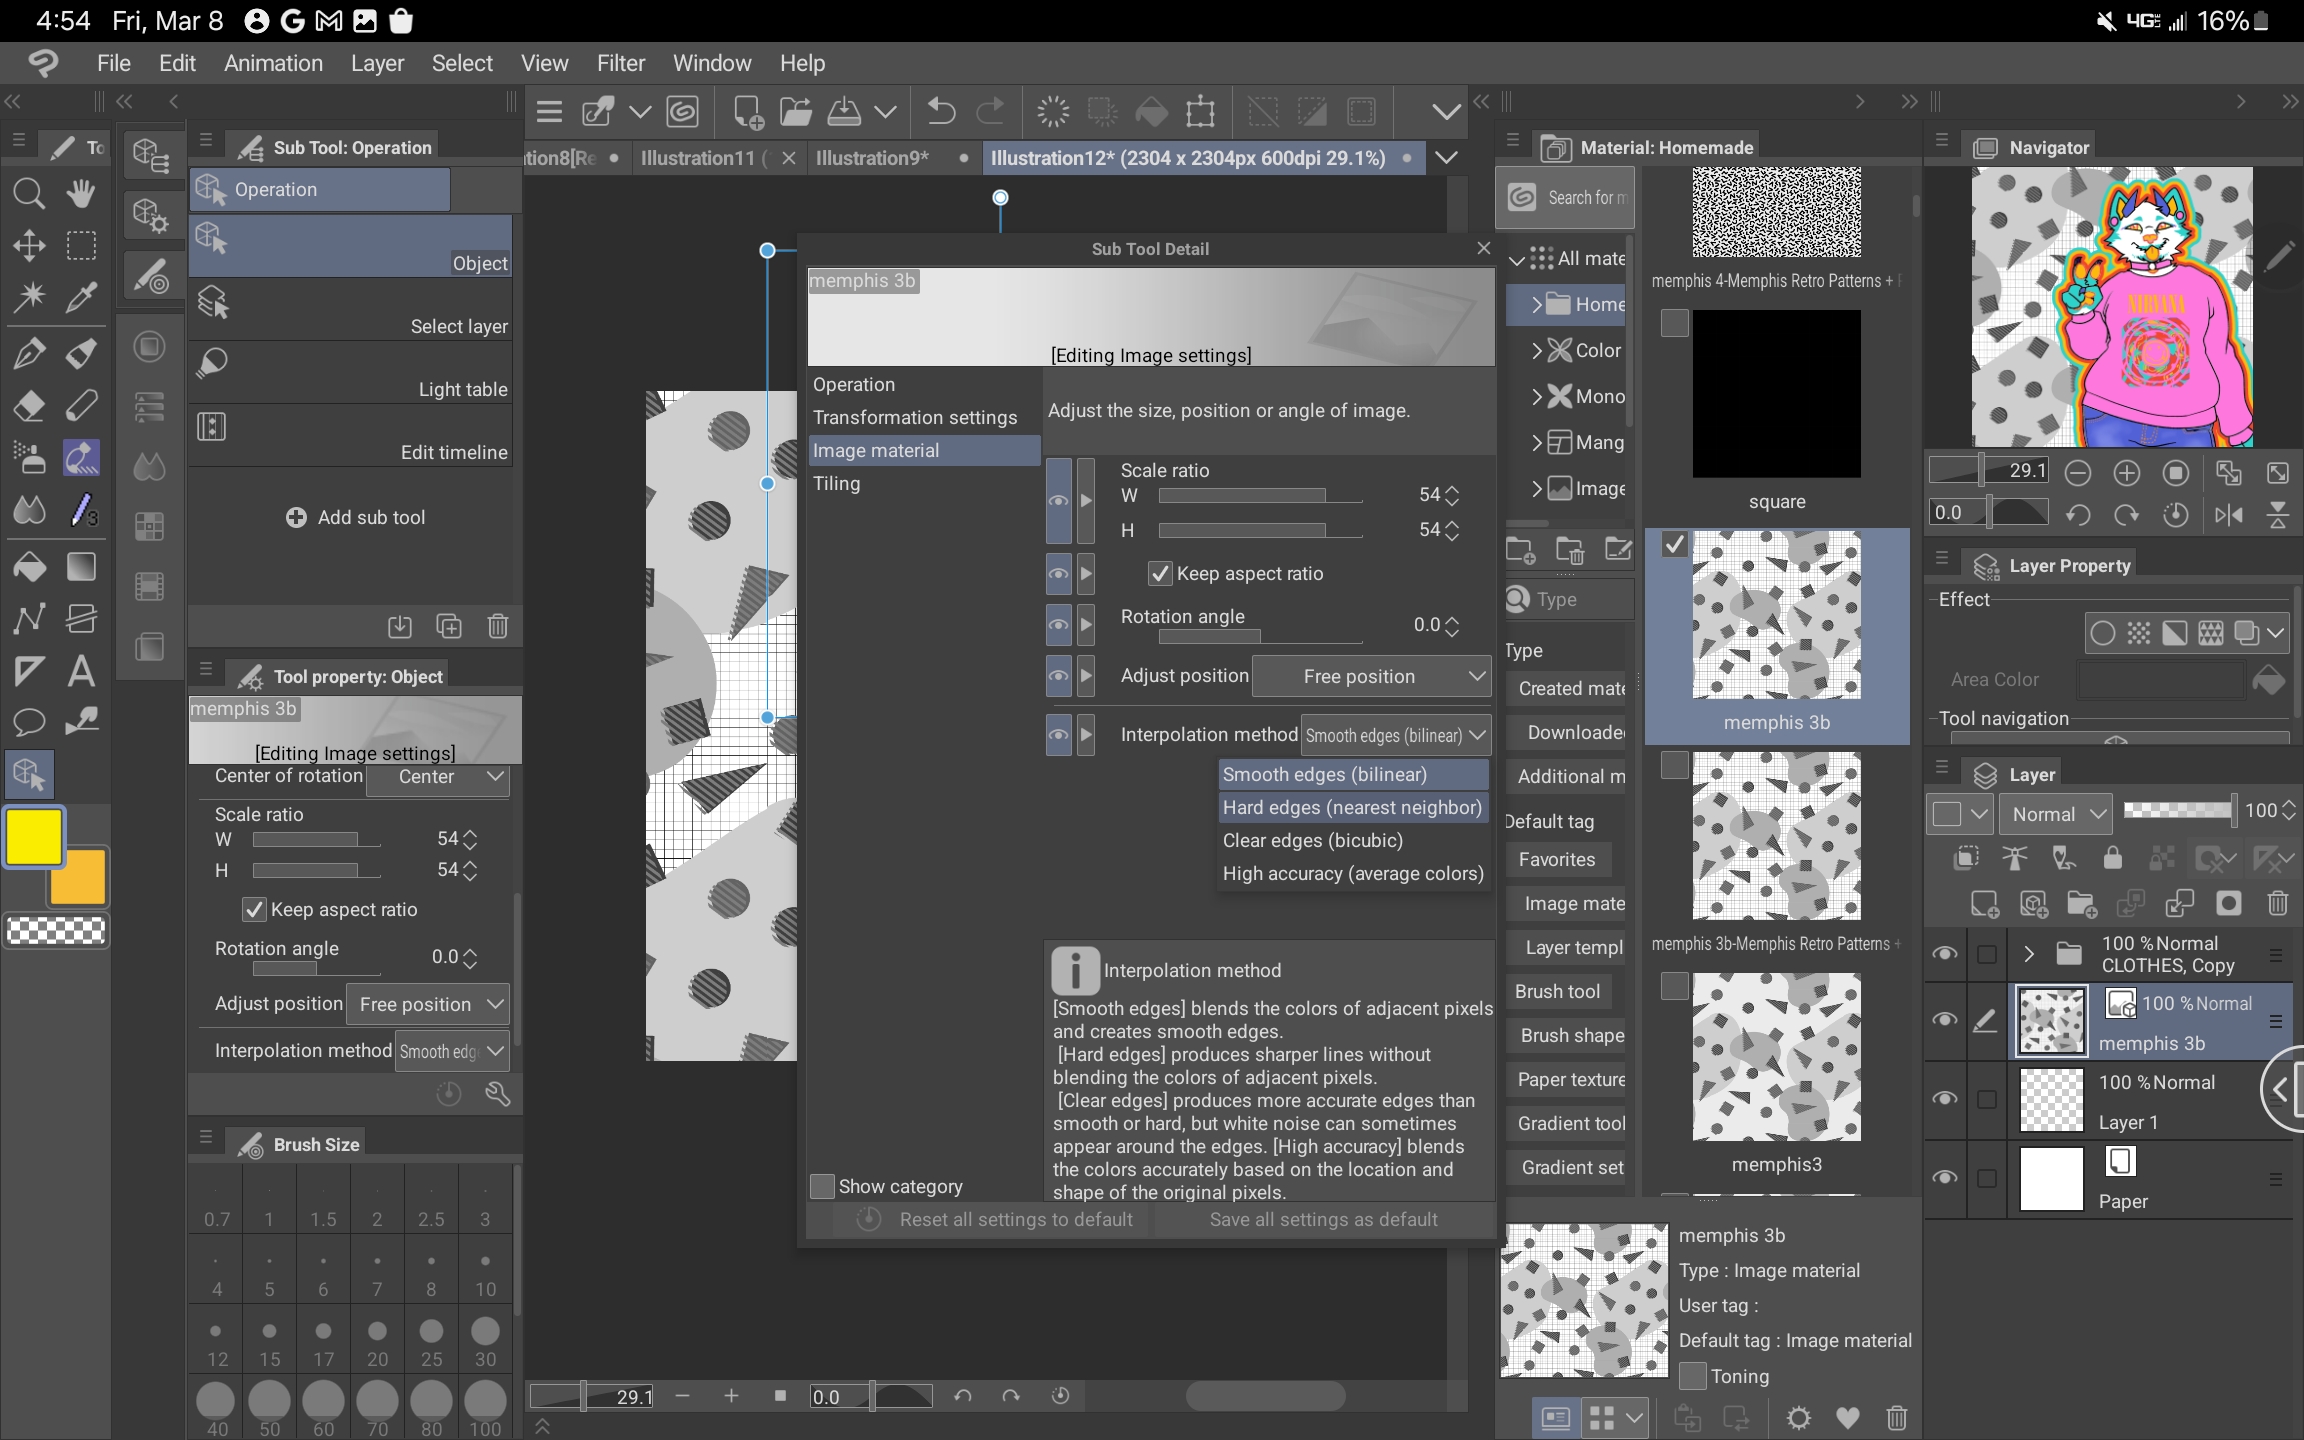

다양한 팔레트를 사용하면 이러한 패턴을 작업 분위기와 훨씬 더 잘 일치시킬 수 있습니다.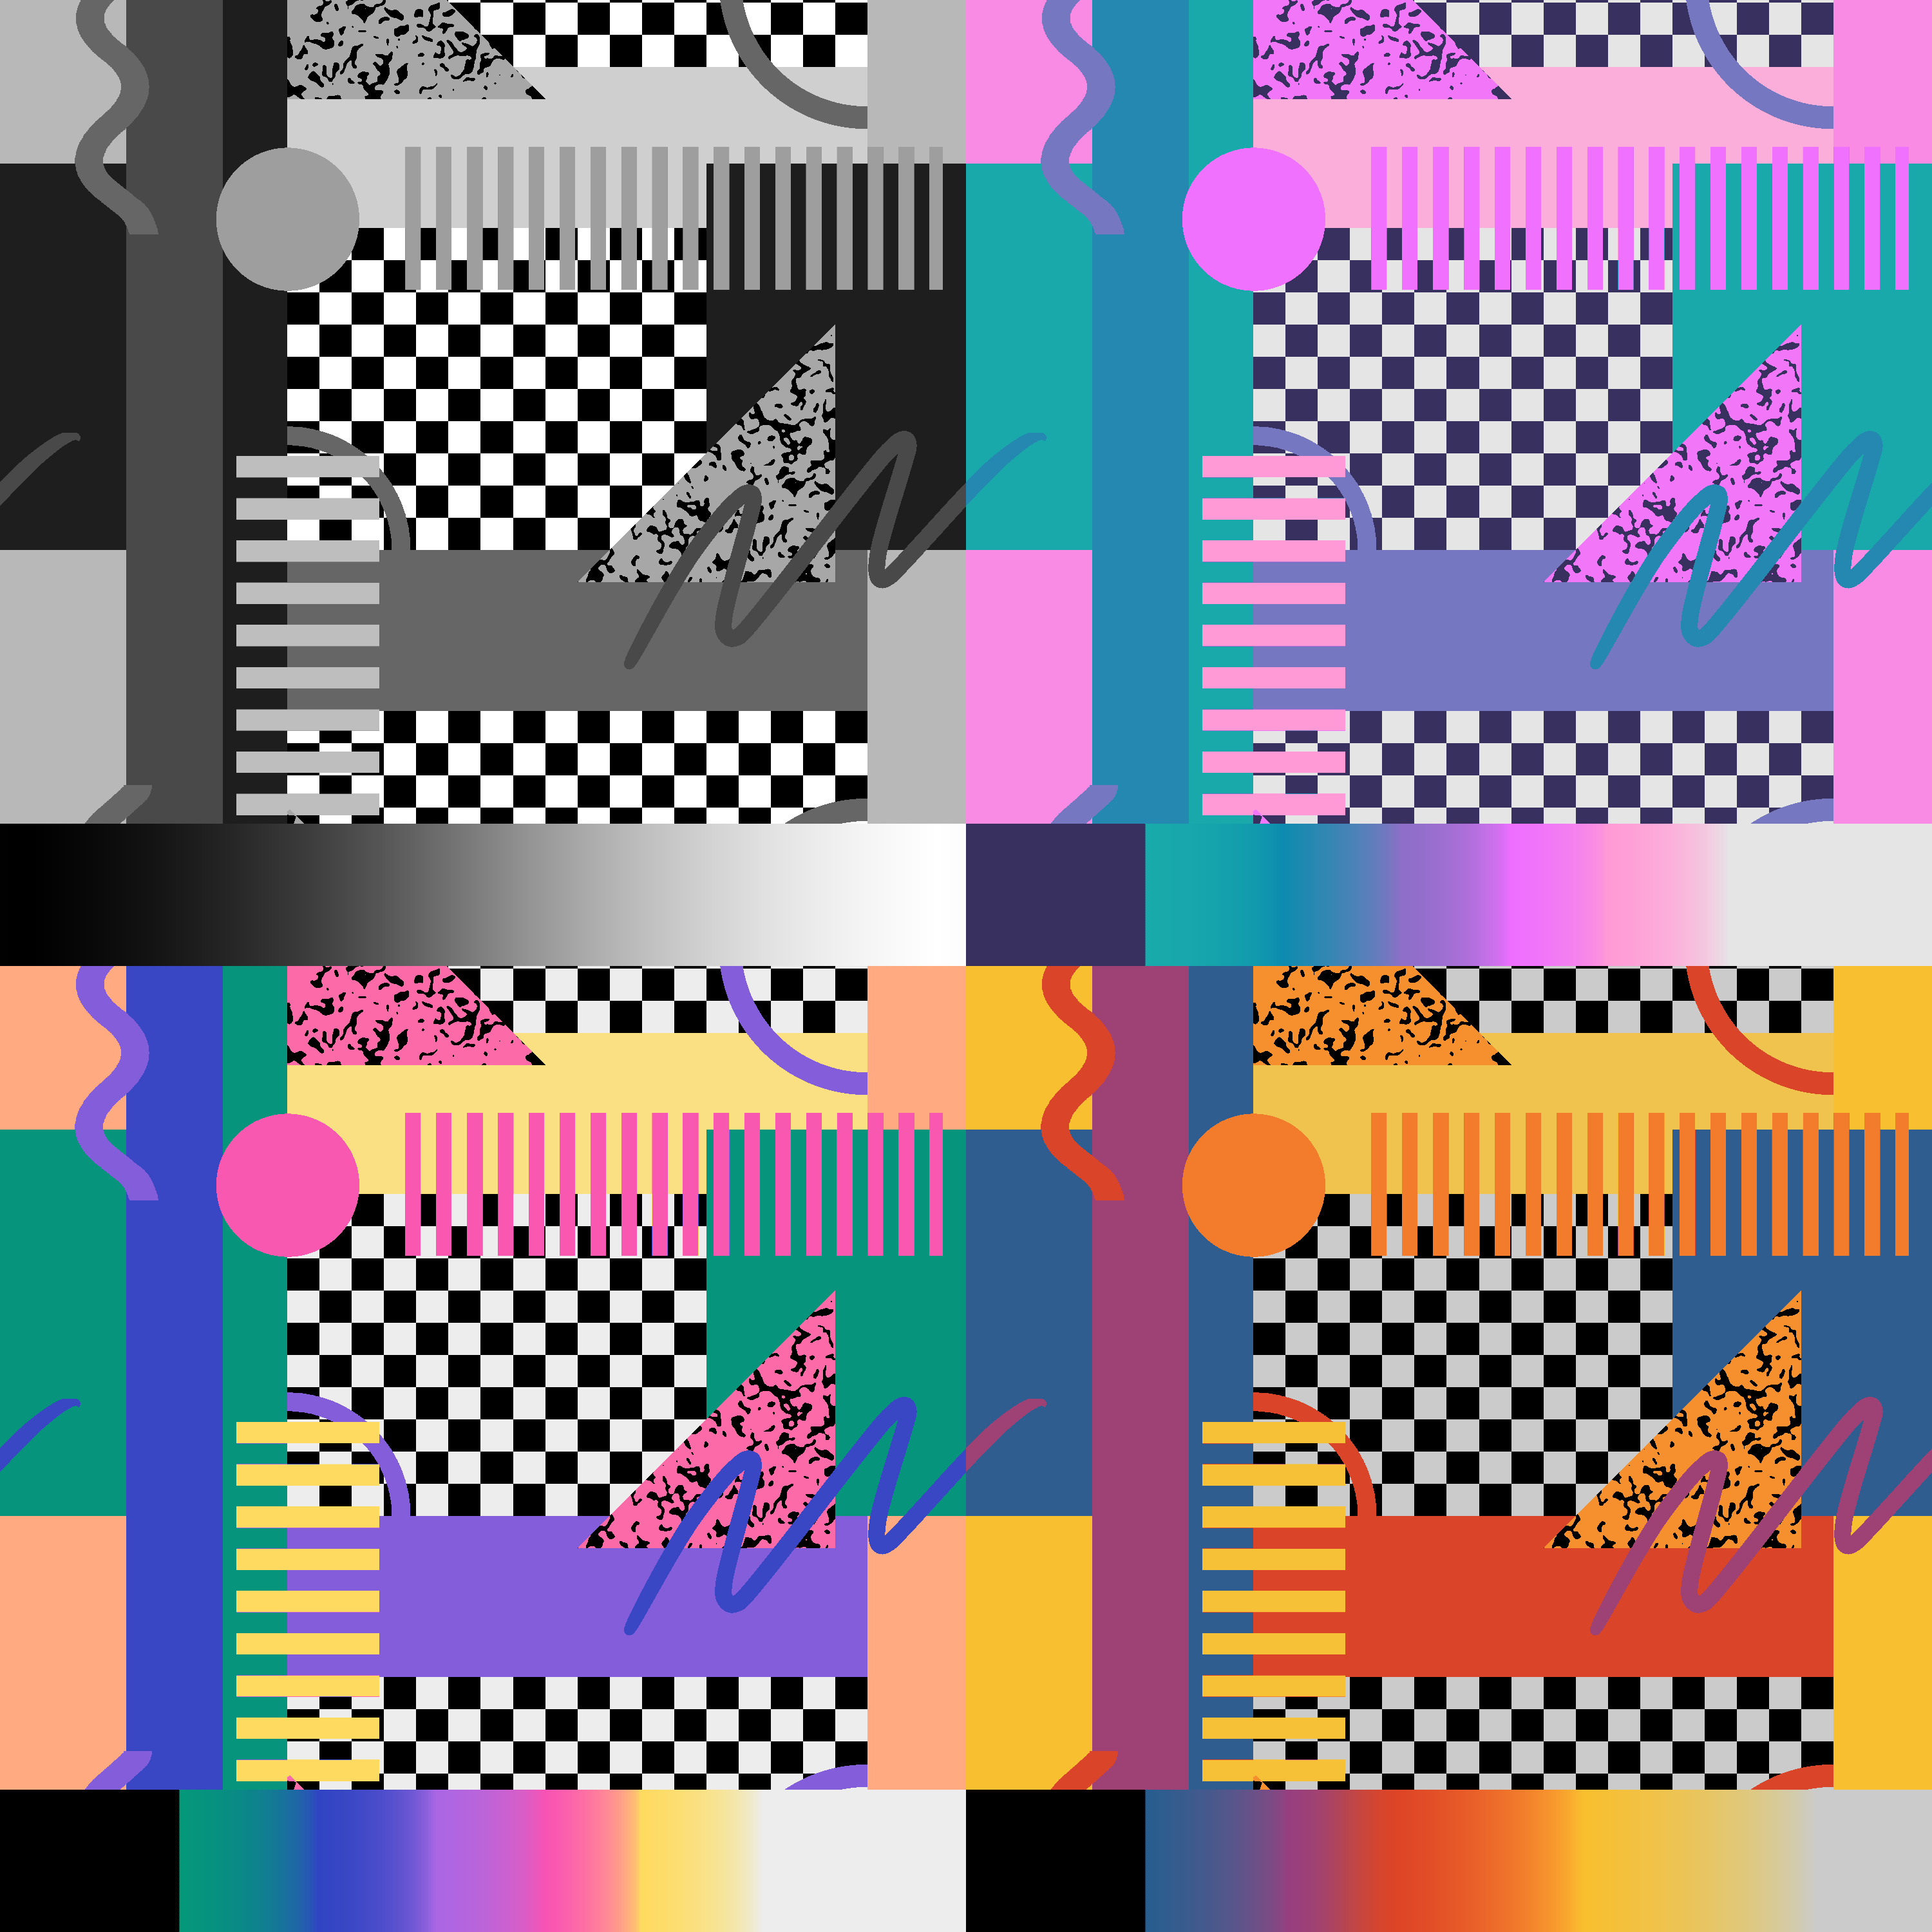
사용하는 방법:
1. 패턴을 작업 공간이나 레이어 목록으로 드래그합니다.

2. 원하는 대로 패턴을 확대/축소합니다. 참고: 앤티 앨리어싱은 회색 픽셀의 다른 음영을 만들어 색상이 렌더링되는 방식에 영향을 줄 수 있습니다. 이를 방지하려면 개체 설정으로 이동하여 "이미지 재료"에서 "하드 가장자리(가장 가까운 이웃)"를 선택합니다.


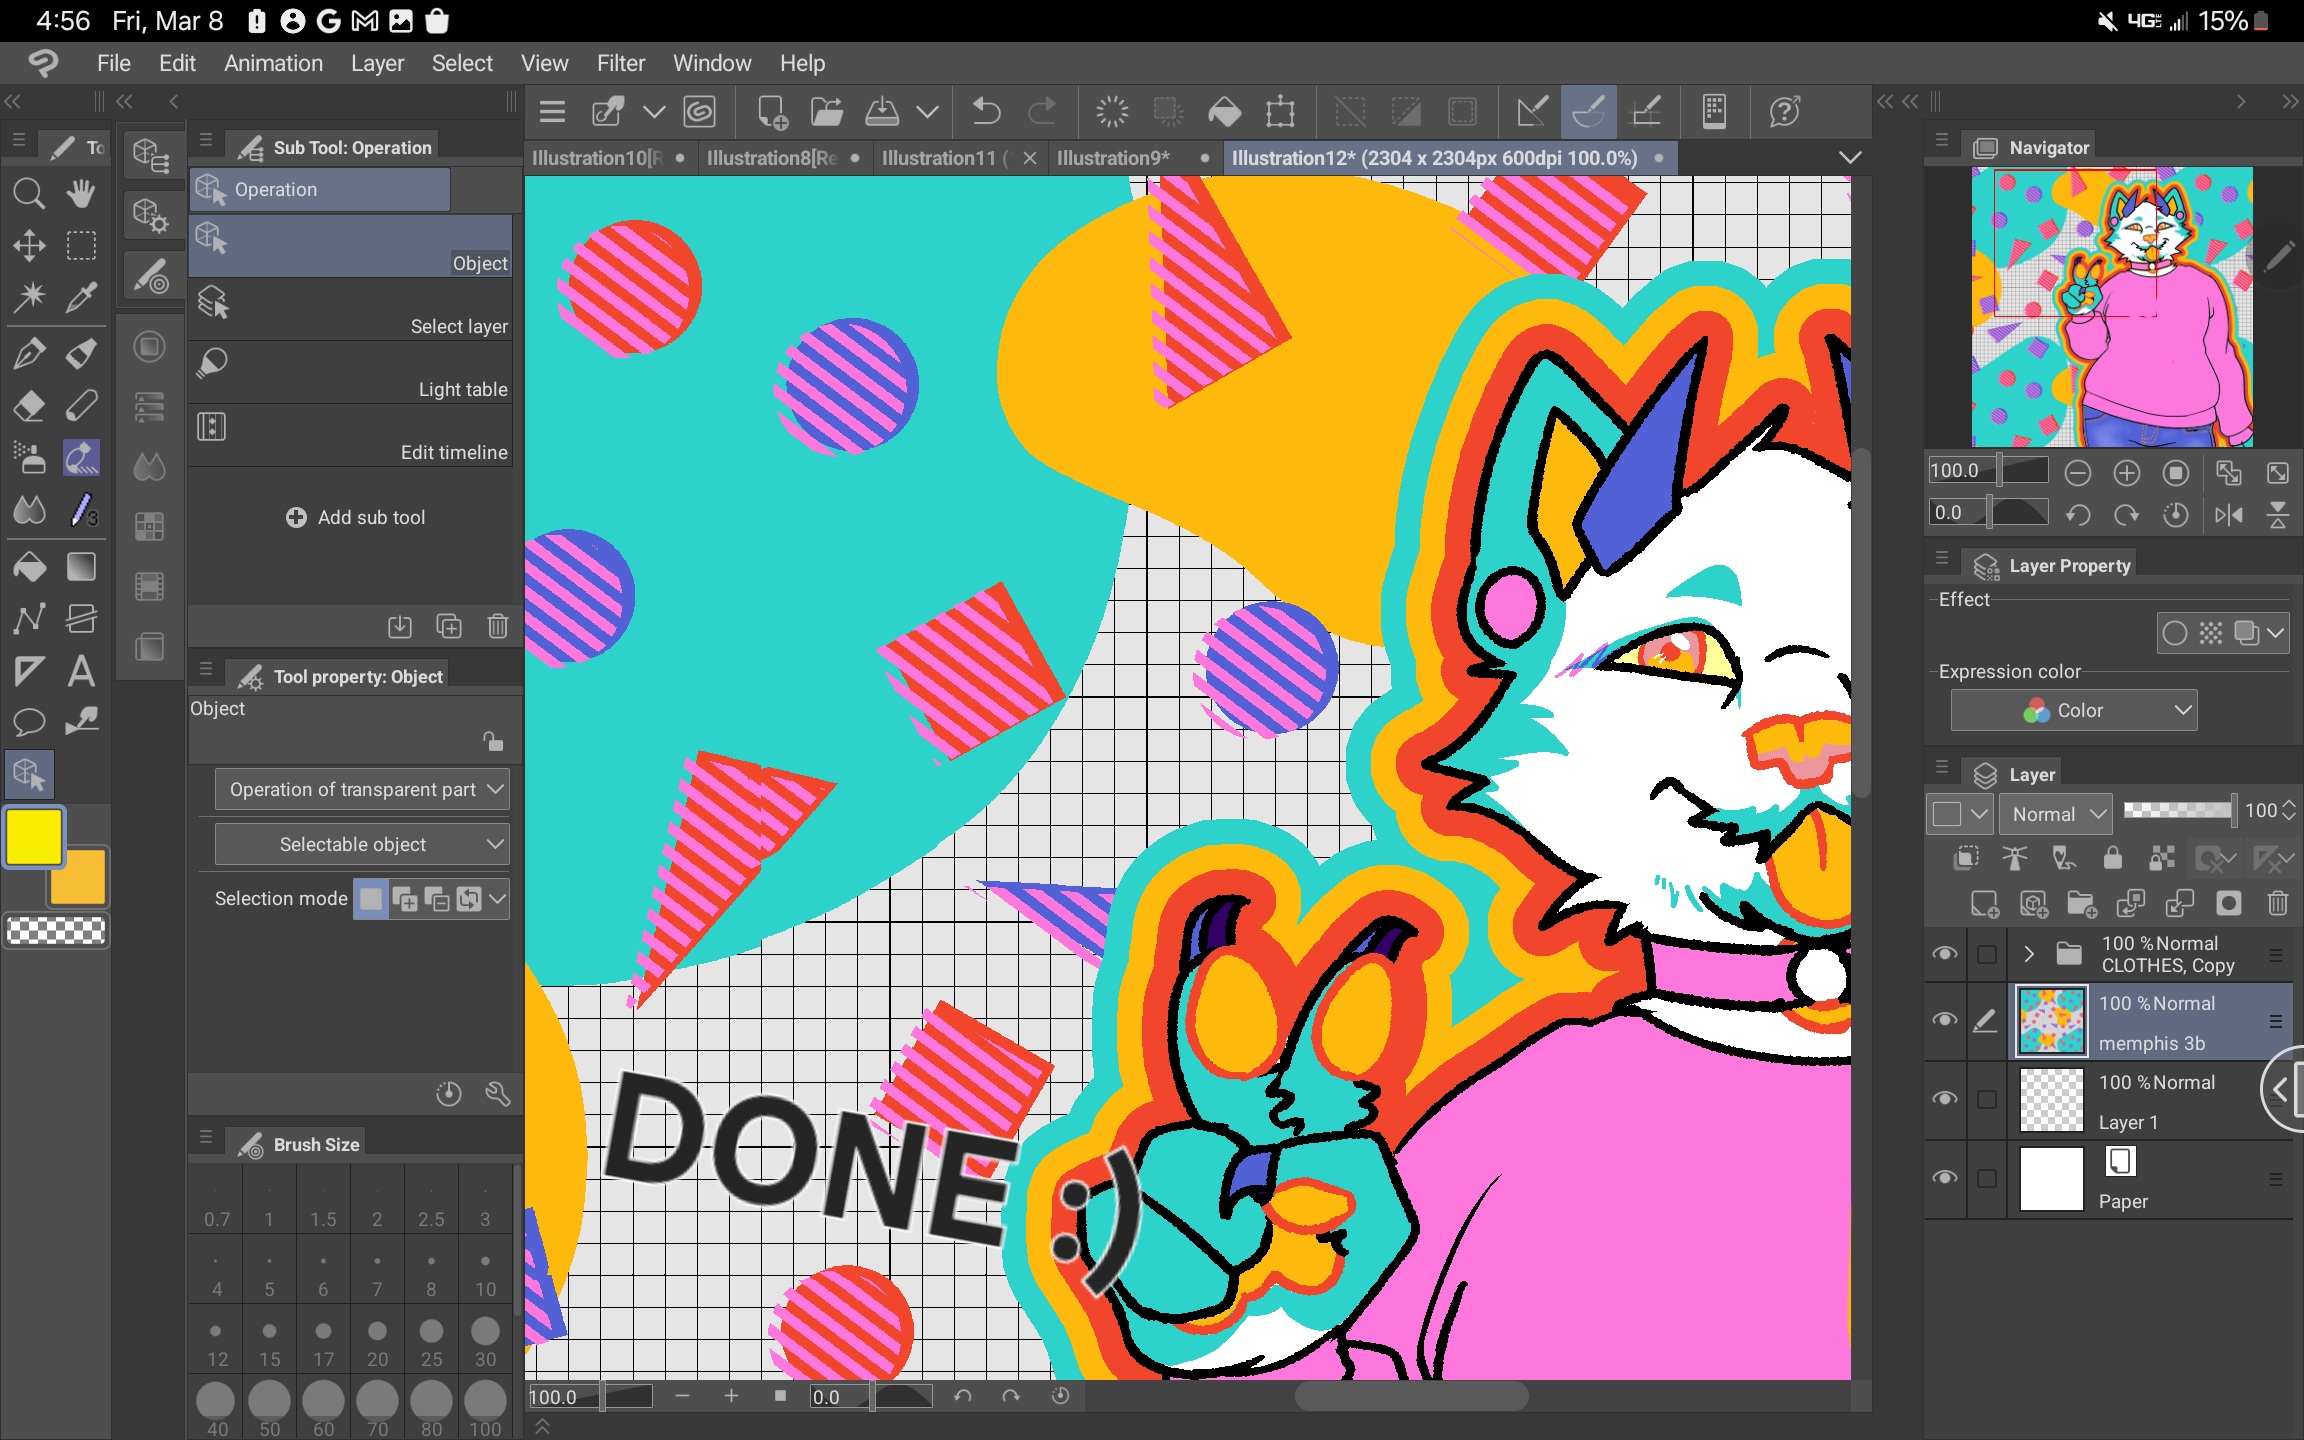
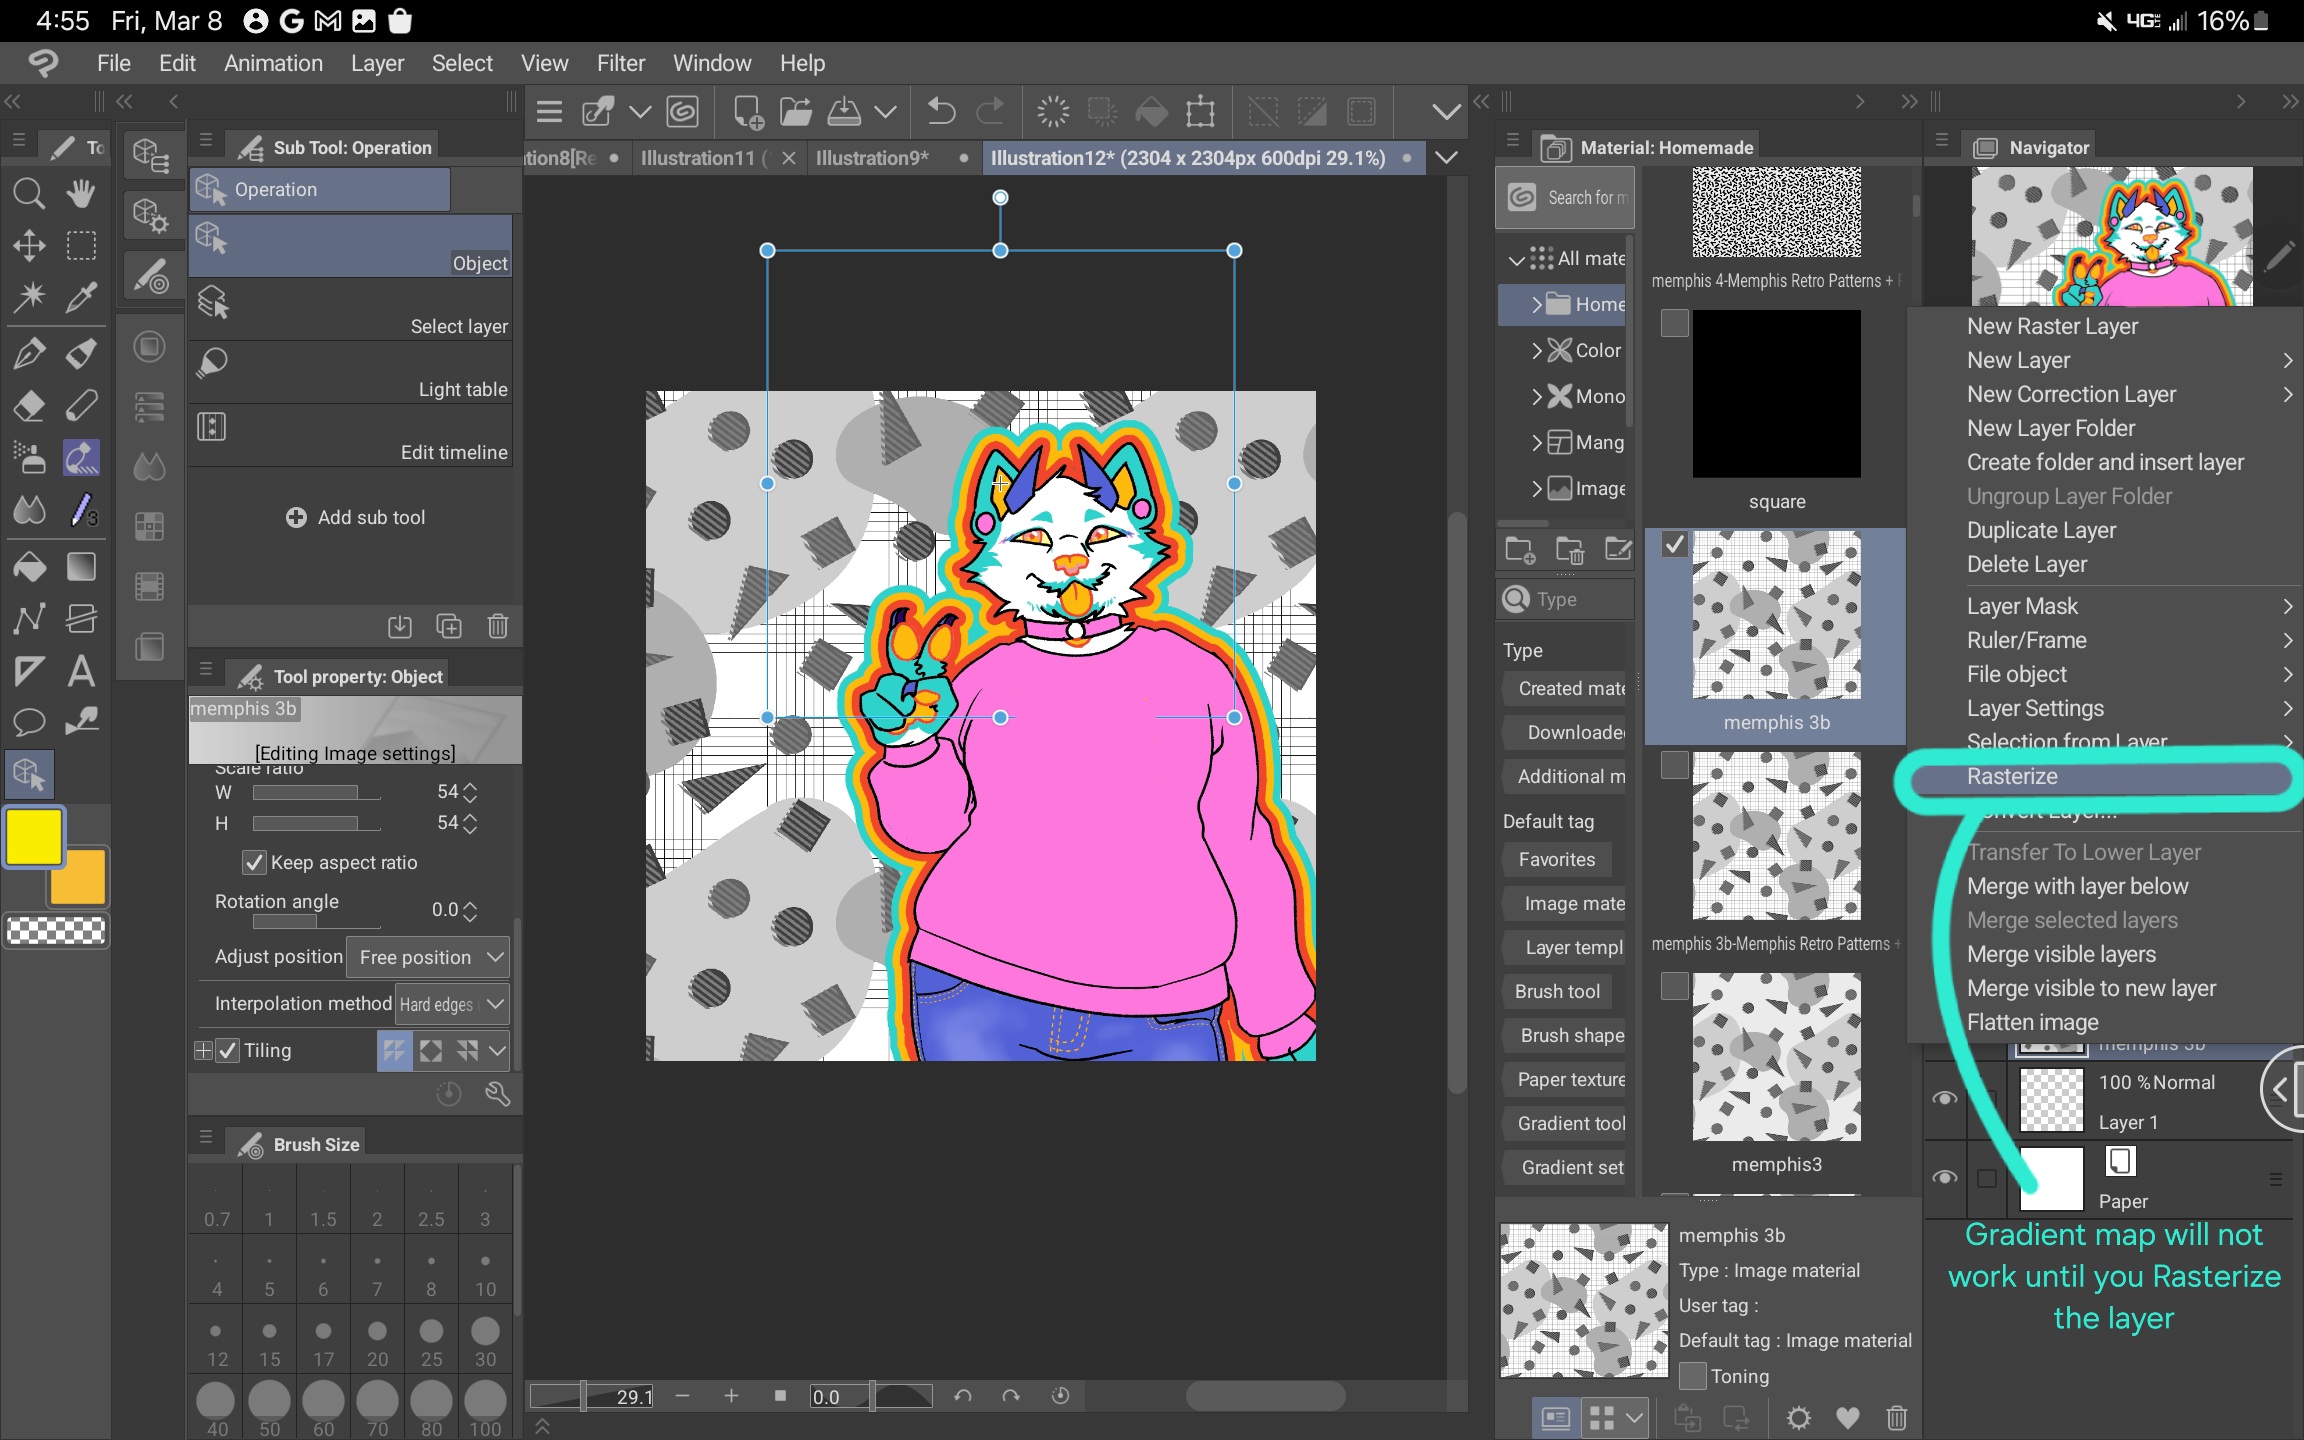
3. 패턴이 원하는 대로 조정되면 패턴 레이어를 마우스 오른쪽 버튼으로 클릭하고 "래스터화"를 선택합니다. 이 작업을 수행할 때까지 그라디언트 맵 기능이 작동하지 않습니다.

4. Edit > Tonal Correction > Gradient maps로 이동합니다. 을 클릭하고 원하는 색상 팔레트를 선택합니다. (그라디언트 맵을 사용하는 방법을 배우려면 이 자습서를 참조하십시오. https://tips.clip-studio.com/en-us/articles/2453 )


5. 확인을 클릭합니다. 작업 :)에 사용자 지정 패턴을 성공적으로 추가했습니다.

다양한 팔레트를 사용하면 이러한 패턴을 작업 분위기와 훨씬 더 잘 일치시킬 수 있습니다.


이러한 패턴과 그라디언트 세트의 대부분은 이전 업로드인 Memphis Retro Patterns + Palettes Vol. 1 및 2는 다음과 같습니다.
These are retro, Memphis style repeating patterns you can customize using the included gradient set (or your own) and the Gradient Map function.
HOW TO USE:
1. Drag the pattern onto your workspace or into your layer list.
2. Scale the pattern as desired. NOTE: Anti-aliasing may affect how colors are rendered by making different shades of gray pixels. To prevent this, go into the object settings, and under "Image Material", select "Hard Edges (nearest neighbor)".
Using different palettes can make these patterns match the vibe of your work so much better.
HOW TO USE:
1. Drag the pattern onto your workspace or into your layer list.
2. Scale the pattern as desired. NOTE: Anti-aliasing may affect how colors are rendered by making different shades of gray pixels. To prevent this, go into the object settings, and under "Image Material", select "Hard Edges (nearest neighbor)".
3. When the pattern is adjusted how you want it, right-click the pattern layer and select "Rasterize". The Gradient Map function will not work until you do this.
4. Go to Edit > Tonal Correction > Gradient maps... and select the desired color palette. (To learn how to use gradient maps, see this tutorial: https://tips.clip-studio.com/en-us/articles/2453 )
5. Click OK. You have successfully added a customized pattern to your work :)
Using different palettes can make these patterns match the vibe of your work so much better.
Many of these patterns and gradient sets can be found in my previous uploads, Memphis Retro Patterns + Palettes Vol. 1 and 2, which are
패턴 Patterns
-
멤피스1 memphis1
-
멤피스1b memphis1b
-
멤피스2 memphis2
-
멤피스2b memphis2b
-
멤피스3 memphis3
-
멤피스 3B memphis 3b
-
멤피스 4 memphis 4
-
멤피스 4.5 memphis 4.5
-
멤피스 5 memphis 5
-
멤피스 6 memphis 6
-
멤피스7 memphis7
-
멤피스 8 memphis 8
-
멤피스 8B memphis 8b
-
멤피스9 memphis9
-
멤피스10 memphis10
-
멤피스10b memphis10b
-
멤피스 11 memphis 11
-
멤피스 11B memphis 11b
-
멤피스 11C memphis 11c
-
멤피스 12 memphis 12
-
멤피스 13 memphis 13
-
멤피스 14 memphis 14
-
멤피스 15 memphis 15


그라디언트 세트 Gradient Sets


'Tealfruit'님의 다른 소재


'소재집'의 인기 소재


신규 소재


배지
-
 MVP ◆질문에 적절한 답변을 많이 게시하고 커뮤니티 운영에 크게 공헌한 사용자입니다. MVP는 3개월에 한 번, 그 사이에 획득한 포인트를 바탕으로 결정하고 표창을 실시하고 있습니다.
 -
 NVP(New Valuable Player) ◆MVP 다음으로 커뮤니티 운영에 공헌한 사용자입니다. 이제까지 MVP 수상 경험이 없는 분 중에서 획득한 포인트를 바탕으로 결정하여 표창을 실시하고 있습니다.
 -
 공식 엑스퍼트 ◆뛰어난 응답자의 증표인 MVP수상자 중에서 선택된 커뮤니티에서 가장 뛰어난 응답자의 증표입니다. 심사를 거쳐서 저희 회사에서 의뢰할 경우 취임되십니다.※ 옛 명칭 '에반젤리스트'
 -
 셀시스 공인 모더레이터 ◆모더레이터는 일본어와 기타 언어로 말할 수 있는 셀시스 공인 스태프입니다. 소프트웨어나 창작 전문가가 아니므로 직접 의문을 해결할 수는 없지만 여러분이 순조롭게 소통할 수 있도록 언어나 커뮤니케이션 측면에서 지원합니다.
 -
 셀시스 공식운영에 관련된 공식 계정입니다.