



This is the finishing correction auto-action used in actual webtoon work! 실제 웹툰 작업에서 사용하는 마무리 보정 오토액션입니다!
📢 Distributed for free for one day after uploading!
After one day, it changes to 10 CLIPPY.
If you need it, feel free to get it during the free distribution period!
It's an auto-action game packed with personal taste!

Please keep this in mind when downloading!
It's a great AutoAction tool for editing large images.
When used on small pictures, the effect is strong, which also adds a fun vibe!
The main retouching is to gently fill in small gaps or boundaries where the drawing isn't properly painted.
A luminance layer is created on top of the calibrated layer.
This layer prevents white flying away while adding a slightly vintage painting-like feel.
If it doesn't suit your taste, feel free to delete it!
I think it's a light animation-style retouching style, and in fact, I use it as a finishing touch when working on webtoons.
If you want to use the background and the figure layer separately
Strong correction in the background
Minor retouching on figures
When applied, they go well together.
If you add a gradient map and level correction or contrast correction on top of the calibrated image, you can use it for a richer look.
The image below shows the auto-action mode after applying gradient maps and contrast.
Since the gradient map uses separately downloaded materials, it is not included in the auto-action.
After selecting the layer you want to calibrate and running AutoAction, a new layer with calibration is created on top of the original layer.
This method is designed to preserve the original image as is.
For cases where you need to select folders or multiple layers at once for correction, layer merging is included in the first step of AutoAction.
If applied to a single layer, there are no layers to combine them,
**Would you like to continue the union?** You may see a message like **".In this case, please press **"Continue <>"**.
As explained above, after calibration, a luminance layer is created.
Use it as is, remove it, or combine it with other layers—feel free to use it according to your preference!
**If you want to use the 'Analog Add'**,
Select both the layer you want to correct and the luminance layer and run it,
Please remove the luminance layer before running.
The image below shows ' Add Analog' while maintaining the luminance layer.
Adjust it to your taste and enjoy using it as you like!

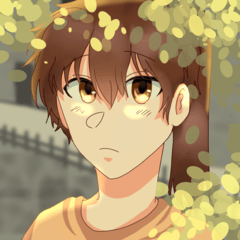
Above is the original illustration.

This is an image with correction and intensification applied.

Correction - Strength + Analog Here is the image I added.

Correction - This is an image with weak effects applied.

Correction - Weakness + Analog Here is the image I added.
📢 업로드 후 하루 동안 무료로 배포합니다!
하루가 지나면 10 CLIPPY로 변경됩니다.
필요하신 분은 무료 배포 기간에 편하게 받아가세요!
개인적인 취향이 가득 담긴 오토액션입니다!
다운로드 시 이 점을 고려해 주세요!
크기가 큰 그림을 보정할 때 사용하기 좋은 오토액션입니다.
작은 그림에 사용하면 효과가 강하게 적용되는데, 이것도 나름 재미있는 느낌이 납니다!
그림이 제대로 칠해지지 않은 작은 틈이나 경계 등을 뽀샤시하게 메워주는 것이 메인인 보정입니다.
보정된 레이어 위에 휘도 레이어가 하나 생성됩니다.
하얗게 날아가는 것을 방지하면서 살짝 옛날 그림 같은 느낌을 더해주는 레이어입니다.
취향에 맞지 않는 경우 삭제하셔도 좋습니다!
가벼운 애니메이션풍 보정 스타일이라고 생각하고 있으며, 실제로 웹툰 작업을 할 때 마무리 보정으로 사용하고 있습니다.
배경과 인물의 레이어를 분리해서 사용하고 싶은 경우
배경에는 강한 보정
인물에는 약한 보정
을 적용하면 서로 잘 어울립니다.
보정한 이미지 위에 그라데이션 맵과 레벨 보정 또는 대비 보정을 추가해 주시면 조금 더 풍부한 느낌으로 사용할 수 있습니다.
아래 이미지는 그라데이션 맵과 대비를 추가로 적용한 뒤 오토액션을 사용한 이미지입니다.
그라데이션 맵은 별도로 다운로드한 소재를 사용하고 있기 때문에 오토액션에는 포함하지 않았습니다.
보정하고 싶은 레이어를 선택한 후 오토액션을 실행하면, 원본 레이어 위에 보정된 새로운 레이어가 생성됩니다.
원본 이미지를 그대로 유지하기 위한 방식입니다.
폴더 또는 여러 레이어를 한꺼번에 선택하여 보정하는 경우를 위해 오토액션의 첫 단계에 레이어 결합이 포함되어 있습니다.
단일 레이어에 적용하면 결합할 레이어가 없기 때문에
**「결합을 계속 진행하시겠습니까?」**라는 메시지가 표시될 수 있습니다.이 경우 **「계속 진행 <네>」**를 눌러주세요.
위에서 설명한 것처럼 보정 후 휘도 레이어가 하나 생성됩니다.
그대로 사용하거나, 제거하거나, 다른 레이어와 합치는 등 취향에 맞게 자유롭게 사용해 주세요!
**「아날로그 추가」**를 사용하고 싶은 경우,
보정하고 싶은 레이어와 휘도 레이어를 함께 선택한 후 실행하거나,
휘도 레이어를 제거한 뒤 실행해 주세요.
아래 이미지는 휘도 레이어를 유지한 상태에서 「아날로그 추가」를 적용한 이미지입니다.
취향에 맞게 조절하면서 재미있게 사용해 주세요!
위에는 원본 그림입니다.
보정-강함을 적용한 이미지입니다.
보정-강함에 +아날로그 추가한 이미지입니다.
보정-약함을 적용한 이미지입니다.
보정-약함에 +아날로그 추가한 이미지입니다.





Other materials by E_03


Popular “Auto Action” materials


New materials




-
 MVP ◆This user has contributed greatly to the management of the community, by posting many great responses to the questions asked. Once every three months, MVPs are determined based on the points earned during that period and will be recognized accordingly.
-
 New Valuable Player (NVP) ◆These are the next-best contributors to the community after MVPs. This is awarded to users who have not yet won an MVP award, based on the number of points they have earned.
-
 Official Expert ◆Chosen out of all MVP awardees, who are already proof of excellence, this is a testimony of outstanding correspondence in the community. After careful screening, they are appointed by CELSYS and assume their position.Note: Formally called “Evangelists”
-
 Official Moderator of CELSYS ◆Moderators are official CELSYS staff members who are fluent in Japanese as well as various other languages. Moderators are not experts on the software or illustration, so they are not able to directly answer your questions. However, moderators provide communication and language support to ensure that everyone can smoothly communicate with each other.
-
 CELSYS official accountThe Official Administrator Account