

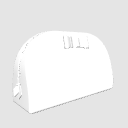
It is a cosmetic pouch with three designs to choose from.
Since the curve is made smoothly, the line comes out beautifully with LT conversion and can be used with little addition.
デザインが3つから選べるコスメポーチです。
曲線をなめらかに作っているのでLT変換で線が綺麗に出て加筆が少なく使用できます。


They have matching designs and list handbags, tote bags, and wallets.
【BOOTH version on sale】
It is 3D with even more beautiful lines.

Please search for BOOTH by "SATORIE".
お揃いデザインで、ハンドバッグ、トートバッグ、財布を出品しています。
【BOOTH版 出品中】
さらに綺麗に線が出る3Dになっています。
BOOTHは「SATORIE」で検索してください。
Material マテリアル
-
Color カラー
-
Monochrome モノクロ
-
for shadowspure white 影用真っ白


configuration 配置
-
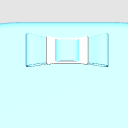
Three-dimensional ribbon 立体リボン
-
Ribbon Plate リボンプレート
-
Rectangular plate 長方形プレート


Other materials by 里@BOOTH販売あり


Popular “3D object” materials


New materials


Badges
-
 MVP ◆This user has contributed greatly to the management of the community, by posting many great responses to the questions asked. Once every three months, MVPs are determined based on the points earned during that period and will be recognized accordingly.
 -
 New Valuable Player (NVP) ◆These are the next-best contributors to the community after MVPs. This is awarded to users who have not yet won an MVP award, based on the number of points they have earned.
 -
 Official Expert ◆Chosen out of all MVP awardees, who are already proof of excellence, this is a testimony of outstanding correspondence in the community. After careful screening, they are appointed by CELSYS and assume their position.Note: Formally called “Evangelists”
 -
 Official Moderator of CELSYS ◆Moderators are official CELSYS staff members who are fluent in Japanese as well as various other languages. Moderators are not experts on the software or illustration, so they are not able to directly answer your questions. However, moderators provide communication and language support to ensure that everyone can smoothly communicate with each other.
 -
 CELSYS official accountThe Official Administrator Account